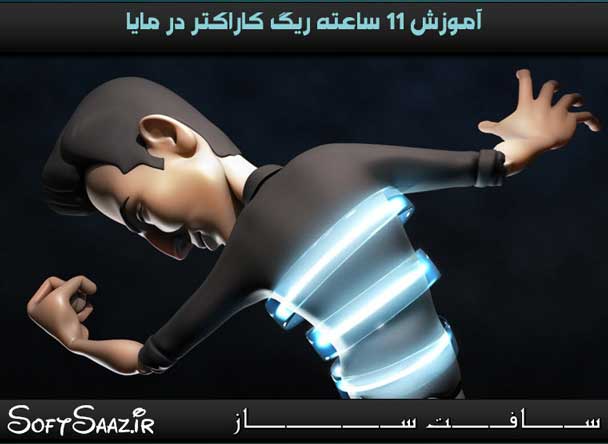
آموزش ریگ کاراکتر در مایا Maya
Pushing Your Character Rigs Beyond the Basics in Maya

ریگ کاراکتر در مایا
در این آموزش ریگ کاراکتر در مایا مربی دوره Delano Athias ، نحوه فشار آوردن به ریگ کاراکتر(push our character rigs) را فراتر از اصول اولیه در نرم افزار Maya آموزش میدهد. او در ادامه نحوه ایجاد Deformer برای به چالش کشیدن Skin کاراکتر و افزودن جزئیات به آن را آموزش میدهد. با سافت ساز همراه باشید.
عناوین اصلی این دوره آموزشی:
- ساخت استخوان های پا
- ایجاد یک ابزار برای ریست مفاصل با پایتون
- اضافه کردن اسختوان سر و دست
- تنظیم سیستم twist برای ساق پا
- توسعه سیستم counter-twist برای ران
- اتصال سر شخصیت
- تغییر شکل مو
- پوست دهی به بازوها
- پوست دهی به شلوار و کفش
- تمیز کردن صحنه
- طراحی کننترل پا
- ساخت سیستم رول پا
- کنترل و چرخاندن ستون فقرات
- ایجاد کنترلهای انگشت
- ریگ کردن
- و ….
لطفا قبل از دانلود پیش نمایش دوره را مشاهده فرمایید:
عنوان دوره : Digital Tutors – Pushing Your Character Rigs Beyond the Basics in Maya
سطح : متوسط
زمان کل دوره : 10.44 ساعت
تعداد فایل های تصویری : 60
سال آموزش : 2014
فایل تمرینی : دارد
مربی دوره : Delano Athias
نرم افزار : Maya 2014
زیرنویس : ندارد
Digital Tutors – Pushing Your Character Rigs Beyond the Basics in Maya
In this set of tutorials we will learn how to push our character rigs beyond the basics in Maya. We’ll start by learning how to set up skeletons with attached twist systems that will help our characters maintain volume as they deform. We’ll then learn how to create our very own cage deformer to hold volume in geometry that is challenging to skin.
01. Introduction and project overview01:10
02. Creating the leg bones13:11
03. Finishing our leg chains09:41
04. Creating a tool to reset the orientation of joints with Python19:03
05. Setting up a joint chain for the torso11:04
06. Creating a tool that will quickly segment bones18:41
07. Using our Joint Resolution Tool to segment the character’s spine02:09
08. Adding a head bone02:07
09. Creating our clavicle and arm bones12:14
10. Adding hand bones08:47
11. Creating a joint chain for the thumb and mirroring the arm09:14
12. Maintaining volume in the knees and elbows10:37
13. Setting up twist systems for the shins06:41
14. Finishing the twist systems for the shins14:03
15. Developing counter-twist systems for the thighs10:30
16. Finalizing the counter-twist rigs for the thighs06:51
17. Adding twist systems to the forearms12:26
18. Counter-twisting the shoulders10:59
19. Preserving volume in the buttocks09:37
20. Finishing our buttocks systems08:06
21. Twist joints for the neck13:16
22. Binding the character’s head17:13
23. Deforming the hair01:59
24. Skinning the arms15:44
25. Creating a proxy cage to skin complex geometry faster10:29
26. Finishing the shirt’s proxy cage09:53
27. Finalizing our proxy cage13:36
28. Connecting our proxy cage to the shirt05:34
29. Refining the deformations of the shirt13:31
30. Improving the deformations of the shoulders06:45
31. Skinning the pants and shoes13:36
32. Mirroring the weights of the torso and legs09:47
33. Cleaning up our scene03:26
34. Setting up foot roll systems09:57
35. Creating an efficient grouping tool with Python17:22
36. Finalizing our foot roll systems05:59
37. Designing leg controls10:06
38. Adding secondary foot controls10:01
39. Finishing our secondary foot controls09:00
40. Building an automated foot roll system17:13
41. Knee controls12:34
42. Dynamically parenting the legs08:08
43. Adding Connect Curves to the knees10:59
44. Controlling the spine13:03
45. Translating the spine15:14
46. Twisting the spine18:05
47. Adding a secondary hip control09:24
48. Creating a control that will drive both the neck and head13:40
49. Rigging the clavicles10:24
50. Arm controls06:44
51. Finalizing the arm controls18:19
52. Controlling the elbows09:37
53. Dynamically parenting the arms03:49
54. Rigging Auto Clavicles08:49
55. Finishing our Auto Clavicle systems04:50
56. Creating finger controls10:23
57. Cleaning up the finger controls19:40
58. Finishing our finger controls14:28
59. Connecting the hand controls and creating signature hand poses07:48
60. Wrapping up the control rig16:40
حجم کل :

برای دسترسی به کل محتویات سایت عضو ویژه سایت شوید
برای نمایش این مطلب و دسترسی به هزاران مطالب آموزشی نسبت به تهیه اکانت ویژه از لینک زیر اقدام کنید .
دریافت اشتراک ویژه
مزیت های عضویت ویژه :
- دسترسی به همه مطالب سافت ساز
- آپدیت روزانه مطالب سایت از بهترین سایت های سی جی
- ورود نامحدود کاربران از هر دیوایسی
- دسترسی به آموزش نصب کامل پلاگین ها و نرم افزار ها
اگر در تهیه اشتراک ویژه مشکل دارید میتونید از این لینک راهنمایی تهیه اشتراک ویژه رو مطالعه کنید . لینک راهنما
For International user, You can also stay connected with online support. email : info@softsaaz.ir telegram : @SoftSaaz
امتیاز به این مطلب :
امتیاز سافت ساز
لطفا به این مطلب امتیاز دهید :)


