دانلود آموزش نحوه تقابل کاراکتر در Maya
Character Interaction in Maya

نحوه تقابل کاراکتر در Maya
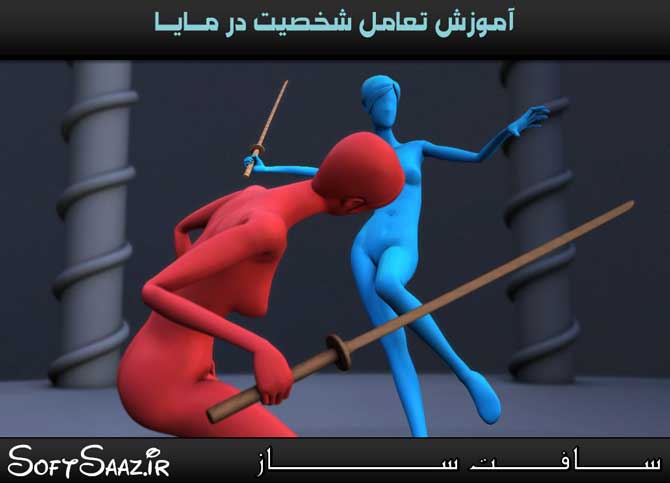
در این آموزش از سایت pluralsight در نرم افزار Maya ،ابتدا ما نحوه ی پیکربندی این پروژه را به شما آموزش داده و سپس به سراغ پیاده سازی ایده ی خود از ابتدا تا انتها با استفاده از تکنیک هایی که می توان به هر کاراکتری اعمال کرد ،می رویم.همچنین ما اسکریپتهای ساده ی Mel را برای انتخاب کردن سریع کنترل ها خواهیم ساخت.سپس در مورد مزایای انتخاب درست برای چرخش اشیا در صحنه بحث خواهیم کرد.در پایان این آموزش شما درک عمیقی از نحوه ی ساخت تقابل چند کاراکتر با هم خواهید داشت با سافت ساز همراه باشید.
عناوین اصلی این دوره آموزشی:
- طرح ریزی انیمیشن
- آشنایی با ریگ کردن انیمیشن
- تنظیمات صحنه و شروع پاس مسدود کردن
- انیمیشن سقوط تبه
- انیمیشن ضد حمله
- کار با دستورات Mel
- جرخش اشیا در صحنه
- و ….
لطفا قبل از دانلود پیش نمایش دوره را مشاهده فرمایید:
عنوان دوره : Digital Tutors – Character Interaction in Maya
سطح : متوسط
زمان کل دوره : 5 ساعت و 8 دقیقه
تعداد فایل های تصویری : 35
سال آموزش : 2012
فایل تمرینی : دارد
مربی دوره : Delano Athias
نرم افزار : Maya 2012
زیرنویس : ندارد
Digital Tutors – Character Interaction in Maya
In this Maya tutorial, we will learn how to animate a multi-character interaction with time-saving techniques. We’ll first explore the planning phase of this project, and then dive right in and built the performance from start to finish, learning skills that can be applied to any character. We’ll also create very simple but useful MEL scripts to select controls faster, discuss the benefit of choosing suitable rotation orders for control objects, and learn ways to overcome gimbal lock interpolations. By the end of this tutorial, you will have attained the set of skills needed to animate fun and believable character interactions.
1. Introduction and project overview
2. Planning the animation
3. Getting familiar with the animation rigging
4. Setting up the scene and starting the blocking pass
5. Roughing in the villain’s initial attack
6. Finalizing the blocking in of the villain’s attack
7. Animating the villain’s fall
8. Roughing in the villain flying back after the strike
9. Continuing the villain’s fall
10. Wrapping up the villain’s extremes
11. Double-check the villian’s timing and adding a breakdown pose
12. Starting on the heroine’s animation
13. Adding anticipation to the heroine’s counter attack
14. Animating the counter-attack
15. Following through from the counter-strike
16. Finalizing the heroine’s blocking pass
17. Starting on the villain’s polish pass
18. Finishing the beginning of the villain’s animation
19. Refining the upper body of the villain as she falls
20. Tweaking the villain’s legs as she falls
21. Polishing the arms as the villain falls
22. Wrapping up the villain’s upper body
23. Finishing our work on the villain’s head
24. Finalizing the villain’s legs
25. Completing the villain’s left arm
26. Wrapping up the villain
27. Smoothing out heroine’s performance
28. Refining the first section of the heroine’s animation
29. Finishing the first section of the heroine
30. Polishing the counter-attack
31. Finalizing the last section of the heroine’s performance
32. Adding follow-through to the heroine’s torso
33. Animating follow-through in the heroine’s left arm
34. Adding follow-through to the heroine’s right arm
35. Finalizing the heroine and completing the project
حجم کل :

برای دسترسی به کل محتویات سایت عضو ویژه سایت شوید
برای نمایش این مطلب و دسترسی به هزاران مطالب آموزشی نسبت به تهیه اکانت ویژه از لینک زیر اقدام کنید .
دریافت اشتراک ویژه
مزیت های عضویت ویژه :
- دسترسی به همه مطالب سافت ساز
- آپدیت روزانه مطالب سایت از بهترین سایت های سی جی
- ورود نامحدود کاربران از هر دیوایسی
- دسترسی به آموزش نصب کامل پلاگین ها و نرم افزار ها
اگر در تهیه اشتراک ویژه مشکل دارید میتونید از این لینک راهنمایی تهیه اشتراک ویژه رو مطالعه کنید . لینک راهنما
For International user, You can also stay connected with online support. email : info@softsaaz.ir telegram : @SoftSaaz
امتیاز
جمع امتیاز
لطفا به این آموزش امتیاز بدهید


