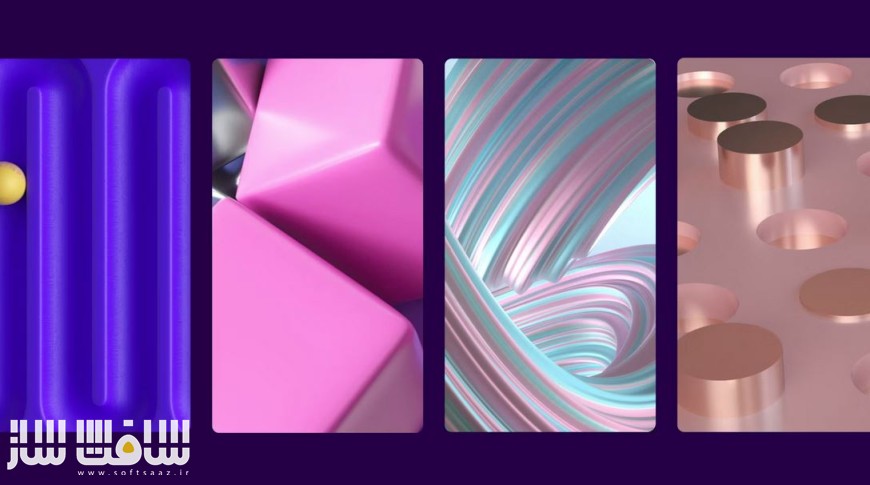
آموزش ساخت موشن گرافیک های 2.5D با After Effects
Motion Array - Create One-of-a-Kind 2.5D Motion Graphics with After Effects

آموزش ساخت موشن گرافیک های 2.5D با After Effects
آموزش ساخت موشن گرافیک های 2.5D با After Effects : در این دوره از سایت Motion Array ، با نحوه ساخت انیمیشن های شکلی و موشن گرافیک های 2.5D در Adobe After Effects آشنا خواهید شد. این دوره نحوه ساخت آبجکت های سه بعدی ، ظاهر سه بعدی ، نحوه ایجاد افکت 2.5D orbiting ، تفاوت بین انیمیشن های 2D, 2.5D, و 3D ؛ بررسی لایه های Camera Orbit Null ، نحوه ایجاد افکت های اشکال مداری ، انیمیشن 2.5D ، استفاد از اشکال فلت در فضای سه بعدی ، انیمیت Orbit Loop ، فیکس جهت ، درخشش و اکو و … را پوشش می دهد.این دوره آموزشی توسط تیم ســافــت ســاز برای شما عزیزان تهیه شده است.
عنوان دوره : Motion Array – Create One-of-a-Kind 2.5D Motion Graphics with After Effects
سطح : متوسط
زمان کل دوره : – ساعت
تعداد فایل ها : 20
سال آموزش : 2024
فایل تمرینی : دارد
مربی دوره : –
نرم افزار : After Effects
زیرنویس انگلیسی : دارد
Motion Array – Create One-of-a-Kind 2.5D Motion Graphics with After Effects
Creating shape animations in Adobe After Effects is relatively straightforward, and you can produce incredible compositions with some practice. Creating a 3D environment is entirely different and can be complex when using AE. Instead, 2.5D allows you to create a 3D look without the complications of building 3D objects. This tutorial will show you how to create a versatile 2.5D orbiting effect that you can use in your shape and text animations.
- Understand the difference between 2D, 2.5D, and 3D Animation.
- Discover Adobe After Effects 2023 Camera Orbit Null layers.
- Learn to create Orbiting Shape Effects from Scratch, or download the Motion Array Orbiting templates.
What is 2.5D Animation?
2D Animation uses shapes moving upwards, downwards, left, or right and will appear flat to the viewer. 3D Animation has all the same movements as 2D, but the 3D objects allow for movement toward and away from the Camera, allowing the viewer to see the object from any angle.
2.5D Animation is somewhere in the middle and involves using flat shapes in a 3D space to fake a 3D-style animation. With 2.5D Animation, you can make it appear like shapes are moving toward and away from the Camera or other shapes without needing a 3D object.
What is an Orbiting Null?
After Effects is constantly updating, and sometimes, this means changing how we create effects. Orbiting animations use various 3D Nulls, but the 2023 update has made the traditional way of circling shapes no longer work.
If you’ve watched a YouTube tutorial showing you orbiting effects, but it’s not worked for you, don’t worry. It is likely due to the Orbiting Null – a handy new Null object hidden behind a Camera Layer.
How to create an Orbiting effect from Scratch in Adobe After Effects
We will use circle shapes to create the look of planets orbiting the Sun for our orbiting effect. Once you’ve mastered the technique, however, you can use the same method to animate any shape, text, or image layer moving around another.
Step 1: Creating your Shapes
For our orbiting effect, we’re going to use shapes created in After Effects, but you can use this method with image layers or imported graphics, such as these fantastic solar system graphics, to create a more detailed look.
- Create a New Composition using Command/Control + N, make sure the comp is 1080×1080, and call it Orbit Comp.
- Click and hold on to your Shape tool to reveal the menu, and select Ellipse.
- Double-click the Circle Shape now in the Tool Icon to add a circle to your composition.
- Select the Layer in the Timeline and hit S to reveal the Scale properties.
- Reduce the size of the Circle to fit within your scene, ensuring it remains central in the canvas.
- To change the color of your Circle, hit the Fill box at the top of the screen and select your preferred color.
- Click on the 3D box in the Layers Menu to make the layer 3D.
- In the Layers Panel, select the Layer and hit Return. Name the Layer Sun.
- With the Layer selected, hit Command/Control + D to duplicate it, and rename the layer Planet 1 – change the color of the Planet shape if required.
- With the Planet 1 layer selected, hit S to open the Scale properties and reduce the size to suit your scene.
- Grab the Planet 1 in the Media Viewer and drag it to the further point you want it to reach from the Sun Layer.
Step 2: Animating the Orbit Loop
Now you’ve set up a basic Planet and Sun scene using After Effects shapes. We can start to make it orbit.
- Right-click in the Timeline, then choose New > Camera.
- Choose 50ml from the Preset Menu in the Camera Setting menu and hit OK.
- In the Layers Panel, right-click the Camera Icon and choose Camera> Creaet Orbit Null.
- Grab the Pick Whip from the Sun Layer and drag it to the Camera 1 Orbit Null layer to tie them together. You can also click the Parent and Link drop-down for the Planet 1 layer and choose Camera Orbit Null.
- Select the Camera 1 Orbit Null Layer and hit R to open the Rotation settings.
- Create a Keyframe for the Y Rotation at the start of the Timeline.
- Move forward in the Timeline to the point you want your Planet to have completed one full rotation – we’re moving forward 2 seconds – and change the setting to 1.
- Hold Alt and click on the Y Rotation Stopwatch to open an Expression Box in the Timeline.
- In the Expression Box, type loopOut(cycle); your Planet will continuously loop around your Sun layer.
Step 3: Fixing the Orientation
At this point, your Planet will be looping around your Sun, but this is where you can see how 2D and 3D Animation differ. Since the shape is a flat object, it has no dimension from the side. As the Planet moves around, we can see its thinnest side, breaking the illusion that it is 3D.
- Select the Planet and go to Layer > Transform > Auto Orient.
- From the Pop-Up, choose Orient Towards Camera and hit OK.
- Select the Camera 1 Orbit Null in the Timeline and hit R to open the Rotation and Orientation settings.
- Adjust the Z and Y Orientation settings to create an angle to your Planet Layer.
Step 4: Glow and Echo
Your orbiting Animation is complete, but you can do a couple of things to improve the overall look and motion using the Glow and Echo Effects.
- Hold Alt at the bottom of the Project Panel and click twice on the bpc box until it reads 32pbc – this is the best for working with glow effects.
- Search for the Glow effect in the Effects Panel and add it to your Sun Layer.
- In the Effects Controls Panel, adjust the settings to get the sort of Glow you like.
- Next, search for Echo in the Effects Panel and add it to your Planet Layer.
- In the Effects Controls panel, adjust the length and intensity of the Echo to create a smooth tail of motion behind your Planet.
حجم کل : 4 گیگابایت

برای دسترسی به کل محتویات سایت عضو ویژه سایت شوید
برای نمایش این مطلب و دسترسی به هزاران مطالب آموزشی نسبت به تهیه اکانت ویژه از لینک زیر اقدام کنید .
دریافت اشتراک ویژه
مزیت های عضویت ویژه :
- دسترسی به همه مطالب سافت ساز
- آپدیت روزانه مطالب سایت از بهترین سایت های سی جی
- ورود نامحدود کاربران از هر دیوایسی
- دسترسی به آموزش نصب کامل پلاگین ها و نرم افزار ها
اگر در تهیه اشتراک ویژه مشکل دارید میتونید از این لینک راهنمایی تهیه اشتراک ویژه رو مطالعه کنید . لینک راهنما
For International user, You can also stay connected with online support. email : info@softsaaz.ir telegram : @SoftSaaz
امتیاز دهی به این مطلب :
امتیاز سافت ساز
لطفا به این مطلب امتیاز بدید 🦋


