آموزش طراحی صحنه داخلی در Autocad , V-ray , 3ds Max
Learn Architectural Visualization: 3ds Max, V-ray, Autocad

آموزش طراحی صحنه داخلی در 3ds Max
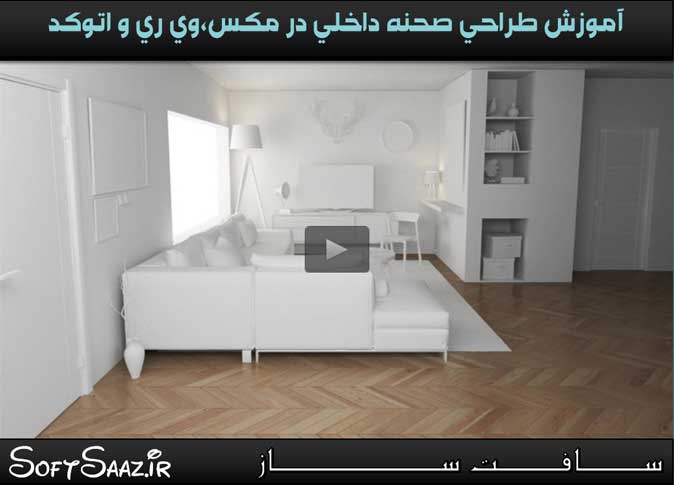
در این آموزش از سایت Udemy در نرم افزارهای Autocad , V-ray , 3ds Max ، نحوه ترسیم پلن طراحی داخلی را در اتوکد می آموزید، سپس با روش های بسیار ساده و عملی در چند ساعت ، می تونید طرح را به مدل تبدیل نمایید.پس از آن به طراحی مدل بدست آمده می پردازم. بعد از این فرآیند ، به تنظیم متریال و تکسچر و تنظیم نورپردازی و رندر در موتور Vray می پردازیم با سافت ساز همراه باشید.
عناوین اصلی این دوره آموزشی:
- اینرتفیس و تنظیمات اتوکد
- نقشه کشی اتاق ساده از هر تصویر
- اینترفیس و تنظیمات تری دی مکس
- ایمپورت و اکسپورت مدلهای رایگان
- مدلسازی صحنه داخلی
- تنظیمات اولیه وی ری و تست رندر
- کار با V-Ray Lights
- تکسچرینگ دیوار و سقف و کف
- تکسچرینگ در و مبل و صندلی و میز بوفه و قفسه و …
- و ….
لطفا قبل از دانلود پیش نمایش دوره را مشاهده فرمایید:
عنوان دوره : Udemy – Learn Architectural Visualization: 3ds Max, V-ray, Autocad
سطح : مبتدی تا حرفه ایی
زمان کل دوره : 4 ساعت
تعداد فایل های تصویری : 28
سال آموزش : 2015
فایل تمرینی : دارد
مربی دوره : Serkan Erkan
نرم افزار : 3ds Max, V-ray, Autocad
زیرنویس : ندارد
Udemy – Learn Architectural Visualization: 3ds Max, V-ray, Autocad
When you complete this training, you will be able to draw interior design plan with AutoCAD and you can model it on 3DS Max with very basic and practical methods in a few hours.
Then, we are going to design the scene we created by using free 3D models.
After doing the design process, we will set materials and textures. Then, we will look light settings and render customizations, we are going to have the final render with V-ray.
You can achieve significant gains with a simple plan by customers which can not catch revive in mind according toAutocad and 2D hand drawings. To see the Autocad project in 3D environment shall speed up your project. It can also help you to capture overlooked small details. I hope that you can reach a good level with this little course. I’m sure that how much you experience the best quality render you will get. I do this job fulltime at the office and get also freelance works.
Section 1: Introduction
Lecture 1 Welcome 01:00
Lecture 2 What You Need? 1 slide
Lecture 3 Installing Required Softwares 1 slide
Section 2: Introduction to AutoCAD
Lecture 4 Workspace and Scaling Settings 03:33
Lecture 5 Unit Settings and Osnap Tools 04:25
Lecture 6 Layers 01:21
Section 3: AutoCAD: Drawing a Simple Room From Any Image
Lecture 7 Creating First Scene Part 1 05:36
Lecture 8 Creating First Scene Part 2 09:06
Section 4: Introduction to 3D Studio Max
Lecture 9 Introduction to 3D Studio Max – Workspace and Scaling Settings 05:11
Section 5: Export, Import, Free Models, Scene Design
Lecture 10 Exporting Plan From AutoCAD – Importing Plan to 3D Studio Max Environment 01:08
Lecture 11 Modelling Part 01 – Starting Interior Modelling 13:54
Lecture 12 Modelling Part 02 – Importing Free 3D Models To Our Scene 15:47
Lecture 13 Modelling Part 03 – Importing Free 3D Models To Our Scene 17:10
Lecture 14 Modelling Part 04 – Importing Free 3D Models To Our Scene 20:32
Section 6: V-Ray Lights, First V-Ray Settings and Test Rendering
Lecture 15 The First Settings For V-Ray Render Engine 00:46
Lecture 16 V-Ray Test Render Settings 10:03
Lecture 17 Adding V-Ray Physical Camera 19:32
Lecture 18 Adding V-Ray Artifical Lights and Test Rendering 08:10
Section 7: Texturing and Material Settings
Lecture 19 Texturing 01 – Texturing The Walls, Ceiling and Floor 15:40
Lecture 20 Texturing 02 – Texturing Our Free Models (Doors and the window) 16:42
Lecture 21 Texturing 03 – Texturing Our Free Models (Sofa) 15:19
Lecture 22 Texturing 04 – Texturing Our Free Models (Chair and The Coffee Table) 05:41
Lecture 23 Texturing 05 – Texturing Our Free Models (Buffet and The Shelf) 06:50
Lecture 24 Texturing 06 – Texturing Our Free Models (Accessories) 18:00
Lecture 25 Texturing 07 – Texturing Our Free Models (Accessories) & Taking a Test Render 04:59
Section 8: Finalize The Project (Test renderings and The Final Render)
Lecture 26 Finalize The Project: Final Render Settings and Final Rendering 08:57
Section 9: Conclusion
Lecture 27 Conclusion 01:24
Lecture 28 Thank You! 00:47
حجم کل :

برای دسترسی به کل محتویات سایت عضو ویژه سایت شوید
برای نمایش این مطلب و دسترسی به هزاران مطالب آموزشی نسبت به تهیه اکانت ویژه از لینک زیر اقدام کنید .
دریافت اشتراک ویژه
مزیت های عضویت ویژه :
- دسترسی به همه مطالب سافت ساز
- آپدیت روزانه مطالب سایت از بهترین سایت های سی جی
- ورود نامحدود کاربران از هر دیوایسی
- دسترسی به آموزش نصب کامل پلاگین ها و نرم افزار ها
اگر در تهیه اشتراک ویژه مشکل دارید میتونید از این لینک راهنمایی تهیه اشتراک ویژه رو مطالعه کنید . لینک راهنما
For International user, You can also stay connected with online support. email : info@softsaaz.ir telegram : @SoftSaaz
امتیاز
جمع امتیاز
لطفا به این آموزش امتیاز بدهید


