آموزش مدلسازی سطح سخت در Photoshop و ZBrush
UDemy - ZBrush and Photoshop Course on Hard Surface modelling
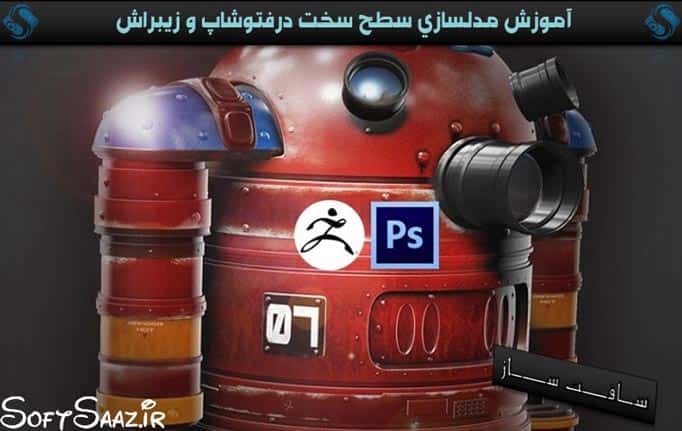
مدلسازی سطح سخت در Photoshop و ZBrush
در این آموزش از سایت UDemy ، به انجام تکنیک های مدلسازی سطح سخت در نرم افزارهای ZBrush , Photoshop برای کاربران مبتدی تا حرفه ایی می پردازیم. این مدلسازی را با استفاده از ابزار ZRemodeller که در نسخه های جدید زیبراش موجود هستش را انجام می دهیم. با تکنیک ها و ترفندهای کاربردی ، رباتی را با همین ابزار خواهیم ساخت با سافت ساز همراه باشید.
عناوین اصلی این دوره آموزشی:
- مرحله اول کپسول
- مدلسازی پا ها
- افزودن چین و چروک و شیارها
- افزایش رزولیشن در مدل
- اضافه کردن جزئیات از طریق آلفا
- استفاده از ZProject
- اضافه کردن نویز
- سفارشی سازی لایت باکس
- اکسپورت متریال
- تنطیمات رندر در زیبراش
- اضافه کردن سایه در فتوشاپ
- اعمال و تغییر رنگ در فتوشاپ
- اضافه کردن جزییات و تکسچر در فتوشاپ
- و …
لطفا قبل از دانلود پیش نمایش دوره را مشاهده فرمایید:
عنوان دوره : UDemy – ZBrush and Photoshop Course on Hard Surface modelling
سطح : مقدماتی تا حرفه ایی
زمان کل دوره : 6 ساعت
تعداد فایل های تصویری : 31
سال آموزش : 2013
فایل تمرینی : دارد
مربی دوره : David Newton
نرم افزار : ZBrush , Photoshop
زیرنویس : ندارد
UDemy – ZBrush and Photoshop Course on Hard Surface modelling
Learn Hardsurface modelling techniques suitable for Beginners to advanced users
Welcome to this fully featured course in ZBrush with a focus on Hard Surface modelling using the new ZRemodeller tool within Zbrush!
During this course you will learn a pletherer of techniques, these will all drive towards creating Hard Surface objects we will create a robot from scratch (Although it could be anything) and along the way learn loads of cool things!
Section 1: Course Intro and resources
Lecture 1 Overview of course 02:16
Lecture 2 Course Introduction 01:48
Section 2: Hard Surface Modelling in ZBrush
Lecture 3 First things first the capsule 08:56
Lecture 4 Adding the shoulder section 07:57
Lecture 5 Modelling the foot 09:05
Lecture 6 Deletion of the foot 01:54
Lecture 7 Adding Bevels to our Geometry 10:42
Lecture 8 Adding the skirting to the model 04:13
Lecture 9 Redoing the foot 04:53
Lecture 10 Finishing the foot 15:34
Lecture 11 Adding creases 05:04
Lecture 12 Potential problems with creasing edges 04:56
Lecture 13 Cleanup 20:08
Lecture 14 Increasing resolution in our model 10:55
Lecture 15 Quick transpose 06:43
Lecture 16 Adding detail through alphas 19:00
Lecture 17 Using ZProject for our grill right and wrong methods 18:42
Lecture 18 Adding noise 07:30
Lecture 19 Timelapse of the whole process in 10 mins 09:59
Lecture 20 Customise your light box 04:59
Lecture 21 Set up for final render Export and Doc size plus custom views 11:46
Lecture 22 Exporting our materials 11:06
Lecture 23 Creatinga colour diffuse 07:20
Lecture 24 Finishing our model and last renders from ZBrush 09:44
Section 3: Compositing in Photoshop
Lecture 25 Photoshop setting up the files 09:24
Lecture 26 Quick overview of the process 13:36
Lecture 27 Masking non distructively 15:39
Lecture 28 Swapping the diffuse colour 06:53
Lecture 29 Adding a drop shadow and More wear and Tear 11:23
Lecture 30 Adding extra details 10:52
Lecture 31 Using textures to finish our comp 19:01
حجم کل :

برای دسترسی به کل محتویات سایت عضو ویژه سایت شوید
برای نمایش این مطلب و دسترسی به هزاران مطالب آموزشی نسبت به تهیه اکانت ویژه از لینک زیر اقدام کنید .
دریافت اشتراک ویژه
مزیت های عضویت ویژه :
- دسترسی به همه مطالب سافت ساز
- آپدیت روزانه مطالب سایت از بهترین سایت های سی جی
- ورود نامحدود کاربران از هر دیوایسی
- دسترسی به آموزش نصب کامل پلاگین ها و نرم افزار ها
اگر در تهیه اشتراک ویژه مشکل دارید میتونید از این لینک راهنمایی تهیه اشتراک ویژه رو مطالعه کنید . لینک راهنما
For International user, You can also stay connected with online support. email : info@softsaaz.ir telegram : @SoftSaaz
امتیاز
جمع امتیاز
لطفا به این آموزش امتیاز بدهید


