دانلود آموزش رندرینگ خودرو در 3ds Max و Vray
Automotive Rendering in 3ds Max
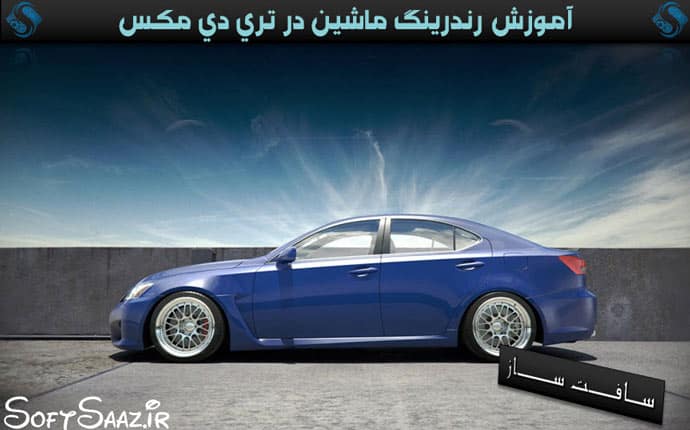
رندرینگ خودرو در 3ds Max و Vray
در این آموزش از سایت pluralsight ، به ایجاد و رندر یک خودروی بسیار واقعی در نرم افزار 3ds Max با Vray می پردازیم ، همچنین ویژگی های کلیدی هنگام کار با رندر این ماشین مانند: ایجاد استنسیل و تکسچر tileable برای نقاشی محیط و تکنیک های مفید نورپردازی آشنا خواهیم شد با سافت ساز همراه باشید.
عناوین اصلی این دوره آموزشی:
- ایجاد استنسیل و تکسچر tileable
- آماده سازی چرخ ها
- طرح بندی (لایوت) صحنه
- نقاشی تکسچر دیوار
- نقاشی تکسچر چرخ
- تنظیم صحنه برای سایه و رندر
- ایجاد شیدر برای دیوار
- ایجاد شیدر برای دوربین ها
- ایجاد شیدر برای اجزای الکتریکی
- ایجاد شیدر برای لاستیک
- ایحاد شیدر برای ترمز خودرو
- متریال به شاسی
- ایحاد سایه برای رنگ ماشین
- ایجاد متریال فیبر کربن
- ایجاد متریال برای چراغ ها
- ایحاد شیدر برای جزییات جلوی خودرو
- ایحاد شیدر برای جزییات عقب خودرو
- تنظیم نور و تکنیک های نورپردازی
- و …
لطفا قبل از دانلود پیش نمایش دوره را مشاهده فرمایید:
عنوان دوره : Digital Tutors – Automotive Rendering in 3ds Max
سطح : پیشرفته
زمان کل دوره : 7 ساعت و 31 دقیقه
تعداد فایل های تصویری : 31
سال آموزش : 2013
فایل تمرینی : دارد
مربی دوره : Kris Cabrera
نرم افزار : 3ds Max , Photoshop , MARI , V-Ray
زیرنویس : ندارد
Digital Tutors – Automotive Rendering in 3ds Max
In this tutorial, we will learn to create a photorealistic automotive render using 3ds Max. We will learn key features such as what to look for when creating a realistic automotive rendering, such as creating tileable textures and stencils to use for painting the environment. Also, we will take a look at some lighting techniques to push our image even further.
1. Introduction and project overview 00:48
2. Key points for when creating an automotive render 12:28
3. Creating tileable textures and stencils for painting 10:09
4. Continuing to create tileable textures and stencils 14:29
5. Preparing the vehicle 11:30
6. Scene layout 12:22
7. Painting the wall textures 20:54
8. Painting the tire texture 15:30
9. Painting textures for the fire extinguisher box and sign 22:01
10. Setting up our scene for shading and rendering 22:59
11. Creating shaders for the front wall 12:58
12. Creating shaders for the back wall 06:13
13. Creating shaders for the ground floor 11:06
14. Creating shaders for the fire assets 15:28
15. Creating more shaders for the fire assets 14:37
16. Creating shaders for the security camera 17:49
17. Creating shaders for the electrical components 15:15
18. Creating more shaders for the electrical components 10:41
19. Creating shaders for the tires 12:10
20. Creating shaders for the brakes 13:40
21. Creating more shaders for the brakes 20:59
22. Finishing up the chassis materials 16:56
23. Creating the car paint shader 14:30
24. Creating the carbon fiber material 12:35
25. Creating headlight materials 22:02
26. Creating shaders for the front details of the vehicle 09:55
27. Creating shaders for the details on the rear of the car 18:24
28. Creating more shaders for the details on the rear of the car 13:07
29. Creating supporting lights and adjust the lighting 16:22
30. Finalizing any missing details and setup for rendering 17:20
31. Working on some post production in After Effects 20:03
حجم کل :

برای دسترسی به کل محتویات سایت عضو ویژه سایت شوید
برای نمایش این مطلب و دسترسی به هزاران مطالب آموزشی نسبت به تهیه اکانت ویژه از لینک زیر اقدام کنید .
دریافت اشتراک ویژه
مزیت های عضویت ویژه :
- دسترسی به همه مطالب سافت ساز
- آپدیت روزانه مطالب سایت از بهترین سایت های سی جی
- ورود نامحدود کاربران از هر دیوایسی
- دسترسی به آموزش نصب کامل پلاگین ها و نرم افزار ها
اگر در تهیه اشتراک ویژه مشکل دارید میتونید از این لینک راهنمایی تهیه اشتراک ویژه رو مطالعه کنید . لینک راهنما
For International user, You can also stay connected with online support. email : info@softsaaz.ir telegram : @SoftSaaz
امتیاز
جمع امتیاز
لطفا به این آموزش امتیاز بدهید


