آموزش مدلینگ اسلحه در مکس 3ds Max
3DMotive – Modeling The Walter P99
مدلینگ اسلحه در مکس
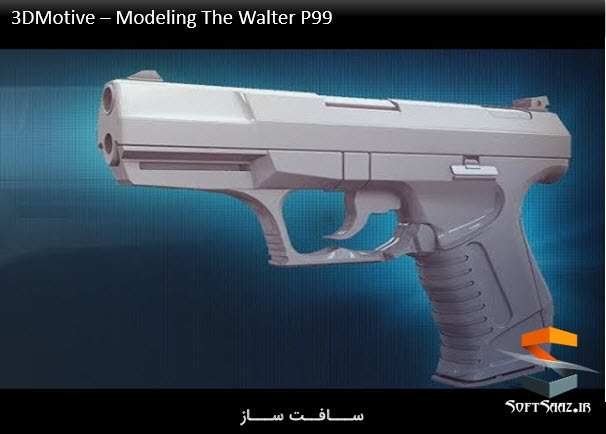
در دوره « مدلینگ اسلحه در مکس » از 3DMotive ، در مورد نحوه ایجاد مدلهای هایپولی و لاوپولی مدل میپردازیم. .. بله درست حدس زدید ، یک اسلحه Walther P99 !!!
برای اولین بار به رفرنسمون مراجعه میکنیم و در مورد بهترین روش مدلینگ یک مدل پیچیده مانند این ، صحبت خواهیم کرد. سپس به ایحاد بدنه مدل هایپولی با استفاده از هندسه تمیز و ورک فلوی عیر مخرب (non destructive) خواهیم پرداخت. پس از آن تایم لپس ، اتمام همه جزییات کوچک روی بنده را می دهیم.
به قسمت بالای تفنگ رفته و از تریکبی از مدلینگ سطح (plane ) و خط برای دریافت نتیجه خوب استفاده مینماییم. بار دیگر ، تایم لپس ، قطعات باقیمانده رو انجام می دهیم. نهایتاً ، زمانی که همه چیزی انجام می شود ، با استفاده از ورک فلوی غیر مخرب ، هایپولی را به لاوپولی تبدیل کرده و آن را برای یک مدل آماده بازی بهینه سازی می کنیم.با سافت ساز همراه باشید .
عناوین دوره مدلینگ اسلحه در مکس :
- تنظیمات صحنه و مروری بر رفرنس ها
- شروع مدلینگ High Poly Base
- تایم لپس مدلینگ بیس اضافی
پیشنمایش دوره مدلینگ اسلحه در مکس :
عنوان دوره : 3DMotive – Modeling The Walter P99
سطح : متوسط
زمان کل دوره : 1.40 ساعت
تعداد فایل های تصویری : 6
سال آموزش : 2018
فایل تمرینی : دارد
مربی دوره : Emiel Sleegers
نرم افزار : 3ds max
زیرنویس : ندارد
3DMotive – Modeling The Walter P99
In Modeling the Walther P99, we will go over on how to create the high and low poly of…you guessed it, a Walther P99 handgun! We will first go over our reference where we will talk about the best way to approach a complicated model such as this one. Next, we will then move onto creating the body for our high poly model using clean geometry and a non destructive workflow. After that we will do a timelapse, finishing all small details on the body. Then once that is done we will move into the top part of the gun where we will use a combination of plane modeling and line modeling to get a good and accurate result. Once again, we will finish off with an timelapse of the remaining parts. During all timelapses there will still be a narration explaining the tought progress behind all the choices I make. Then finally when everything is done, we will use the non destructive workflow to turn our high poly back into a low poly and optimize it until it is a game ready model.
Volume 1
Chapter 1 – Intro 01:28
Chapter 2 – Reference Overview and Scene Setup 09:58
Chapter 3 – Start Modeling the High Poly Base 19:28
Chapter 4 – Continuing the High Poly Base19:58
Chapter 5 – Modeling the Top High Poly Base19:07
Chapter 6 – Finish Modeling the High Poly Base15:06
Chapter 7 – Additional Base Modeling Timelapse16:23
Volume 2
Chapter 1 – Intro00:50
Chapter 2 – Modeling the Top of the High Poly14:42
Chapter 3 – Finish the Top of the High Poly14:25
Chapter 4 – Making Some Minor Changes16:17
Chapter 5 – Modeling the Front of the High Poly17:09
Chapter 6 – Modeling the Back of the High Poly19:06
Chapter 7 – Additional High Poly Timelapse
Volume 3
Chapter 1 – Intro 00:52
Chapter 2 – Converting the Base to the High Poly 19:49
Chapter 3 – Finish Converting the Base into High Poly 13:50
Chapter 4 – Timelapse for the Final Pieces09:08
Chapter 5 – Converting the High Poly into Low Poly 09:36
Chapter 6 – Finish Converting the Low Poly
حجم کل :

برای دسترسی به کل محتویات سایت عضو ویژه سایت شوید
برای نمایش این مطلب و دسترسی به هزاران مطالب آموزشی نسبت به تهیه اکانت ویژه از لینک زیر اقدام کنید .
دریافت اشتراک ویژه
مزیت های عضویت ویژه :
- دسترسی به همه مطالب سافت ساز
- آپدیت روزانه مطالب سایت از بهترین سایت های سی جی
- ورود نامحدود کاربران از هر دیوایسی
- دسترسی به آموزش نصب کامل پلاگین ها و نرم افزار ها
اگر در تهیه اشتراک ویژه مشکل دارید میتونید از این لینک راهنمایی تهیه اشتراک ویژه رو مطالعه کنید . لینک راهنما
For International user, You can also stay connected with online support. email : info@softsaaz.ir telegram : @SoftSaaz
امتیاز دهی به این مطلب :
امتیاز سافت ساز - 81%
81%
لطفا به این مطلب امتیاز دهید ?


