آموزش ساخت یک صحنه واقعی به روشی بسیار سریع در Blender
Udemy - A quick way to build a realistic scene in Blender
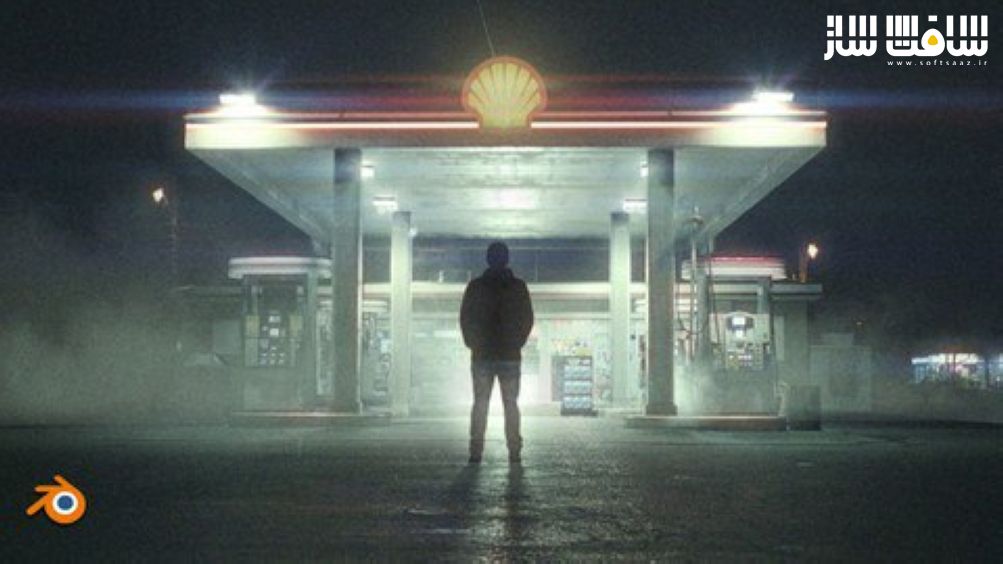
آموزش ساخت یک صحنه واقعی به روشی بسیار سریع در Blender
آموزش ساخت یک صحنه واقعی به روشی بسیار سریع در Blender : در این دوره از هنرمند Sime Bugarija ، در 2 ساعت با نحوه ساخت یک صحنه واقعی بصورت گام به گام و روشی سریع در بلندر آشنا خواهید شد. این دوره همه موارد مدل سازی،یافتن مدل ها،تکسچرینگ،نورپردازی،پست پراسسینگ و موارد دیگر را در هنگام خلق یک صحنه سینمایی نشان می دهد.
این دوره نحوه ایمپورت تصویر،دوربین به بلندر با پرسپکتیو صحیح ؛ نحوه تنظیم نور،سایه و رفلکشن مطابق با عکس ؛ نحوه غنی کردن بافت های خسته کننده بصری ؛ یافتن و افزودن overlay به صحنه ؛ درجه بندی رنگ پست پراسسینگ و … را پوشش خواهد داد. این دوره آموزشی توسط تیم ســافــت ســاز برای شما عزیزان تهیه شده است.
عناوین آموزش :
- آشنایی با نرم افزار سه بعدی بلندر
- مدلینگ،تکسچرینگ،نورپردازی،رندرینگ و پست پراسسینگ
- نحوه خلق یک صحنه سینمایی به بهترین کل
- نحوه بدست آوردن یک صحنه واقعی در بلندر
- نحوه گسترش یک تصویر بصورت صحیح
عنوان دوره : Udemy – A quick way to build a realistic scene in Blender
سطح : متوسط
زمان کل دوره : 2.07 ساعت
تعداد فایل های تصویری : 15
سال آموزش : 2023
فایل تمرینی : ندارد
مربی دوره : Sime Bugarija
نرم افزار : Blender
زیرنویس انگلیسی : ندارد
Udemy – A quick way to build a realistic scene in Blender
Creating a fully CGI scene is fun but also a time-consuming job and requires a lot of skills to make everything look realistic. From modeling or finding models, texturing, lighting, post-processing, etc. But what if we already have a photo or video that we just want to extend with some elements?
In this tutorial, we will talk about exactly that. How to extend a photo with 3D elements in a free program blender.
We’ll talk about how to import an image and camera into a blender with the correct perspective.
How to set lighting, shadows, and reflection to match the photo.
How to enrich the visual boring and low-resolution textures.
Where to find and how to add overlays that will make the scene more cinematic.
We will talk about post-processing color grading and much more.
At the end of this tutorial, you will be able to extend any photo with any 3d elements and get more realistic renders in a faster way.
All resources and links are included + final .blend file
No previous blender experience is required for this tutorial. The tutorial is step-by-step and is also intended for beginners.
Part 1 – Inspiration and preparation (7 min)
Part 2 – F-spy (14 min)
Part 3 – Blender, camera, and character import (7 min)
Part 4 – Combining background image and render (5 min)
Part 5 – Gas station modeling (15 min)
Part 6 – Creating lighting and shadows (15 min)
Part 7 – UV Project modifier (6 min)
Part 8 – Color matching (5 min)
Part 9 – Improving textures (6 min)
Part 10 – Creating reflections on the ground (12 min)
Part 11 – Adding details (9 min)
Part 12 – Overlays (11 min)
Part 13 – Post-processing – Part 1 (9 min)
Part 14 – Post-processing – Part 2 (12 min
حجم کل : 0.5 گیگابایت

برای دسترسی به کل محتویات سایت عضو ویژه سایت شوید
برای نمایش این مطلب و دسترسی به هزاران مطالب آموزشی نسبت به تهیه اکانت ویژه از لینک زیر اقدام کنید .
دریافت اشتراک ویژه
مزیت های عضویت ویژه :
- دسترسی به همه مطالب سافت ساز
- آپدیت روزانه مطالب سایت از بهترین سایت های سی جی
- ورود نامحدود کاربران از هر دیوایسی
- دسترسی به آموزش نصب کامل پلاگین ها و نرم افزار ها
اگر در تهیه اشتراک ویژه مشکل دارید میتونید از این لینک راهنمایی تهیه اشتراک ویژه رو مطالعه کنید . لینک راهنما
For International user, You can also stay connected with online support. email : info@softsaaz.ir telegram : @SoftSaaz
امتیاز به این مطلب :
امتیاز سافت ساز
لطفا به این مطلب امتیاز بدید


