آموزش آرک ویز با Blender و هوش مصنوعی Stable Diffusion
Udemy - Archviz with Blender and Stable Diffusion

آموزش آرک ویز با Blender و هوش مصنوعی Stable Diffusion
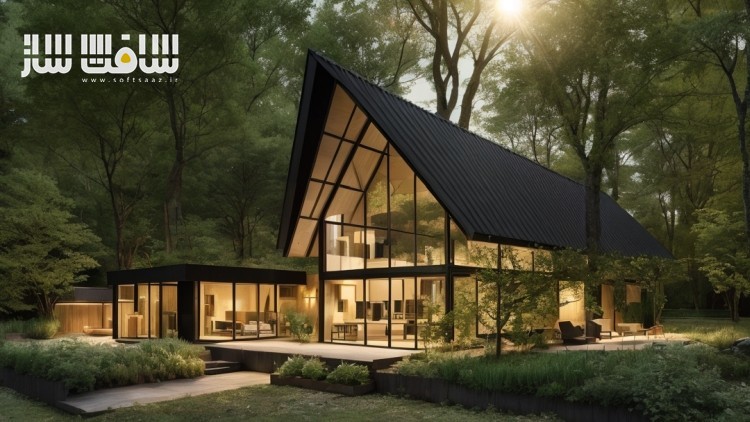
آموزش آرک ویز با Blender و هوش مصنوعی Stable Diffusion : در این دوره از هنرمند Alvaro Celis ، با نحوه ساخت تصاویر آرک ویز داخلی/خارجی با استفاده از بلندر و هوش مصنوعی Stable Diffusion آشنا خواهید شد. این دوره نحوه پروتوتایپینگ یک تصویر و استفاده از StableDiffusion AI برای بهبود تولید انواع مختلف را نشان می دهد.
این دوره نحوه نصب پایتون و GIT جهت شبیه سازی مخازن پروژه و کامپایل خودکار ، کار با ورک فلوی بلندر ، ایجاد تصاویر اولیه با هوش مصنوعی ، نصب پلاگین krita_ai_diffusion و Krita ؛ رندرینگ تصاویر با هوش مصنوعی ، نصب و کار با Webui Forge و ComfyUI در نهایت رندینگ با افزونه AI-Render در بلندر را پوشش می دهد.این دوره آموزشی توسط تیم ســافــت ســاز برای شما عزیزان تهیه شده است.
عناوین آموزش آرک ویز با Blender و هوش مصنوعی Stable Diffusion :
- استفاده از پروژه بلندر برای ایجاد تصویر خروجی اولیه برای رندرینگ هوش مصنوعی
- آموزش نصب پلاگین AI-Diffusion و Krita
- نحوه نصب و استفاده از اینترفیس های Stablediffusion’s Webui Forge و ComfyUI
- درک و استفاده از مدل های مختلف Controlnet جهت تولید تصاویر آرک ویز
- رندر تصاویر مستقیماً در بلندر با پلاگین AI-render
عنوان دوره : Udemy – Archviz with Blender and Stable Diffusion
سطح : متوسط
زمان کل دوره : 3.46 ساعت
تعداد فایل ها : 12
سال آموزش : 2024
فایل تمرینی : دارد
مربی دوره : Alvaro Celis
نرم افزار : Blender – Stable Diffusion
زیرنویس انگلیسی : ندارد
Udemy – Archviz with Blender and Stable Diffusion
Creating exterior/interior Archviz images with Blender and Stable Diffusion
Use a blender project to create a basic output image for AI rendering.
Learn how to install Krita and AI-Diffusion plugin
Learn how to Install and use Stablediffusion’s Webui Forge and ComfyUI interfaces
Understand and use different Controlnet models to generate Archviz images.
Render image variants directly from blender with AI-render plugin.
Using blender to load a project scene, we will learn how to prototype a basic image and enhance it generating different variants through the use of StableDiffusion AI.
First we will install basic software requirements like Python and GIT to be able to clone the projects’ repositories and compile them automatically
Next we will install Blender and practice with an existing project to become familiar with the workflow and generate a basic image to work with AI.
After that, we will install Krita and the plugin krita_ai_diffusion to load the image generated in Blender and start creating AI images based on our render.
Once we are familiar with the basic concepts we will dive a little deeper and install Webui Forge and ComfyUI, two of the most renown and versatile StableDiffusion interfaces.
We will install the required controlnet models to take advantage of them in Archviz.
We will learn how to render images both in Webui Forge and ComfyUI and compare the results between both interfaces.
Workflows for ComfyUI will be provided to help rendering the images with the different models.
Finally, we will install the AI-Render plugin for Blender to learn how to render directly from the 3d program
No advanced skills or knowledge required, the basic usage of each program will be explained and demonstrated in the course.
حجم کل : 3 گیگابایت

برای دسترسی به کل محتویات سایت عضو ویژه سایت شوید
برای نمایش این مطلب و دسترسی به هزاران مطالب آموزشی نسبت به تهیه اکانت ویژه از لینک زیر اقدام کنید .
دریافت اشتراک ویژه
مزیت های عضویت ویژه :
- دسترسی به همه مطالب سافت ساز
- آپدیت روزانه مطالب سایت از بهترین سایت های سی جی
- ورود نامحدود کاربران از هر دیوایسی
- دسترسی به آموزش نصب کامل پلاگین ها و نرم افزار ها
اگر در تهیه اشتراک ویژه مشکل دارید میتونید از این لینک راهنمایی تهیه اشتراک ویژه رو مطالعه کنید . لینک راهنما
For International user, You can also stay connected with online support. email : info@softsaaz.ir telegram : @SoftSaaz
امتیاز دهی به این مطلب :
امتیاز سافت ساز
لطفا به این مطلب امتیاز بدید 🦋


