آموزش ساخت کاراکتر ترسناک با سبک خاص در مایا Maya 2022
Udemy – Creating a Stylized Horror Character in Maya 2022
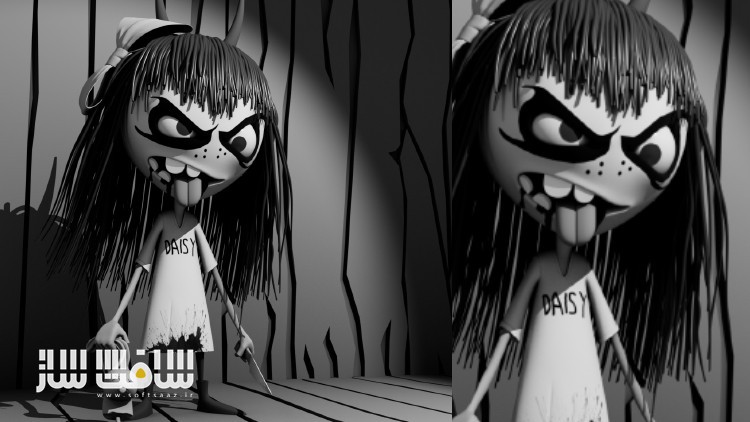
آموزش ساخت کاراکتر ترسناک با سبک خاص در مایا
آموزش ساخت کاراکتر ترسناک با سبک خاص در مایا : در این دوره از هنرمند Digital Saucer Studios ، با نحوه تسلط بر هنر مدلینگ سه بعدی ، تکسچرینگ،نورپردازی و رندرینگ در مایا و استفاده از فتوشاپ برای تکسچر سازی جهت ایجاد یک کاراکتر ترسناک با سبک خاص آشنا می شوید.
این دوره نحوه کار با اینترفیس مایا ، اصول مفاهیم ، ابزارهای مدلینگ در مایا ، هدایت دوربین ، نحوه انتخاب آبجکت ، فرآیند مدلینگ، مدل سازی سر چشم دهان دندان زبان بازو دست پا ؛ ورک فلوی توپولوژی ، فرآیند یووی مپینگ ، نقاشی بافت ها ، تکسچرینگ در فتوشاپ ، ایجاد بک گراند ، نورپردازی و رندرینگ را پوشش می دهد.این دوره آموزشی توسط تیم ســافــت ســاز برای شما عزیزان تهیه شده است.
عناوین آموزش ساخت کاراکتر ترسناک با سبک خاص در مایا :
- نحوه استفاده از ابزارهای مدلینگ در مایا
- نحوه مدل سازی کاراکتر
- نحوه تکسچر دهی به کاراکتر
- نحوه نوردهی و رندرینگ یک کاراکتر
عنوان دوره : Udemy – Creating a Stylized Horror Character in Maya 2022
سطح : متوسط
زمان کل دوره : 16 ساعت
تعداد فایل ها : 81
سال آموزش : 2024
فایل تمرینی : ندارد
مربی دوره : Digital Saucer Studios
نرم افزار : Maya 2022
زیرنویس انگلیسی : ندارد
Udemy – Creating a Stylized Horror Character in Maya 2022
Laern to master the art of 3D Modelling, Texturing, Lighting and Rendering in Maya and using Photoshop for texturing
Students will learn how to use modelling tools in Maya
Students will learn how to model a character
Students will learn how to texture a character
Students will learn how to light and render a character
You will begin by getting familiar with the Maya interface. Then you will learn some of the basic concepts and modelling tools inside of Maya. It is important to learn how to navigate the camera and how to select objects.
Next, you will begin the modelling process. This is a human character so you will learn how to model the head, eyes, mouth, teeth, tongue, and the rest of the body, like the arms, hands, and legs. You will learn the importance of topology and how to get the topological workflow right to achieve a great looking result.
Then we will move to the UV mapping process. This is an important step in the 3D model creaton, as creating UV maps will allow you to paint textures and plug these texture maps into the model. The texturing process will be done in Photoshop.
Then we will go back into Maya, and you will learn how to plug the texture maps into the 3D models using shaders from Maya’s Hypershade menu.
Finally, we will create a background, and set up a camera, which will enable us to render the character. You will also learn and understand the concept of how lights work in Maya, and how to use these lights to create a great looking scene. And finally, you will learn how to render out the final render to give yourself a gorgeous looking render.
حجم کل : 14.2 گیگابایت

برای دسترسی به کل محتویات سایت عضو ویژه سایت شوید
برای نمایش این مطلب و دسترسی به هزاران مطالب آموزشی نسبت به تهیه اکانت ویژه از لینک زیر اقدام کنید .
دریافت اشتراک ویژه
مزیت های عضویت ویژه :
- دسترسی به همه مطالب سافت ساز
- آپدیت روزانه مطالب سایت از بهترین سایت های سی جی
- ورود نامحدود کاربران از هر دیوایسی
- دسترسی به آموزش نصب کامل پلاگین ها و نرم افزار ها
اگر در تهیه اشتراک ویژه مشکل دارید میتونید از این لینک راهنمایی تهیه اشتراک ویژه رو مطالعه کنید . لینک راهنما
For International user, You can also stay connected with online support. email : info@softsaaz.ir telegram : @SoftSaaz
امتیاز دهی به این مطلب :
امتیاز سافت ساز
لطفا به این مطلب امتیاز بدید 🦋


