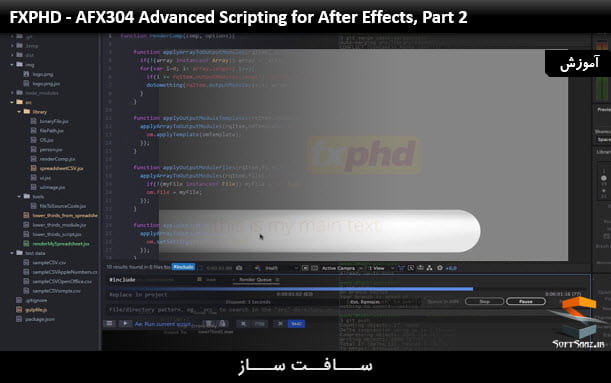
اسکریپت نویسی در افترافکت After Effects بخش 2
AFX304 Advanced Scripting for After Effects
اسکریپت نویسی در افترافکت
در دوره ” اسکریپت نویسی در افترافکت ” ، اصول اولیه استفاده از سیستم کنترل نسخه گیت را فرا میگیرید استفاده از این سیستم به صورت تیمی صورت می پذیرد برای همین، نحوه کار با دسته های شاخه های مختلف ، ادغام و همچنین هماهنگ کردن پروژه تان با یک سرویس دهنده که می تواند توسط اعضای تیم قابل دسترس باشد ، را به شما عزیزان آموزش می دهیم .
اسکریپتینگ صف رندر
در اینجا، نحوه شروع یک صف رندر افتر افکت یا Adobe Media Encoder directly از یک اسکریپت و تمامی جزئیات کنترل کردن تنظیمات رندر و ماژول های خروجی را فرا میگیرید به عنوان یک مثال اسکریپیتی را مینویسیم که انواع دیگری از یک پروژه دسته سوم مبتنی برداده های ذخیره شده در یک فایل صفحه گسترده را رندر میکند. مشابه پوشه watch اسکریپت میتواند حتی بر صفحات گسترده نظارت داشته باشد و به محض اینکه محتوای صفحه گسترده تغییرکرد، به صورت اتوماتیک، اسکریپت شروع به رندرینگ محتوای کامل جدیدی کند. .با سافت ساز همراه باشید.
پیش نمایش دورهاسکریپت نویسی در افترافکت :
عنوان دوره : FXPHD – AFX304 Advanced Scripting for After Effects, Part 2
سطح : –
زمان کل دوره : – ساعت
تعداد فایل های تصویری : 9
سال آموزش : 2017
فایل تمرینی : دارد
مربی دوره : Mathias Möhl
نرم افزار : After Effects
زیرنویس : ندارد
FXPHD – AFX304 Advanced Scripting for After Effects, Part 2
You learn how to start the After Effects render queue or Adobe Media Encoder directly from a script. We cover all the details of controlling the render settings and output modules. As an example, we write a script that renders different variants of a lower thirds project based on data stored in a spreadsheet file. Similar to a watch folder, the script can even monitor the spreadsheet and as soon as the content of the spreadsheet changes, the script starts rendering the new content fully automatically. While focusing on those three topics, you will also hone your skills to write clean and modular code. With gulp, for example, we also configure a linter that permanently checks your code quality in the background. And in our scripting code for the render queue, for example, we exercise how to minimize redundancy in the code by using functions as arguments of other functions.
1-Learn the basics of gulp, in particular how to install it and how to use it to automatically combine all source files of a script into a single result file.
2-We add a lot of extra functionality to our automated gulp build system. In particular, we learn how to obfuscate and zip the result file, how to add a meaningful header with version information and how to implement a clean task.
3-We integrate gulp into our atom text editor and learn how to execute After Effects scripts directly from gulp. In order to do this, we also learn the basics of asynchronous execution and callbacks in JavaScript and Node.js. Finally, we learn how to configure a linter with gulp that monitors our code quality in the background.
4-All about linting. You learn how to work with the linter JSHint and how to configure it properly to deal with the special needs of After Effects ExtendScript.
5-Time for some team work! In this class, we setup a central code repository using the web service of bitbucket.org. We use it to share our code among several team members such that the code we write during the next classes can be developed by several people in parallel.
6-You’ve learned a lot about gulp already. But today, we are not just using it to build your scripting project, but to setup an automated Ae workflow: We configure gulp such that it monitors a spreadsheet file in the background and as soon as the spreadsheet file changes, it automatically renders the jobs described in the spreadsheet file. In this class, you do not just get a new perspective on gulp, but also learn the basics of scripting the render queue of After Effects.
7-We take an in depth look at rendering. You learn how a script can apply presets for render settings and output modules, adjust individual settings and send render jobs to Adobe Media Encoder.
8-We focus on your skill to write clean and modular code. We wrap all the knowledge you gained in the previous class into a convenient and intuitive function that will become your swiss army knife for scripting the render queue. To avoid repetitive parts in our code, we use advanced concepts like passing functions as argument of other functions.
9-Finally, it is time to bring everything together. First we finish our rendering function and then we merge the code of all team members into the final result. To do this you learn how to merge code with git and resolve merge conflicts when several team members modified the same part of the code in parallel. The end result is a fully automatic pipeline to render lower thirds. The content of the lower thirds is stored in a spreadsheet file that is monitored by our pipeline. As soon as the content of the spreadsheet changes on disk, a template project for the tower thirds is opened in After Effects. Then for each lower third contained in the spreadsheet, the content of the template project is updated and rendered immediately.
حجم کل :

برای دسترسی به کل محتویات سایت عضو ویژه سایت شوید
برای نمایش این مطلب و دسترسی به هزاران مطالب آموزشی نسبت به تهیه اکانت ویژه از لینک زیر اقدام کنید .
دریافت اشتراک ویژه
مزیت های عضویت ویژه :
- دسترسی به همه مطالب سافت ساز
- آپدیت روزانه مطالب سایت از بهترین سایت های سی جی
- ورود نامحدود کاربران از هر دیوایسی
- دسترسی به آموزش نصب کامل پلاگین ها و نرم افزار ها
اگر در تهیه اشتراک ویژه مشکل دارید میتونید از این لینک راهنمایی تهیه اشتراک ویژه رو مطالعه کنید . لینک راهنما
For International user, You can also stay connected with online support. email : info@softsaaz.ir telegram : @SoftSaaz
امتیاز دهی به این مطلب :
امتیاز سافت ساز
لطفا به این مطلب امتیاز دهید


