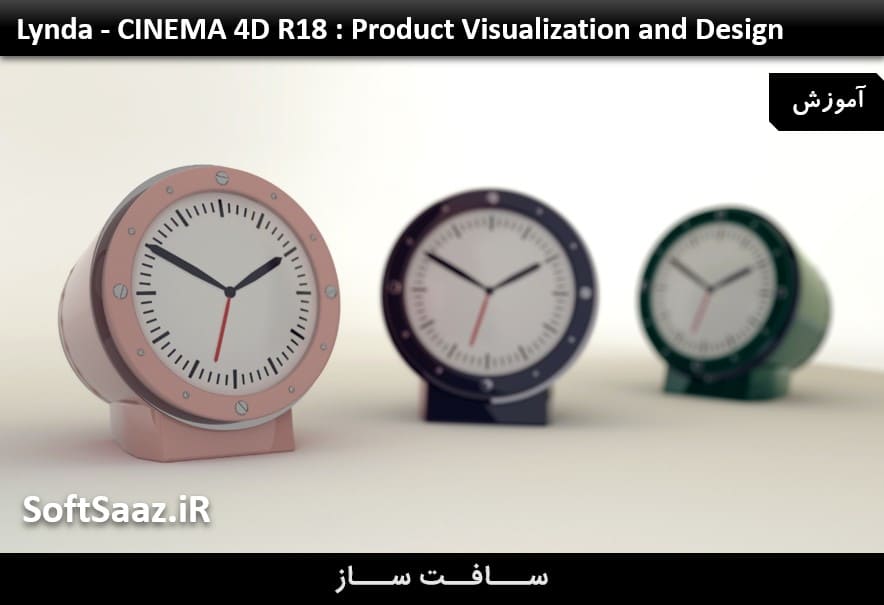
آموزش طراحی محصول در سینمافوردی CINEMA 4D R18
CINEMA 4D R18 Essential Training: Product Visualization and Design
طراحی محصول در سینمافوردی
طراحی محصول در سینمافوردی : آشنایی با نحوه کار با متریال و نورپردازی در CINEMA 4D ، و دیدن چگونگی نحوه ترکیب کردن تکنیک ها در ورک فلوی ویزوالیزیشن محصولتان شما را غنی می بخشد. در این دوره آموزشی از شرکت Lynda ، مفاهیم هسته سینمافوردی را بررسی و نحوه کار با مدلهایی که فرمت C4D را ندارند را فرا می گیریم . چگونگی ساخت انواع مختلف متریال : ناهموار ، درخشان ، رفلکتیو و انکساری و همچنین نحوه کار با متریال های موجود و مدل های ایمپورت شده را خواهید آموخت.
سپس نحوه کار با دوربین ها برای ایجاد افکت هایی از قبیل : عمق میدان ، چگونگی استفاده از Global Illumination و دیگر متدهای نورپردازی برای افزایش واقع گرایی و رئالیسم به رندر های زیباتون را می آموزید. این دوره علاوه بر اینکه سطح مقدماتی هستش ، اصول اولیه CINEMA 4D R18 ، مفاهیم اساسی برای کمک به شناخت بیشتر C4D را نیز یاد می گیریم.با سافت ساز همراه باشید .
عناوین دوره طراحی محصول در سینمافوردی :
- مدل سازی با splines
- ایجاد و اعمال متریال ها
- تعیین نوع موتور رندر برای استفاده
- افزودن دوربین
- تغییر تنظیمات دوربین
- افزودن عمق میدان
- ایجاد و دستکاری منابع نور
- ایجاد استودیوی عکاسی ساده
- استفاده از ambient occlusion
- تنظیم رندر multipass
- تصحیح رنگ با استفاده از مات
- طراحی محصول در سینمافوردی
- و ….
پیشنمایش دوره طراحی محصول در سینمافوردی :
عنوان دوره : Lynda – CINEMA 4D R18 Essential Training: Product Visualization and Design
سطح : متوسط
زمان کل دوره : 4.22 ساعت
تعداد فایل های تصویری : 50
سال آموزش : 2017
فایل تمرینی : ندارد
مربی دوره : Andy Needham
نرم افزار : CINEMA 4D R18
زیرنویس : ندارد
Lynda – CINEMA 4D R18 Essential Training: Product Visualization and Design
Enrich your understanding of how to work with materials and lighting in CINEMA 4D (C4D), and see how to incorporate these techniques in your product visualization workflow. In this course, review core C4D concepts, discover how to work with models that are not in the native C4D format, and see how to build different kinds of materials—bumpy, luminous, reflective, and refractive—as well as how to work with existing materials on imported models. This course also shows how to work with cameras to create effects such as depth of field, how to use Global Illumination and other lighting methods to enhance the realism of your renders, and more.
This is an introductory course, but if you’re brand new to C4D, check out CINEMA 4D R18 Essential Training: The Basics. In that course, instructor Andy Needham starts from the very beginning, introducing you to the interface and other basic concepts to help you understand what C4D is and how it functions.
Topics include:
- Modeling with splines
- Creating and applying materials
- Determining which renderer to use
- Adding a camera
- Changing camera settings
- Adding depth of field
- Creating and manipulating light sources
- Creating a simple photographic studio
- Using ambient occlusion
- Setting up multipass renders
- Creating takes and using overrides
- Color correction using mattes
1. Product Visualization
What is product visualization? 1m 28s
How is C4D used for product visualization? 1m 52s
Examples of work 3m 19s
Big picture concepts 4m 50s
2. Working with Models
Understanding the hierarchy 5m 20s
Manipulating models 4m 21s
Importing models 4m 2s
Working with subdivision surfaces 6m 41s
Using splines to alter models 1m 43s
How to create a cross-section of a model 6m 42s
3. Materials and Textures
What are materials and textures? 4m 8s
Creating and applying materials 8m 13s
Bumpy materials 5m 18s
Luminous materials 3m 45s
Reflective materials 3m 58s
Refractive materials 4m 11s
Applying materials with alpha channels 4m 58s
Modifying existing materials 8m 32s
4. Rendering Basics
What is rendering? 2m 55s
Basic render settings 5m 19s
Which renderer should I use? 54s
Differences between standard and physical 8m 58s
5. Working with Cameras
Adding a camera 4m 39s
Changing camera settings 3m 7s
Adding depth of field 11m 54s
6. Lighting Environments and Global Illumination
Product shot lighting concepts 5m 23s
Creating a simple photographic studio 5m 28s
Adding lighting to the photographic studio 10m 14s
What is Global Illumination? 2m 56s
Global Illumination settings 8m 16s
Lighting with HDRIs 11m 19s
Polygonal lighting 5m 44s
Using ambient occlusion 4m 8s
GI and AO tips and tricks 10m 27s
7. Setting Up Multipass Renders and Takes
What is multipass rendering? 2m 28s
Setting up multipass renders 7m
Creating mattes to isolate objects 4m 45s
Creating takes and using overrides 4m 42s
Render takes using tokens 4m 16s
8. Adding Finishing Touches
Compositing mutipass renders 2m 58s
Color correction using mattes 9m 53s
Adding finishing touches and exporting 4m 11s
9. Challenge
Challenge overview 2m 45s
Solution: Camera, materials, and lights 10m 18s
Solution: Takes, settings, and output 9m 55s
Solution: Compositing 9m 41s
دانلود با لینک مستقیم و سرعت بالا :

برای دسترسی به کل محتویات سایت عضو ویژه سایت شوید
برای نمایش این مطلب و دسترسی به هزاران مطالب آموزشی نسبت به تهیه اکانت ویژه از لینک زیر اقدام کنید .
دریافت اشتراک ویژه
مزیت های عضویت ویژه :
- دسترسی به همه مطالب سافت ساز
- آپدیت روزانه مطالب سایت از بهترین سایت های سی جی
- ورود نامحدود کاربران از هر دیوایسی
- دسترسی به آموزش نصب کامل پلاگین ها و نرم افزار ها
اگر در تهیه اشتراک ویژه مشکل دارید میتونید از این لینک راهنمایی تهیه اشتراک ویژه رو مطالعه کنید . لینک راهنما
For International user, You can also stay connected with online support. email : info@softsaaz.ir telegram : @SoftSaaz
امتیاز دهی به این مطلب :
امتیاز سافت ساز
لطفا به این مطلب امتیاز دهید ☺️


