آموزش انیمیت یک مکعب مربوط به آینده 3D در Blender
Skillshare – Animate a 3D futuristic cuboid in Blender by Rany Bechara
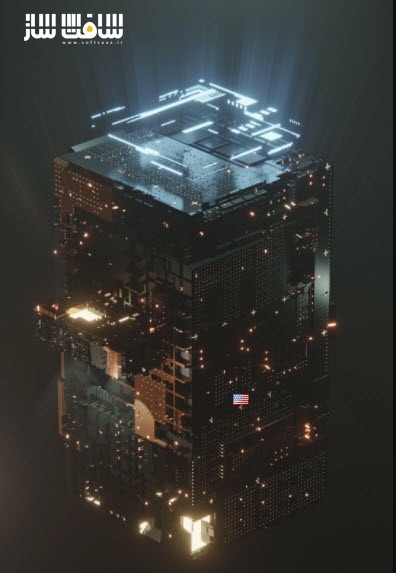
آموزش انیمیت یک مکعب مربوط به آینده 3D
در این آموزش انیمیت یک مکعب مربوط به آینده 3D از هنرمند Rany Bechara، با نحوه ایجاد و انیمیت یک مکعب آینده نگر با استفاده از ترفند های مربوط به انیمیشن،نورپردازی و displacement در بلندر آشنا خواهید شد. از یک مکعب ساده شروع میکنیم ، از تکسچرها برای تولید از JSPlacement و سرانجام شید و نورپردازی مدل استفاده خواهیم کرد. این دوره نکات و تکنیک هایی برای تولید تکسچر،مدلینگ مکعب، شیدینگ ،نورپردازی صحنه تا کامپوزیت و رندرینگ انیمیشن را ارائه می دهد. این دوره آموزشی توسط تیم ســافــت ســاز برای شما عزیزان تهیه شده است.

عنوان دوره : Skillshare – Animate a 3D futuristic cuboid in Blender by Rany Bechara
سطح : مبتدی و متوسط
زمان کل دوره : 1.40 ساعت
تعداد فایل های تصویری : 9
سال آموزش : 2021
فایل تمرینی : ندارد
مربی دوره : Rany Bechara
نرم افزار : Blender
زیرنویس انگلیسی : ندارد
Skillshare – Animate a 3D futuristic cuboid in Blender by Rany Bechara
In this class, I will show you how to create and animate a futuristic cuboid using displacement and some lighting and animation tricks in Blender.
We will use a simple cube to start with and use textures we generate from JSPlacement to displace, shade and light the model.
The course is packed with tips and tricks resulting in beautiful and quick results and goes over everything from generating the textures, modelling the cube, shading and lighting the scene to composite and render the animation.
This is a beginner-to-intermediate level tutorial, and it is expected that you have some basic knowledge of the Blender interface.
If this is your first time using Blender or you need a refresher, you can go over the official fundamentals playlist and watch my previous beginner-friendly tutorial.
I will guide you through the whole process of creating the scene as follows:
Explaining displacement maps and generating the patterns in JSPlacement.
Creating the cuboid using the displacement modifier and the generated maps
Adding textures and colours to the model using the shader network.
Lighting the scene and adding some effects.
Animating the scene using expressions and making it loop.
Setting up the render parameters.
Fixing the overall colours and mood in the compositing workspace.
Exporting the animation to a video file.
حجم کل : 1.6 گیگابایت

برای دسترسی به کل محتویات سایت عضو ویژه سایت شوید
برای نمایش این مطلب و دسترسی به هزاران مطالب آموزشی نسبت به تهیه اکانت ویژه از لینک زیر اقدام کنید .
دریافت اشتراک ویژه
مزیت های عضویت ویژه :
- دسترسی به همه مطالب سافت ساز بدون هیچ گونه محدودیتی
- آپدیت روزانه مطالب سایت از بهترین سایت های سی جی
- بدون تبلیغ ! بله با تهیه اکانت ویژه دیگه خبری از تبلیغ نیست
- دسترسی به آموزش نصب کامل پلاگین ها و نرم افزار ها
اگر در تهیه اشتراک ویژه مشکل دارید میتونید از این لینک راهنمایی تهیه اشتراک ویژه رو مطالعه کنید . لینک راهنما
For International user, You can also stay connected with online support. email : info@softsaaz.ir telegram : @SoftSaaz
امتیاز به این مطلب :
امتیاز سافت ساز
لطفا به این مطلب امتیاز بدید 🦋