آموزش تکسچرینگ دارایی های متعدد با Substance Painter
Skillshare – Substance Painter – Texturing multiple stylized assets
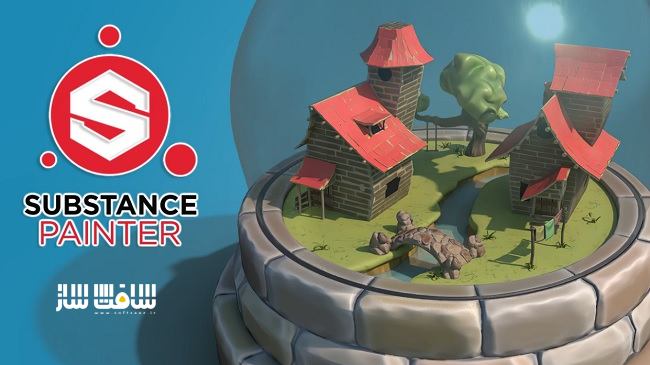
آموزش تکسچرینگ دارایی های متعدد
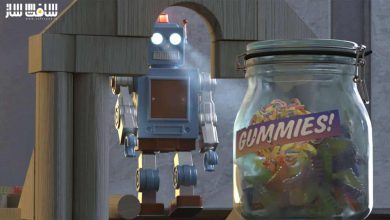
در این آموزش تکسچرینگ دارایی های متعدد از هنرمند Lukas Partaukas، با چگونگی نقاشی چندین دارایی در صحنه و ایجاد تکسچرها با سبک خاص را در نرم افزار Substance Painter آشنا می شویم. این آموزش نحوه تکسچر دهی انواع مختلفی از دارایی ها و سازماندهی آنها را در یک پروژه Substance Painter و بهترین بهره گرفتن از آن را آموزش می دهد. در ادامه با نحوه فیکس کردن تکسچرهای بیک شده چون مپ های ambient occlusion و normal آشنا خواهید شد. این دوره آموزشی توسط تیم ســافــت ســاز برای شما عزیزان تهیه شده است.
عناوین اصلی دوره آموزشی :
- ایجاد تکسچر های سفارشی
- نحوه ایجاد متریال های ساده و در عین حال شیک
- نحوه استفاده از متریال هایی چون سنگ،چوب،آب،شیشه،شاخ و برگ
- آموزش تکنیک های جدید ورک فلو
- نحوه تسریع بخشیدن به فرآیند با استفاده از ماسک های جنریت شده برای ایجاد اسمارت متریال ها
- استفاده مجدد از متریال ها و تکسچرهای سفارشی در صحنه
- ایجاد شیدر ها در Substance Painter
- تفاوت بین شیدر ها در سابستنس
- استفاده از شیدر ترانسپارنسی برای ایجاد شیشه واقعی
- رندرینگ و گرفتن خروجی از صحنه
عنوان دوره : Skillshare – Substance Painter – Texturing multiple stylized assets
سطح : تمامی سطوح
زمان کل دوره : 3 ساعت
تعداد فایل های تصویری : 23
سال آموزش : 2020
فایل تمرینی : ندارد
مربی دوره : Lukas Partaukas
نرم افزار : Substance Painter
زیرنویس انگلیسی : دارد
Skillshare – Substance Painter – Texturing multiple stylized assets
Within this ’Substance Painter – Texturing multiple stylized assets’ class, we are going to be painting a multi-asset scene and creating stylized textures for the snow globe. The course will teach you how to texture a variety of assets within a single Substance Painter Project file and how you can make the best use out of it. You will learn how to fix baked textures such as normal and ambient occlusion maps and avoid getting artefacts within this workflow.
Creating custom textures
In this class, you will also learn how to create your own simple yet stylish materials within Substance Painter in order to texture a scene. By the end of it, you will know how to create stylized materials such as stone, wood, water, glass and foliage by making use out of smart masks in order to exaggerate specific parts of the detail to create a distinctive look. The videos will help you form a unique theme to your artwork.
Learn new workflow techniques
This Substance Painter class will teach you how you can speed up your progress by making use out of the software generated masks to create smart materials which can then be reused onto other assets
In this course I will also teach you of the ways which will help you to make use out of the created custom textures in order to help us reuse our created smart materials on other objects within the scene which will help you to keep the visual consistency throughout the artwork as well as helping you to cut down the time within your texturing process.
Make use out of Substance Painter shaders
During the end of our lessons we are going to be covering how to use and edit multiple Substance Painter shaders within a 3d object. You will learn the differences within shaders in order to help us get the materials with altered visual properties. This will include making use out of the built shaders such as transparency shader in order to create a realistic glass. Substance Painter also includes two sided shader which we are going to make use out of in order to us help with the visualisation of 2 dimensional cloth planes.
Set up for any level 3D artists
The videos are set up for Substance Painter users of with any amount of experience to be able to follow the lessons with ease. This Substance Painter course will allow any beginner to follow it through with ease as it includes a briefing lesson showing the basics of camera manipulation within the software to help you get familiarised with its movements. The lessons will cover texturing techniques which I am sure that every level of Substance Painter user will benefit as it will help you build a stronger foundational understanding of the software.
Create a render
Finally, we are going to finish it off by creating a quick little render which we’ll do by covering the render basics in order to get a nice image of our textured asset. By the end of it, you will have a fully rendered image of your own textured asset which you will be able to share with others.
حجم کل : 1.9 گیگابایت

برای دسترسی به کل محتویات سایت عضو ویژه سایت شوید
برای نمایش این مطلب و دسترسی به هزاران مطالب آموزشی نسبت به تهیه اکانت ویژه از لینک زیر اقدام کنید .
دریافت اشتراک ویژه
مزیت های عضویت ویژه :
- دسترسی به همه مطالب سافت ساز
- آپدیت روزانه مطالب سایت از بهترین سایت های سی جی
- ورود نامحدود کاربران از هر دیوایسی
- دسترسی به آموزش نصب کامل پلاگین ها و نرم افزار ها
اگر در تهیه اشتراک ویژه مشکل دارید میتونید از این لینک راهنمایی تهیه اشتراک ویژه رو مطالعه کنید . لینک راهنما
For International user, You can also stay connected with online support. email : info@softsaaz.ir telegram : @SoftSaaz
امتیاز به این مطلب :
امتیاز سافت ساز
لطفا به این مطلب امتیاز بدید 🦋


