نحوه ایجاد و ریگ یک ربات غول آهنین در Blender
Udemy – BLENDER: How to create and rig the Iron Giant
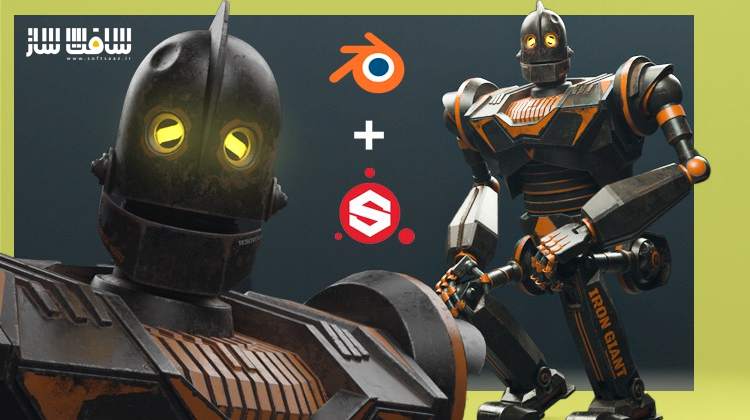
نحوه ایجاد و ریگ یک ربات غول آهنین
در این دوره نحوه ایجاد و ریگ یک ربات غول آهنین از هنرمند Mrawan Hussain، با نحوه ایجاد یک روبات غول آهنین و آشنایی با مدلینگ،آنرپینگ،ریگ بندی،تکسچرینگ و رندرینگ با Blender آشنا خواهید شد. در ابتدا روی صفر تا صد ساخت روبات و مدلینگ سطوح سخت تمرکز خواهیم کرد.
سپس با نحوه صحیح سایه انداخت،نحوه استفاده از مدیفایر Bevel و دیگر مدیفایر ها آشنا می شویم. سپس بسادگی نحوه انجام آنرپینگ را یاد می گیرید. بعد از آن سفر ریگ بندی را شروع و نحوه استفاده از آرماتور،نحوه ریگ مفاصل لازم و آماده سازی برای انیمیشن را می آموزیم.
در بخش آخر روی تکسچرینگ و رندرینگ تمرکز میکنیم. پروژه را به Substance Painter برای انجام عملیات تکسچرسازی،ایجاد متریال های PBR واقعی، افزودن افکت هایی مانند زنگ زدگی،گرد و غبار ،کثیفی اکسپورت خواهیم کرد. سپس آنها را به بلندر ایمپورت کرده و با انجین های Cycles و Eevee رندر میگیریم و کار پست پراسسینگ را انجام می دهیم. این دوره آموزشی توسط تیم ســافــت ســاز برای شما عزیزان تهیه شده است.
عناوین اصلی دوره آموزشی :
- صفر تا صد ساخت مدل روبات آهنین
- آنرپینگ کل مدل از صفر تا صد
- ریگ بندی : نحوه ریگ روبات جهت آماده سازی برای انیمیشن
- تکسچرینگ : ساخت متریال PBR برای دادن ظاهر واقعی به روبات با Substace Painter
- رندرینگ با Cycles و Eevee
عنوان دوره : Udemy – BLENDER: How to create and rig the Iron Giant
سطح : تمامی سطوح
زمان کل دوره : 20 ساعت
تعداد فایل های تصویری : 69
سال آموزش : 2021
فایل تمرینی : دارد
مربی دوره : Mrawan Hussain
نرم افزار : Blender
زیرنویس انگلیسی : دارد
Udemy – BLENDER: How to create and rig the Iron Giant
in the beginning, we will learn how to model the whole robot from start to finish, this kind of modeling call Hard surface, it’s a lot of fun we will learn how to shade your model correctly, how to use Bevel modifier symmetry, and other modifiers,
After that we will jump to the next section I will call it Unwrapping, we will learn how to unwrap hard surface modeling correctly and reduce the UV distortion at the minimum
I will unwrap all the pieces one by one so you could learn how to do that and make it easier for you.
After the unwrapping section, we will start with the rig journey, in this journey, we will learn how to use armature and how to rig all necessary joint so you could be able to move your robot and make it ready for some animation.
the last section will be the Texturing and Rendering, this is very important section because the final result depends on it.
we will export the project to Substance Painter and we will start the texture journey there, we will learn how to make realistic PBR material from scratches step by step and we will learn how to add the wether effect like rust and dust so it looks old and dirty,
all of that will done with Substance Painter after we finish texturing journey we will import the PBR texture back to Blender to make the render.
I will render the scene with Cycles and Eevee, and after that, we will make some quick post-processing with the compositor.
What you’ll learn
modeling the Iron giant from start to finish
unwrapping the whole model from start to finish
Rigging, we will learn how to rig the robot so you can make it ready to animation
Texturing, we will use PBR mterial to make the robot looks realistic by using Substace Painter.
Rendering, we will make quick render to the final result with Cycles and Eevee.
حجم کل : 16.4 گیگابایت

برای دسترسی به کل محتویات سایت عضو ویژه سایت شوید
برای نمایش این مطلب و دسترسی به هزاران مطالب آموزشی نسبت به تهیه اکانت ویژه از لینک زیر اقدام کنید .
دریافت اشتراک ویژه
مزیت های عضویت ویژه :
- دسترسی به همه مطالب سافت ساز
- آپدیت روزانه مطالب سایت از بهترین سایت های سی جی
- ورود نامحدود کاربران از هر دیوایسی
- دسترسی به آموزش نصب کامل پلاگین ها و نرم افزار ها
اگر در تهیه اشتراک ویژه مشکل دارید میتونید از این لینک راهنمایی تهیه اشتراک ویژه رو مطالعه کنید . لینک راهنما
For International user, You can also stay connected with online support. email : info@softsaaz.ir telegram : @SoftSaaz
امتیاز به این مطلب :
امتیاز سافت ساز
لطفا به این مطلب امتیاز بدید 🦋


