آموزش ریگ کاراکتر برای پروداکشن در تری دی مکس 3ds Max
Character Rigging for Production in 3ds Max
آموزش ریگ کاراکتر برای پروداکشن
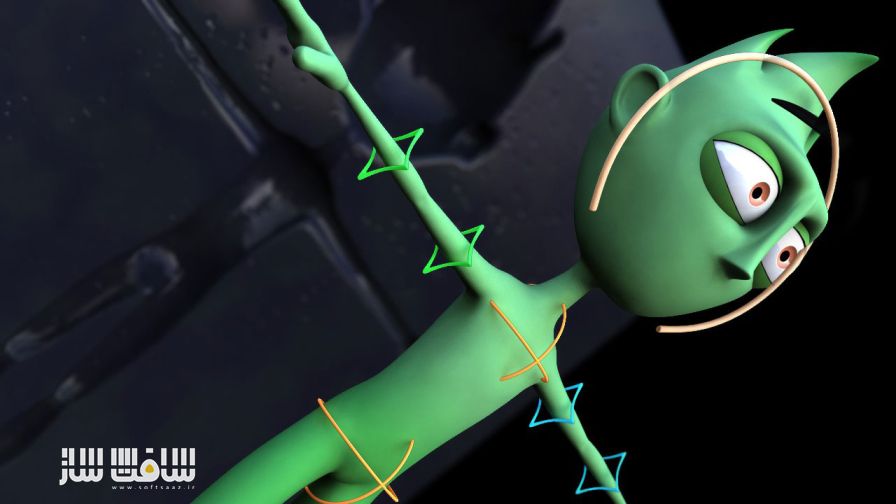
در این آموزش ” آموزش ریگ کاراکتر ” از شرکت Digital Tutors مربی دوره Delano Athias ، ابزارها و تکنیک های لازم برای تنظیم کردن ریگ شخصیت را تحت پوشش قرار می دهد. در این آموزش ریگ کاراکتر ده ساعته ، به صورت گام به گام ، یک ریگ کنترل قدرتمند و انیماتور پسند را بسازید. قرار دادن استخوان به درستی و تکنیک هایی برای عیب یابی ، ایجاد منوهای چهار گانه سفارشی و … جز مابحث این دوره می باشد..با سافت ساز همراه باشید .
پیشنمایش دوره آموزش ریگ کاراکتر را مشاهده فرمایید:
عنوان دوره : Digital Tutors – Character Rigging for Production in 3ds Max
سطح : پیشرفته
زمان کل دوره : 10 ساعت
تعداد فایل های تصویری : 78
سال آموزش : 2010
فایل تمرینی : دارد
مربی دوره : Delano Athias
نرم افزار : 3ds Max 2010
زیرنویس : ندارد
Digital Tutors – Character Rigging for Production in 3ds Max
In this course, we will cover the tools and techniques for setting up character rigs in 3ds Max. Step by step, we’ll construct a control rig that is robust and animator-friendly. We’ll learn everything from proper bone placement and techniques for troubleshooting, to learning fun ways we can preserve volume as our mesh deforms and how to make our controls efficient and easy to comprehend. We’ll also learn how to create customized quad menus and toolbars that will help speed up our workflow, so we can focus primarily on building our control rigs with the best practices. Software required: 3ds Max 2010.
01. Introduction and Project Overview
02. Preparing the scene
03. Creating leg bones
04. Completing the leg bones
05. Working with fins and adding a toe bend bone
06. Setting up initial controls for the feet
07. Constraining the foot bones to the Reverse-Lock helpers
08. Building the primary foot control
09. Establishing secondary foot controls
10. Starting on our foot bank rig
11. Locking controllers
12. Setting up custom parameters for the foot bank
13. Using custom parameters to drive the toe bend
14. Adding knee controls
15. Setting up association curves for the knee controls
16. Creating the curve that will drive our spine bones
17. Connecting helpers to the spine curve
18. Building the bones for the spine
19. Confining the spine bones
20. Deforming the spine curve
21. Establishing hip and chest controls
22. Setting up the Center of Gravity control
23. Choosing a suitable axis order
24. Finishing the spine rig
25. Creating a Global Control
26. Working on the head rig
27. Completing the head rig
28. Creating a control for the blinks
29. Wrapping up the blink controls
30. Building eye controls
31. Finishing our eye rig
32. Starting on the facial controls
33. Building facial controls
34. Completing the facial controls
35. Constructing the shoulder and arm chains
36. Creating the left hand bones
37. Setting up IK-FK Blending switches
38. Building the IK – FK Chains
39. Mirroring the shoulders and arms
40. Cleaning up the shoulder and arm bones
41. Constraining the arms to the IK – FK Chains
42. Blending Between IK – FK modes
43. Rigging IK arm controls
44. Utilizing a custom parameter to control the elbow
45. Creating FK arm controls
46. Finishing the FK arms
47. Setting up the wrists
48. Establishing shoulder controls
49. Starting on finger controls
50. Finishing the left fingers
51. Finishing the right fingers
52. Building twist bones for the arms
53. Completing the left arm twist bones
54. Finishing the left arm’s twist rig
55. Finishing the right arm’s twist rig
56. Cleaning up the control rig
57. Enveloping the character
58. Blocking in the deformations of the left leg
59. Setting the initial weights of the spine
60. Focusing on the weights of the neck and head – Correcting bone skewing
61. Modifying the deformations of the neck and head
62. Refining the weights of the left eyebrow
63. Finishing the left eyebrow
64. Saving envelope weights
65. Editing the deformations of the index finger
66. Correcting the weights of the pinky finger
67. Fixing the weighting of the thumb
68. Finishing the deformations of the index finger
69. Wrapping up the weights of the pinky finger
70. Completing the thumb’s weights
71. Finalizing the weights of the left hand
72. Working on the forearm’s weights
73. Refining the weights of the elbow and upper arm
74. Finishing up the left arm’s deformations
75. Concluding the deformations of the left leg
76. Finishing the deformations of the upper body
77. Finalizing the deformations of the head and neck and mirroring weights
78. Solidifying the neck twist
حجم کل :

برای دسترسی به کل محتویات سایت عضو ویژه سایت شوید
برای نمایش این مطلب و دسترسی به هزاران مطالب آموزشی نسبت به تهیه اکانت ویژه از لینک زیر اقدام کنید .
دریافت اشتراک ویژه
مزیت های عضویت ویژه :
- دسترسی به همه مطالب سافت ساز
- آپدیت روزانه مطالب سایت از بهترین سایت های سی جی
- ورود نامحدود کاربران از هر دیوایسی
- دسترسی به آموزش نصب کامل پلاگین ها و نرم افزار ها
اگر در تهیه اشتراک ویژه مشکل دارید میتونید از این لینک راهنمایی تهیه اشتراک ویژه رو مطالعه کنید . لینک راهنما
For International user, You can also stay connected with online support. email : info@softsaaz.ir telegram : @SoftSaaz
امتیاز دهی به این مطلب :
امتیاز سافت ساز
لطفا به این مطلب امتیاز دهید ?


