آموزش تکسچرینگ ربات جنگی در 3ds Max و Photoshop
3DMotive – Dreadnought Texturing Volume 1-4
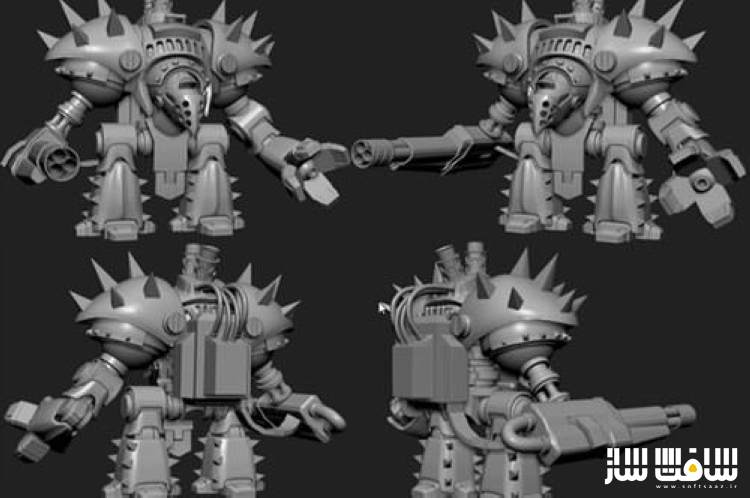
آموزش تکسچرینگ ربات جنگی
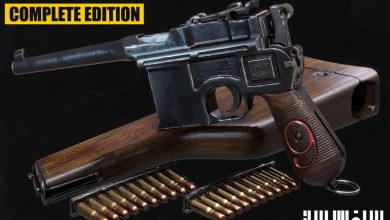
آموزش تکسچرینگ ربات جنگی در 3ds Max و Photoshop : پس از ایجاد مش و مدلسازی نوبت متریال دهی و بافت میرسد به همین خاطر شاید در وهله اول متریال یک مدل پیچیده کار دلهره آوری بنظر برسد زیرا ابزار و برنامه های بسیاری برای این کار وجود دارد و برای همین شاید شما رو گیج کند ولی ما برای تسلط و غلبه به این ترس در نرم افزار Photoshop اقدام به ساخت متریال برای مدلی میکنیم ک پیچیده به نظر می آید.
فتوشاپ یک استاندارد در مرحله بافت دهی و ساده ترین و موثرترین روش برای ایجاد متریال و Uv میباشد که با توسل به روش های مذکور قادر به ایجاد یک مدل رئال هستیم سپس در مراحل بعدی برای ایجاد براقیت و خراش های فلزی روی مدل از تکسچر های PBR استفاده میکنیم و به شما یاد میدهیم چگونه به وسیله فتوشاپ و تکسچرهای PBR اقدام به ساخت متریال هایی بکنید که کثیف و زنگ زده به نظر برسد پس فراموش نکنید نه تنها در این اموزش بلکه در تمامی مراحل تکسچر دهی فتوشاپ به عنوان یک ابزار اصلی تلقی میشود. این دوره آموزشی توسط تیم ســافــت ســاز برای شما عزیزان تهیه شده است.
عنوان دوره : 3DMotive – Dreadnought Texturing Volume 1-4
سطح : متوسط
زمان کل دوره : 5.23 ساعت
تعداد فایل های تصویری : 6
سال آموزش : 2019
فایل تمرینی : –
مربی دوره : Stephen Wells
نرم افزار : Marmoset , 3ds Max, Photoshop
زیرنویس : ندارد
3DMotive – Dreadnought Texturing Volume 1-4
After creating a mesh, in this case a mechanical Dreadnought, it’s not enough to simple have a greyscale model…now comes texturing! Texturing models can be a daunting task because there are so many tools/programs geared towards creating texturing that are stylized or physically based, it can be confusing. Photoshop, a standard in texturing, is the simplest, most direct method to create first a colour base and then add details, via masks, to the colours for better realism. Once the model has a base diffuse/albedo, we can then still use Photoshop to create the glossiness and metal maps to support PBR workflows without requiring any third party (or more expensive) program to create acceptable end results. One need only understand the PBR basics to understand how using simple Photoshop filters and masks can help create the needed details to make our model look dirty/rusty and worn as nothing looks faker or more phoney than perfect colours on a Dreadnought mechanical robot that has seen many battles. So, we’ll be able to first create a base diffuse/albedo so we have the colour scheme for the mech and then we’ll focus on creating the detailing/dirt/grime needed to help give the diffuse/albedo a more ‘lived in’ quality. Masking is an integral part of Photoshop’s suite of tools and we’ll be using it to help with our coluors as well as our metals.After we established our colour palette, it’ll then be deciding which parts of the mech are metallic, which are rubber and which are plastic so we can use Photoshop to help create the different textures needed for the PBR pipeline.
حجم کل : 5.6 گیگابایت

برای دسترسی به کل محتویات سایت عضو ویژه سایت شوید
برای نمایش این مطلب و دسترسی به هزاران مطالب آموزشی نسبت به تهیه اکانت ویژه از لینک زیر اقدام کنید .
دریافت اشتراک ویژه
مزیت های عضویت ویژه :
- دسترسی به همه مطالب سافت ساز
- آپدیت روزانه مطالب سایت از بهترین سایت های سی جی
- ورود نامحدود کاربران از هر دیوایسی
- دسترسی به آموزش نصب کامل پلاگین ها و نرم افزار ها
اگر در تهیه اشتراک ویژه مشکل دارید میتونید از این لینک راهنمایی تهیه اشتراک ویژه رو مطالعه کنید . لینک راهنما
For International user, You can also stay connected with online support. email : info@softsaaz.ir telegram : @SoftSaaz
امتیاز به این مطلب :
امتیاز سافت ساز
لطفا به این مطلب امتیاز دهید :)


