آموزش مدلسازی موجودات دوپا برای تولید حرفهای در Maya و ZBrush
fxphd - Bipedal Modeling for Production

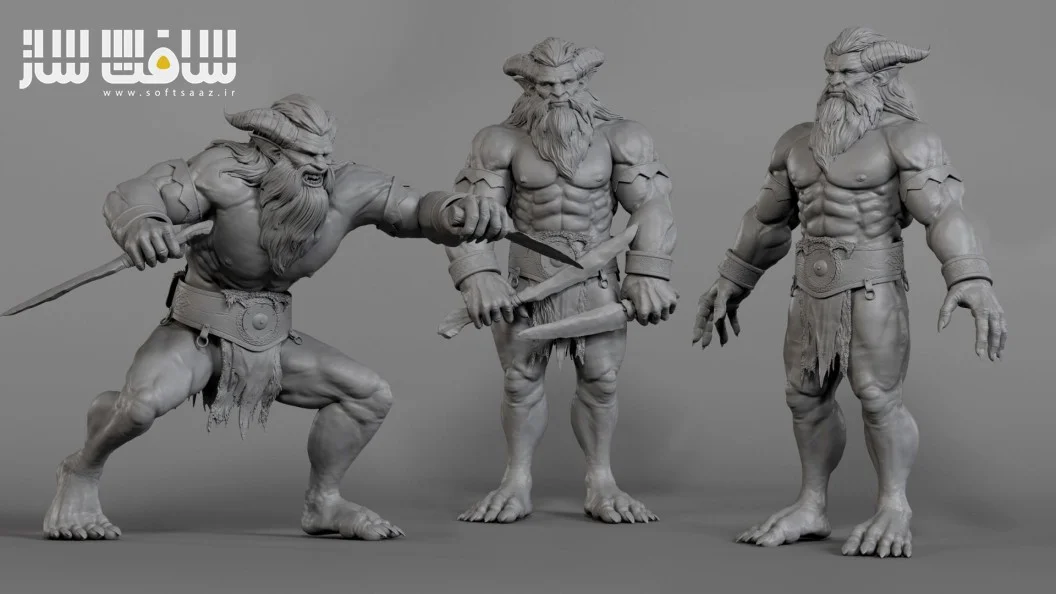
آموزش مدلسازی موجودات دوپا
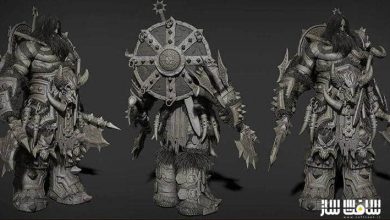
آموزش مدلسازی موجودات دوپا : این دوره از fxphd با تدریس Adam Dewhirst، لید مدلر باسابقه صنعت فیلم، بازی و تبلیغات، به آموزش کامل ورکفلوهای حرفهای مدلسازی موجودات دوپا (Biped Creatures) میپردازد. در این دوره با فرآیند کامل تولید یک کاراکتر از جمعآوری رفرنس و طراحی اولیه تا اسکالپت جزئیات، ساخت لباس، UV، مو و رندر نهایی آشنا خواهید شد. همچنین از قابلیت جدید Redshift در ZBrush برای تولید رندرهای حرفهای بدون نیاز به نرمافزارهای جانبی استفاده میشود. این دوره آموزشی توسط تیم ســافــت ســاز برای شما عزیزان تهیه شده است.
عناوین آموزش مدلسازی موجودات دوپا :
- آشنایی با ورکفلوهای استاندارد مدلسازی کاراکتر در استودیوهای حرفهای
- جمعآوری و سازماندهی رفرنسها در PureRef
- اصلاح تناسبات بدن در ZBrush
- تبدیل مش پایه انسانی به موجودات فانتزی و دوپا
- اسکالپت سر و ویژگیهای صورت
- طراحی و تنظیم چشمها و دندانها
- اصلاح آناتومی دستها و پاها
- آمادهسازی مدل برای ریگ و انیمیشن
- افزودن جزئیات سطحی و High Resolution
- انتقال جزئیات از مدلهای پایه
- مدلسازی لباس و اکسسوریها در Maya
- ساخت مو و ریش بهعنوان راهنمای Grooming
- ایجاد UV و بهینهسازی چیدمان آن
- سازماندهی حرفهای صحنه و نامگذاری آبجکتها
- آمادهسازی مدل برای همکاری تیمی
- ساخت پوز نهایی کاراکتر
- رندر حرفهای در Maya و ZBrush
- آموزش Redshift Rendering در ZBrush
- تنظیم نورپردازی و متریال برای رندرهای حرفهای
- آمادهسازی مدل برای ارائه در استودیوهای تولیدی
عنوان دوره : fxphd – Bipedal Modeling for Production
سطح : متوسط
زمان کل دوره : 7.18 ساعت
تعداد فايل ها : 10
سال آموزش : 2025
فایل تمرینی : دارد
مربی دوره : adam dewhirst
نرم افزار : Maya – Zbrush
زیرنویس انگلیسی : ندارد
fxphd – Bipedal Modeling for Production
Explore production-tested creature modeling workflows that reflect major facility standards. This course covers the practical steps required to transform a base mesh into a fully realized biped creature, with an emphasis on clean topology, displacement workflows, and review-ready presentation. It demonstrates production workflows designed to maintain efficiency and consistency across assets, while still pushing creative detail through sculpting, costume modelling, and early grooming concepts.
Across ten classes, the course follows a complete end-to-end pipeline for creature creation. Beginning with reference gathering and proportion adjustments in ZBrush, the classes progress into sculpting the body and facial features, as well as integrating eyes, teeth, hands, and feet. The workflow then shifts into Maya for clean topology, UV layout, and accessory modelling. The final classes include building reference hair for grooming, posing the model, and rendering for review to deliver a polished, production-ready result.
New Redshift Rendering in ZBrush
In class 10, Adam shares his approach to rendering directly within ZBrush, using tools and techniques he relies on in studio environments. As a member of the ZBrush beta testing team, he’s had early access to the powerful new Redshift integration, allowing artists to create high-quality stills without exporting to external applications. Learn how to set up Redshift renders from scratch, including tips for lighting, materials, and output settings, ideal for showcasing your work at a professional standard. Several of Adam’s renders now appear in ZBrush’s startup menu, demonstrating just how far these native tools have come.
The course is taught by Adam Dewhirst, an experienced lead modeller with over 18 years in film, TV, games, and commercials. Formerly the Head of Assets at UNIT TV & Film and The Mill, and a lead modeller at ILM London, Adam has contributed to projects such as Tenet, Guardians of the Galaxy, and high-profile campaigns for Audi, Nike, and the BBC.
Class Listing
Class 1: Reference Gathering and Setup
Organize production reference in PureRef, including anatomy, approved concept art, materials, poses, and surface details. By the end of this class the project will be fully prepared for modelling.
Class 2: Body Proportions
Reshape the base mesh in ZBrush, adjusting overall proportions to transition from a human form to the creature concept while maintaining clean, usable topology.
Class 3: Head Sculpt
Focus on the head and facial features, refining forms to match concept art. Apply a range of ZBrush brushes to achieve a distinctive yet anatomically grounded creature design.
Class 4: Teeth and Eye Adjustment
Fit and adjust teeth and eyes to the new head geometry. Use a jaw-open blendshape to validate placement, scale, and gum alignment.
Class 5: Body Adjustments – Hands and Feet
Refine hand and foot anatomy to ensure proper definition and even topology. Emphasis is placed on deformation-ready geometry for reliable rigging and animation.
Class 6: Adding Fine Detail
Transfer high-resolution sculpt detail from the base human model and build additional detail unique to the new creature, with focus areas including the face, hands, and body surface.
Class 7: Costume and Accessories
Complete the modeling phase by creating costume elements and simple accessories in Maya, maintaining clean organization for downstream use.
Class 8: Hair Sculpt
Create reference sculpts for head and beard hair, providing guides for grooming artists while presenting the character in a complete, review-ready state.
Class 9: UV Layout and Scene Organization
Generate UVs for new geometry and optimize layout for consistency. Finalize scene organization and naming conventions to ensure the asset can be easily picked up by other artists.
Class 10: Pose and Render
Develop a basic pose and produce renders from ZBrush and Maya for final review. These presentation outputs ensure the character is ready for approval in a production context
حجم کل : 16.5 گیگابایت

برای دسترسی به کل محتویات سایت عضو ویژه سایت شوید
برای نمایش این مطلب و دسترسی به هزاران مطالب آموزشی نسبت به تهیه اکانت ویژه از لینک زیر اقدام کنید .
دریافت اشتراک ویژه
مزیت های عضویت ویژه :
- دسترسی به همه مطالب سافت ساز
- آپدیت روزانه مطالب سایت از بهترین سایت های سی جی
- ورود نامحدود کاربران از هر دیوایسی
- دسترسی به آموزش نصب کامل پلاگین ها و نرم افزار ها
اگر در تهیه اشتراک ویژه مشکل دارید میتونید از این لینک راهنمایی تهیه اشتراک ویژه رو مطالعه کنید . لینک راهنما
For International user, You can also stay connected with online support. email : info@softsaaz.ir telegram : @SoftSaaz