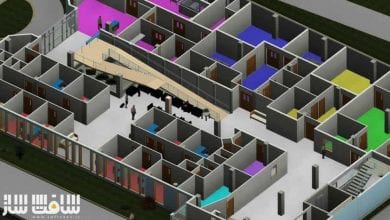
آموزش جامع ساخت سازههای بتنی در Revit
Balkan Architect - Concrete Structures in Revit Masterclass


آموزش جامع ساخت سازههای بتنی در Revit
آموزش جامع ساخت سازههای بتنی در Revit : این دوره از مدرس معروف Milos Temerinski ، راهی جامع برای تسلط کامل بر ساخت سازههای بتنی در نرمافزار Revit است. در این مسترکلاس، تمامی مراحل طراحی سازههای بتنی از جمله آرماتوربندی (Rebar)، سازههای پیشساخته (Precast)، جزئیاتسازی، حاشیهنویسی (Annotation) و زمانبندی (Scheduling) بهصورت عملی آموزش داده میشود تا بتوانید پروژههای حرفهای را با دقت و بهرهوری بالا به انجام برسانید.این دوره آموزشی توسط تیم ســافــت ســاز برای شما عزیزان تهیه شده است.
عناوین آموزش جامع ساخت سازههای بتنی در Revit :
- مدلسازی کامل عناصر سازهای شامل دیوارها، کفها، ستونها، تیرها، سقفها، تیرهای کناری، فونداسیون و سایر اجزا
- آموزش کار با فایلهای مرجع شامل لینکهای Revit و فایلهای CAD برای استفاده از نقشههای معماری
- یادگیری اصول آرماتوربندی با Rebar شامل Bar، Area Rebar، Path Rebar، Fabric Sheet و حتی اشکال پیچیده بتنی
- آموزش آرماتوربندی فرمهای بتنی آزاد و غیراستاندارد با ابزارهای پیشرفته مانند Free Form Rebar
- کار با سازههای پیشساخته شامل تبدیل دیوارها و کفهای معمولی به اجزای Precast، آرماتوربندی اجزای پیشساخته و تولید خودکار نقشههای کارگاهی (Shop Drawings)
- آموزش نحوهی نمایش حرفهای اجزا با استفاده از کدهای رنگی برای میلگردها و شخصیسازی تگها و فمیلیهای Revit
- استخراج اطلاعات دقیق از مدل BIM با ساخت جداول زمانبندی پیشرفته برای قیمتگذاری، برش و خمکاری میلگردها
- ایجاد شیتهای حرفهای شامل نماها، تگها، ابعاد و زمانبندیهای دقیق با امکان استفاده از فرمول و فیلدهای محاسباتی پیشرفته در Revit
عنوان دوره : Balkan Architect – Concrete Structures in Revit Masterclass
سطح : متوسط
زمان کل دوره : 6 ساعت
تعداد فايل ها : 5 فصل
سال آموزش : 2024
فایل تمرینی : دارد
مربی دوره : Milos Temerinski
نرم افزار : Revit
زیرنویس انگلیسی : ندارد
فشردگی اختصاصی سافت ساز : ندارد
Balkan Architect – Concrete Structures in Revit Masterclass
Ultimate Revit course that covers building concrete structures, including reinforcement (rebar), precast structures, detailing, annotation and scheduling.
Modeling the Structure
The first chapter of the course is dedicated to the modeling of the concrete structure. You will learn how to model structural elements such as walls, floors, columns, beams, roofs, edge beams, foundation and more…
Apart from learning how to use the tools you will also learn about the most efficient workflows for using those tools.
Using Revit Links and CAD Imports
In a lot of cases you will not be designing the building and you will need to use an architecture model and drawings as reference in order to create the structure.
For this, you will learn how to use both 2D CAD files and 3D Revit files as reference for placing structural components.
You will be learning about the best methods to make this quick and easy!
Structural Reinforcement – Rebar
Placing Rebar in all Structural Elements
After we have created the concrete structure it’s time to learn how to reinforce it with rebar.
This course will cover how to make sure that all the settings have been adjusted properly so the placement of rebar can be done quickly and easily.
You will learn how to place different types of rebar starting from bars, area rebar, path rebar, fabric area to fabric sheet rebar.
Apart from learning how to use rebar tools you will develop a complete understanding of the workflow so placing rebar as well as making adjustments and edits can be quick and easy.
Rebar for Complex “in-place” Concrete Shapes – YES, It’s Possible!
You might be thinking “well it’s easy to place rebar on regular rectangular shapes, but what to do when we have some complex concrete structures with difficult shapes?”
This is covered too. You will learn about free form rebar and other tools that make it possible to include rebar in all concrete shapes no matter how complex they are.
Precast Structures
Precast walls
You will learn how to adjust the precast wall settings. After this converting regular walls into complex precast assemblies is done with just a click.
Precast floors
You will learn about multiple types of precast floors that you can use. Complete customization of all components will be covered as well.
Reinforcement in precast
As we did for regular concrete structures, we will also cover how to include and customize the rebar in precast elements.
Precast shop drawings
After completing the process of converting regular Revit elements such as walls and floors into precast, we will be generating shop drawings. Yes, I said generating, this means that we just have to adjust some important settings and Revit will do the rest of the work for us!
This process incudes creating a sheet with all necessary views that include all required annotation. Apart from this you will also be generating a couple of schedules that hold important info on the precast parts of the walls/floors.
Annotation & Presentation
Proper annotation and good presentation are really important part of any project. Because of this you will learn how you can properly display elements. Color coding the rebar is an important par of this process so I will show you how to automate that process with implementing the Filter tool.
Annotation is something that is going to be different for each part of the world. This is why you will not only learn how to add basic dimensions and tag, but you will also learn how to customize them and create your own Revit tag family.
Scheduling
Data extraction
Creating a BIM model is really powerful because it allows you to extract data from it. Because of this in the final chapter of this course you will learn how to create this complex schedule that will include all necessary data for pricing, ordering, cutting and bending rebar for your concrete structures.
You will master Revit schedule functionality trough building this complex schedule that reports data exactly in way that we need.
The schedule will include shape images that will automatically be fed from the rebar families. It will include combined parameters that give you all dimensions in one column. Finally you will learn how to include formulas in your smart parameters for the calculated fields.
حجم کل : 2.5 گیگابایت
برای نمایش این مطلب و دسترسی به هزاران مطلب آموزشی، نسبت به تهیهی اکانت ویژه از لینک زیر اقدام کنید.
وضعیت فعلی شما
- لینکهای دانلود این مطلب قفل است
- بقیهی مطالب ویژه هم بسته است
- بدون دسترسی به آموزش نصب
با اشتراک ویژه
- دسترسی به همهی مطالب سافتساز
- آپدیت روزانه مطالب سایت از بهترین سایتهای سیجی
- ورود نامحدود کاربران از هر دیوایسی
- دسترسی به آموزش نصب کامل پلاگینها و نرمافزارها
For international users: online support — email info@softsaz.ir or Telegram @SoftSaaz.
امتیاز دهی به این مطلب :
لطفا به این مطلب امتیاز دهید