خلق یک صحنه سایبرپانکی در Blender گامبهگام
Udemy - Creating A Cyberpunk Scene In Blender step-by-step

خلق یک صحنه سایبرپانکی در Blender گامبهگام
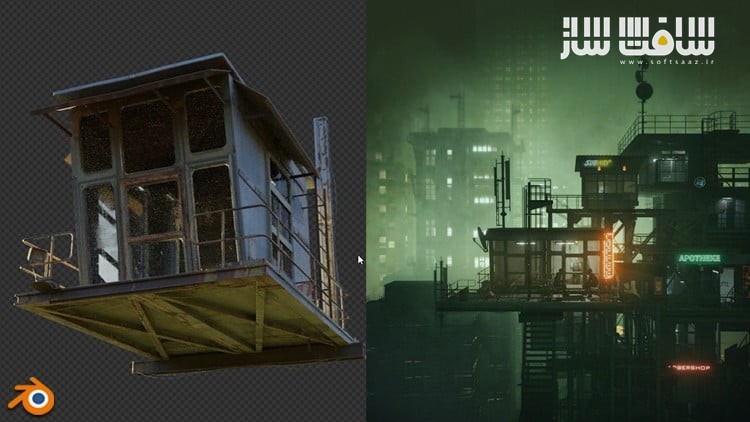
خلق یک صحنه سایبرپانکی در Blender گامبهگام : در این آموزش ۴ ساعتهی گامبهگام از هنرمند Sime Bugarija ، یاد خواهید گرفت چگونه با استفاده از Blender یک صحنهی جذاب با حالوهوای سایبرپانک بسازید. کل آموزش بهصورت عملی و در زمان واقعی ضبط شده و شامل ۲۵ بخش کوتاه و قابلدرک با میانگین زمان ۱۰ دقیقهای است. این آموزش برای یادگیری مدلسازی، تکسچرینگ و UV Projection در Blender بسیار مناسب است و تمام مراحل بهصورت واقعی و گامبهگام ضبط شدهاند، بنابراین برای مبتدیها نیز قابل استفاده است.این دوره آموزشی توسط تیم ســافــت ســاز برای شما عزیزان تهیه شده است.
عناوین خلق یک صحنه سایبرپانکی در Blender گامبهگام :
- شروع کار از مکعب پیشفرض بلندر و تبدیل آن به یک کافیبار سایبرپانکی پرجزئیات
- استفاده از تنها یک تصویر مرجع و یک بافت بتن برای ایجاد نقصهای واقعگرایانه
- آموزش اصول مدلسازی، تکسچرینگ و پروجکشن UV در بلندر
- مناسب برای مبتدیها و کسانی که میخواهند ابزارهای پایه و روند کامل ساخت صحنه را یاد بگیرند
- استفاده از دوربین، نورپردازی و پستپراسسینگ برای نهایی کردن صحنه
- معرفی منابع و لینکهای موردنیاز در طول آموزش
- ضبط کامل فرآیند ساخت خانه کانتینری و مدلسازی تا نهاییسازی پروژه
عنوان دوره : Udemy – Creating A Cyberpunk Scene In Blender step-by-step
سطح : تمامی سطوح
زمان کل دوره : 3.49 ساعت
تعداد فايل ها : 26
سال آموزش : 2025
فایل تمرینی : ندارد
مربی دوره : Sime Bugarija
نرم افزار : Blender
زیرنویس انگلیسی : ندارد
فشردگی اختصاصی سافت ساز : ندارد
Udemy – Creating A Cyberpunk Scene In Blender step-by-step
Hello and welcome to a new tutorial in which we create this cyberpunkish scene in Blender step-by-step.
The tutorial lasts about 4 hours in total, divided into 25 chapters with an average duration of about 10 minutes, to make it as easy to follow as possible.
In the first part, we start from Blender’s default cube and turn it into a detailed coffee bar, using only one reference image plus an additional concrete texture for imperfections.
This is an ideal practice if you want to learn modeling, texturing, and UV projection in Blender because we go through more or less all the tools and the whole process is recorded in real time, so the tutorial is also suitable for beginners.
After we finish our coffee bar, we continue with the scene creation. In this part, we use other assets that I created earlier and talk about the camera, lighting, post-processing, and more.
The tutorial is step-by-step and suitable for beginners as well.
I recorded the entire process of modeling and texturing the container house as well as the creation of the entire scene in real time.
All resources and links are included in the tutorial
The first part of the tutorial is free!
What you’ll learn
I will introduce you to Blender (free software)
I will introduce you to modeling and texturing
I’ll show you how to achieve realistic results quickly
We will create a scene from the introduction in Blender
حجم کل : 3.8 گیگابایت
برای نمایش این مطلب و دسترسی به هزاران مطلب آموزشی، نسبت به تهیهی اکانت ویژه از لینک زیر اقدام کنید.
وضعیت فعلی شما
- لینکهای دانلود این مطلب قفل است
- بقیهی مطالب ویژه هم بسته است
- بدون دسترسی به آموزش نصب
با اشتراک ویژه
- دسترسی به همهی مطالب سافتساز
- آپدیت روزانه مطالب سایت از بهترین سایتهای سیجی
- ورود نامحدود کاربران از هر دیوایسی
- دسترسی به آموزش نصب کامل پلاگینها و نرمافزارها
For international users: online support — email info@softsaz.ir or Telegram @SoftSaaz.