
ورک فلوی ساخت گیماَسِت : راهنمای جامع بلندر
Gumroad - Game Asset Workflow: A Complete Blender Guide

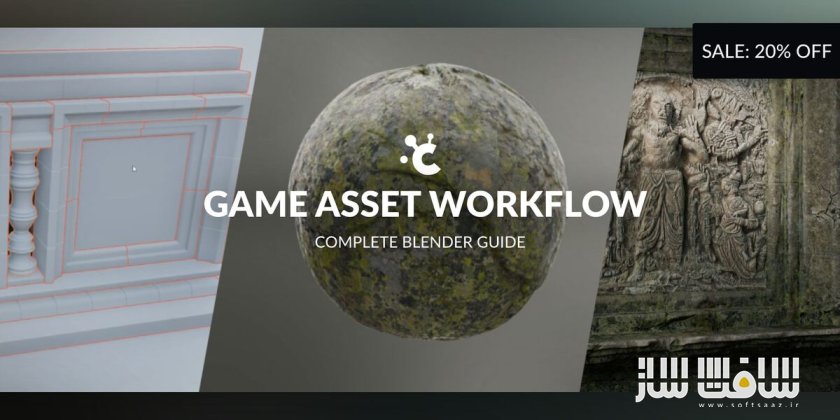
ورک فلوی ساخت گیماَسِت
ورک فلوی ساخت گیماَسِت : این دوره از Aidy Burrows و Gleb Alexandrov از استودیوی Creative Shrimp، یک راهنمای گامبهگام و کامل برای تسلط بر فرآیند ساخت گیماَسِت در Blender است که از مدلسازی اولیه تا اسکالپت، تکسچرینگ، UV، بهینهسازی و خروجی گرفتن برای موتورهای بازی را پوشش میدهد.
اگر همیشه میخواستید اَسِتهای آمادهی بازی و باکیفیت بسازید اما پیچیدگیهای فنی شما را سردرگم میکرد، این آموزش با یک پروژهی واقعی و گردشکار منسجم، مسیر را برایتان شفاف میکند.
سطح دوره متوسط است و برای افرادی مناسبتر است که با محیط و ابزارهای پایهی بلندر آشنایی دارند و چند آموزش ساده را قبلاً انجام دادهاند. این دوره آموزشی توسط تیم ســافــت ســاز برای شما عزیزان تهیه شده است.
عناوین ورک فلوی ساخت گیماَسِت :
- فصل ۱: Blockout – اصول مدلسازی و ساخت مش واترتایت مناسب برای ریمش و اسکالپت
- فصل ۲: Highpoly Sculpting – ایجاد جزئیات فرسودگی، فرسایش و وِدرینگ؛ ساخت براشهای Vector Displacement
- فصل ۳: Displacement مبتنی بر Depth Map – ایجاد باسریلیف بدون اسکالپت و استخراج Depth از تصاویر (اشاره کوتاه به روشهای AI مانند Stable Diffusion)
- فصل ۴: Texturing و متریالهای PBR – استفاده از چندین Albedo، Roughness و Normal و ترکیب آنها با Occlusion، Edge Highlight و نویزهای پروسیجرال
- فصل ۵: مقدمه بهینهسازی – روشهای رسیدن به مش کمپلیگان (Decimation و سایر رویکردها)
- فصل ۶: Normals – مبانی نرمالها و ایجاد توهم جزئیات High-Res روی مشهای Low-Res
- فصل ۷: اَسِت ساده – درک انتخابها (لبههای نرم/سخت، Seam یا بدون Seam) و چرایی آنها
- فصل ۸: Decimation – ساخت اولین مش Low-Poly قابلاستفاده در بازی
- فصل ۹: مبانی UV – آمادهسازی برای رندر سریعتر یا ارسال به موتورهای خارجی
- فصل ۱۰: Triplanar Mapping سفارشی – حل محدودیتهای Box Mapping استاندارد با نودستاپ اختصاصی
- فصل ۱۱: Texture Baking – مهمترین مرحله؛ تولید تکسچرها برای القای جزئیات بیشتر با هندسهی کمتر
- فصل ۱۲: Exporting – آمادهسازی نهایی و خروجی گرفتن برای Godot
عنوان دوره : Gumroad – Game Asset Workflow: A Complete Blender Guide
سطح : متوسط
زمان کل دوره : 11 ساعت
تعداد فايل ها : 12 فصل
سال آموزش : 2025
فایل تمرینی : دارد
مربی دوره : Creative Shrimp
نرم افزار : Blender
زیرنویس انگلیسی : ندارد
فشردگی اختصاصی سافت ساز : ندارد
Gumroad – Game Asset Workflow: A Complete Blender Guide
Master Game Asset Creation in Blender: A Step-by-Step Guide to Modeling, Sculpting, Texturing, UVs, Optimization and Exporting for Game Engines.
Have you ever wanted to create stunning, game-ready assets but felt overwhelmed by the technical challenges? This course presented by Aidy Burrows and Gleb Alexandrov of Creative Shrimp is your ultimate guide to mastering the entire game asset workflow in Blender.
Key Features
• 11+ Hours of Video Content: Comprehensive step-by-step tutorials, 1440p, 60fps
• Complete Workflow: From blockout to export, covering modeling, sculpting, texturing, optimization, UVs and baking
• Real-World Project: Build an ancient wall asset in Blender
• Open-source Workflow (Software Used: Blender 4.3 and Godot 4.3)
• Skill Level: Intermediate
Difficulty: Intermediate
This particular course is best geared towards those that aren’t completely new to Blender. An absolute beginner or someone very new to 3D modeling is going to find it very challenging.
We would definitely recommend to already have some familiarity with Blender’s interface, basic tools and menus. We do call out lots of basic keypresses, there are subtitles to help and we’ll be repeating important ideas as much as possible however, having experience of already accomplishing some short and simple tutorials from around the web already as a foundation would be advisable.
Instructors
Gleb Alexandrov
– 3D Artist at Creative Shrimp, presenter of the acclaimed
Cinematic Lighting
and
Blender to Resolve
courses doing art directing, sculpting & materials/texturing for this course.
Aidy Burrows
– 3D Artist at Creative Shrimp, gamedev veteran and Blender expert doing asset optimization, UVs, retopology and texture baking for this course.
Contents
This course is more than 11 hours of step-by-step tutorials that cover the entire game asset creation process from blockout to exporting a game-ready 3d asset with baked textures.
The whole process is split in two sections: Designing the asset (A) and Preparing it for game engines (B).
Section A: Designing the Asset
Chapter 1: Blockout
You’ll begin with the fundamentals of modeling, learning simple yet effective techniques to create a watertight mesh that’s easy to remesh for sculpting. As the chapter progresses you’ll be introduced to more advanced modeling techniques.
Chapter 2: Highpoly Sculpting
Next, you’ll dive into sculpting and detailing, where you’ll handcraft realistic wear, erosion, and weathering using standard sculpting brushes, as well as create custom vector displacement brushes to bake high-quality displacement maps.
Chapter 3: Depthmap-based Displacement
You’ll also explore alternative detailing techniques, such as creating bas-reliefs without sculpting and extracting depth maps from images for displacement.
We’ll also briefly touch on some potentially controversial AI-driven methods, such as using Stable Diffusion for tasks like depth detection, and as a bonus, for generating images.
This can be safely skipped if desired, though we understand that it’s also useful to stay aware of these new options cascading from Pandora’s box.
Chapter 4: Texturing & PBR Materials
Moving on to texturing and physically-based materials, you’ll bring your assets to life with realistic textures and finely crafted surface details.
We’ll be using multiple albedo, roughness and normal maps, and blend them together in multiple ways using occlusion, edge highlighting, procedural noise and so on.
Section B: Optimizing for Game Engines
At this point we’re using millions of polygons, but that high resolution isn’t going to cut it in most games, that’s a lot of data to have to store on disk even for something like unreal engines nanite tech, so that’s where the optimizing for game engines process will help us.
Chapter 5: Optimizing Introduction
We cover a few different ways to achieve the low polygonal version of the mesh in the course, but we’ll start off with one of the most convenient decimating methods.
Chapter 6: Normals
A key part of the optimizing for games process centers around ‘normals’. Here you’ll get familiar with the fundamentals and how we’ll be wielding vectors to create the magical illusion of high resolution detail on low resolution meshes.
Chapter 7: Simple Asset
Soft or Hard edges? Seams or no seams? In this chapter you’ll quickly be brought up to speed about the whole optimizing process using a super simple mesh. Explaining many of the considerations we need to make and how it all links together.
This will help to put into context a lot of the questions that can come up about HOW and WHY to approach your final optimized asset.
Chapter 8: Decimation
How low is low enough? Here’s where you’ll create the first low polygonal mesh that can be used in game. The decimation process will be our first go to option – it can get us a very usable result reasonably quickly when compared to the more manual retopology processes.
Chapter 9: UV Fundamentals
Should we want to optimize it for faster renders or send it into an external engine such as a game environment we’re going to need to start with some UV’s.
Chapter 10: Custom Triplanar Mapping
There are some limitations with the standard box mapping when it comes to rotating our texture coordinates so to get the most out of it we’ve also included a custom box mapping node setup to get around that limitation with steps on how to use it.
Chapter 11: Texture Baking
If we had to pick the most important chapter it’d be this one, this is where all the work we’ve done finally pays off or to put it another way, this is where the magic happens.
The final piece of the puzzle, in this chapter you’ll create a series of textures to trick the eye into thinking there’s much more geometry going on than there really is.
Chapter 12: Exporting
Now it’s time for any last minute preparations needed before exporting, and then we’ll demonstrate the process for exporting to Godot.
حجم کل : 12.2 گیگابایت

برای دسترسی به کل محتویات سایت عضو ویژه سایت شوید
برای نمایش این مطلب و دسترسی به هزاران مطالب آموزشی نسبت به تهیه اکانت ویژه از لینک زیر اقدام کنید .
دریافت اشتراک ویژه
مزیت های عضویت ویژه :
- دسترسی به همه مطالب سافت ساز
- آپدیت روزانه مطالب سایت از بهترین سایت های سی جی
- ورود نامحدود کاربران از هر دیوایسی
- دسترسی به آموزش نصب کامل پلاگین ها و نرم افزار ها
اگر در تهیه اشتراک ویژه مشکل دارید میتونید از این لینک راهنمایی تهیه اشتراک ویژه رو مطالعه کنید . لینک راهنما
For International user, You can also stay connected with online support. email : info@softsaaz.ir telegram : @SoftSaaz


ممنون از اشتراک این اموزش خوب و کارامد شما
لینک متاسفانه کار نمیکنه.
سلام الان چک بفرمایید