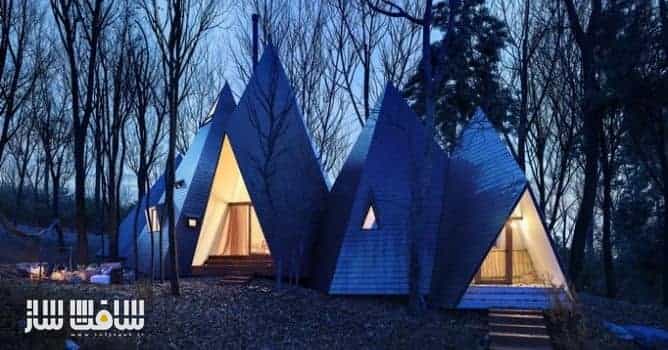
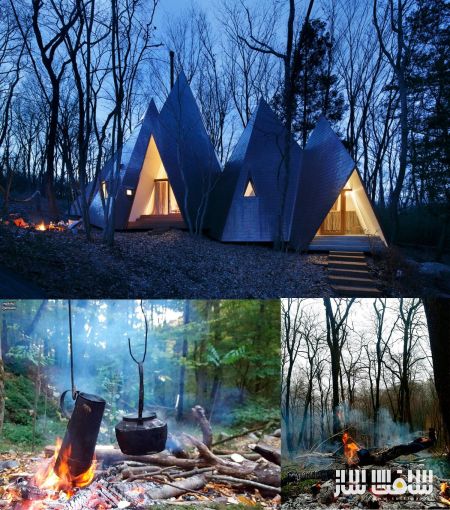
میکینگ آف پروژه “Nasu Tepee”
در این آموزش، من تجربیات خود را در طول ساخت پروژه Nasu Tepee به شما آموزش خواهم داد. امیدوارم که از آن لذت ببرید.
اسم من حسین یدالله پور است، من در سال 1368 در ایران متولد شده ام، در سال 1381 زمانی که کتاب آموزشی مکس ورژن 2.5 را مطالعه میکردم به دنیایCG علاقه مند شدم. تخصص من شامل : شبیه سازی معماری – طراحی محیط – طراحی کاراکتر (شخصیت) – جلوه های ویژه است
 ویدیوی نحوه ساخت :
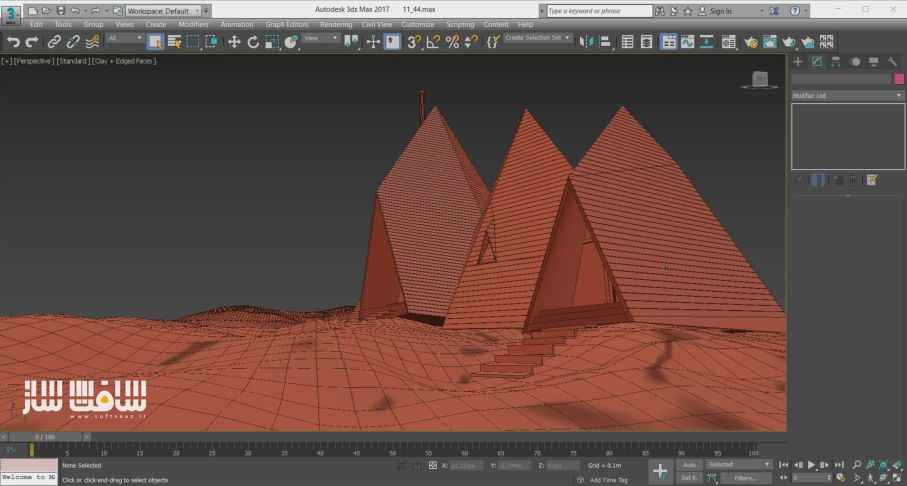
قدم اول – مدلسازی ساختمان
قبل از شروع مدلسازی هر پروژه، مهم است که یونیت (Unit) های صحنه را تنظیم کنید که در طول فرایند پروژه به مشکل بر نخورید
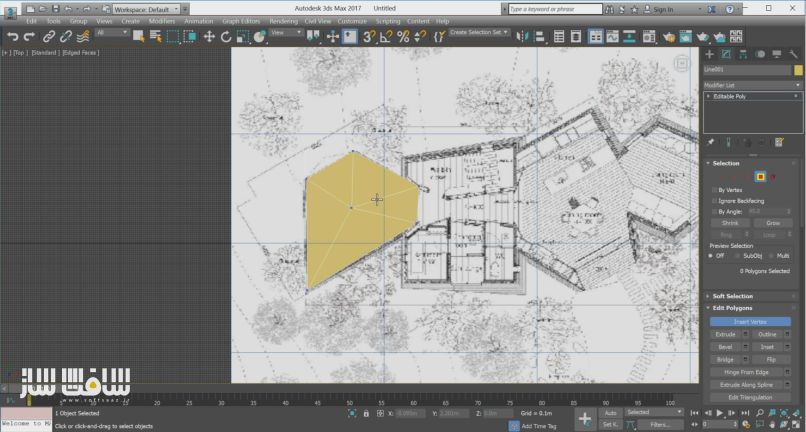
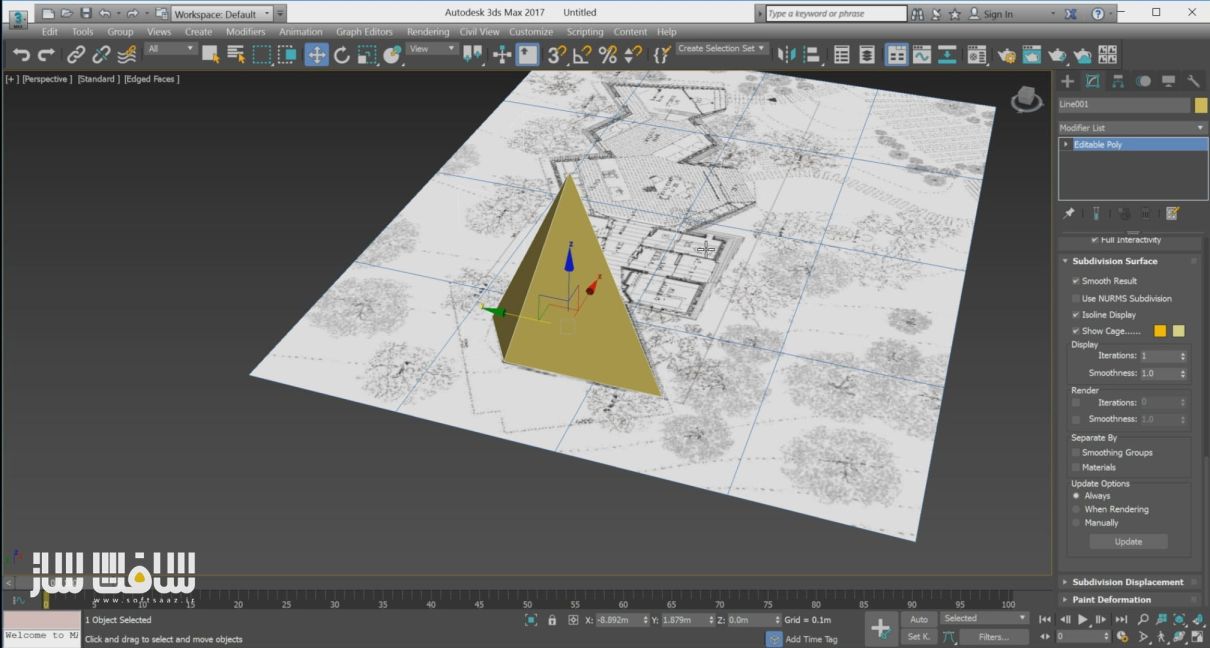
من شروع به مدلسازی سازه بر اساس اطلاعاتی که در اینترنت یافتم میکنم.
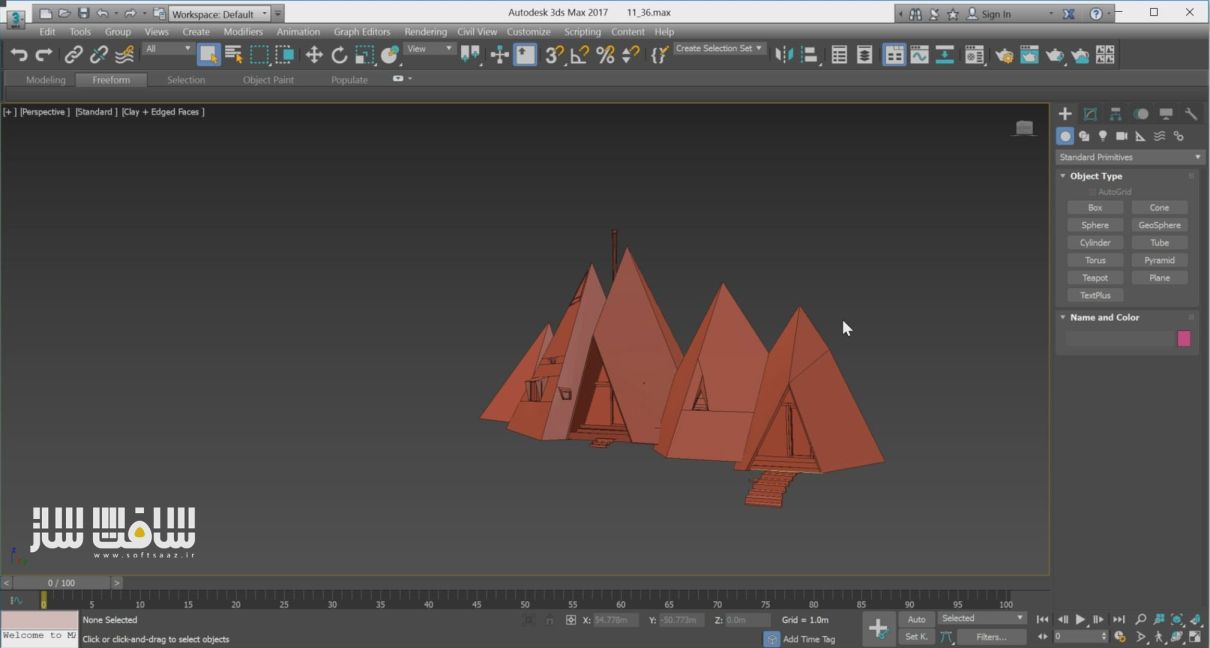
جهت تکمیل مدل سازی از پلاگین Rayfire استفاده میکنم.
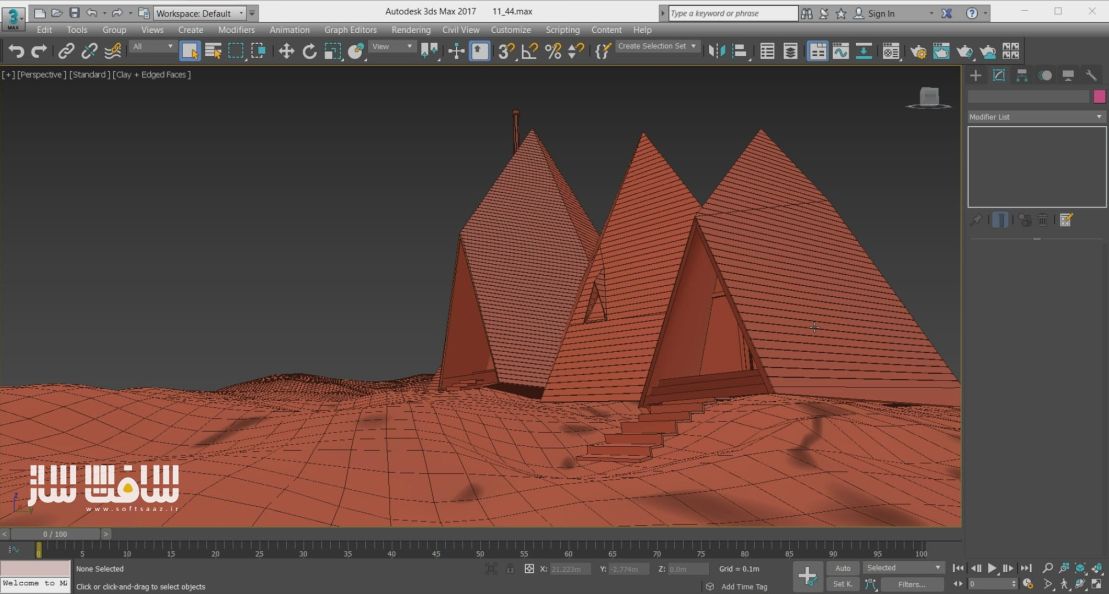
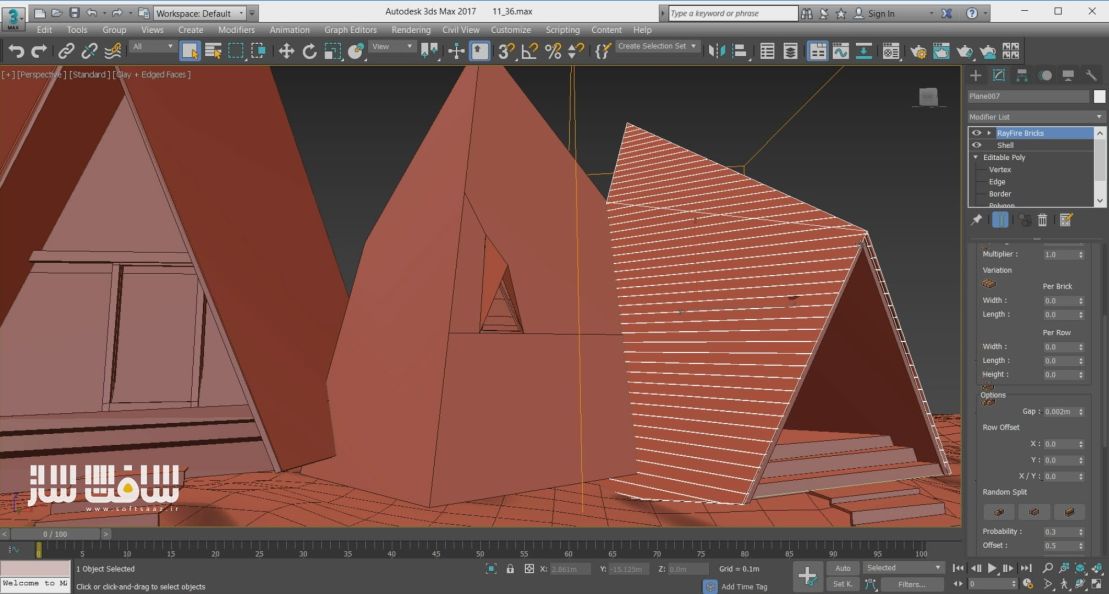
اشتباه نکنید ما نمیخواهیم چیزی رو از بین ببریم (منظور تخریب با پلاگین Rayfire)، با نصب این پلاگین قدرتمند ما یک ابزار خیلی جالب و قدرتمند به مدیفایر مکس اضافه میکنیم به نام RayFire Bricks، از نظر من این افزونه یکی از سریع ترین و ساده ترین راه های ساخت تایل برای ساختمان است.
قدم دوم – مدلسازی زمین
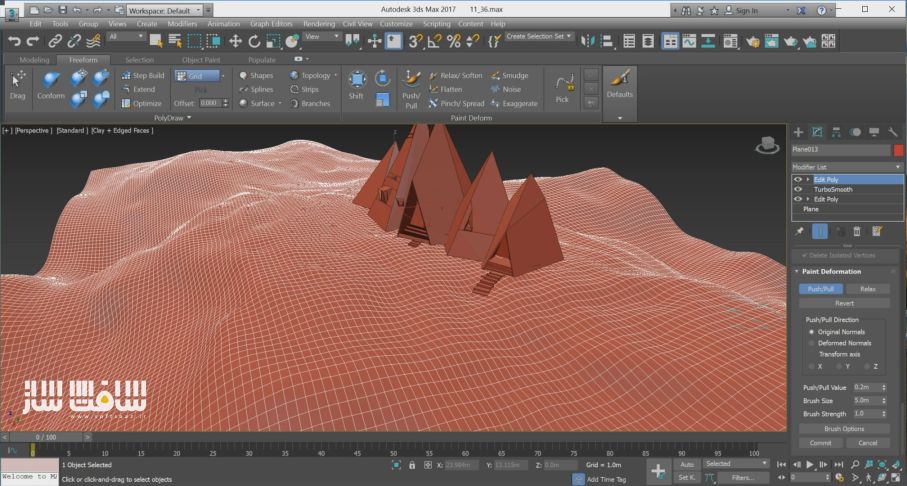
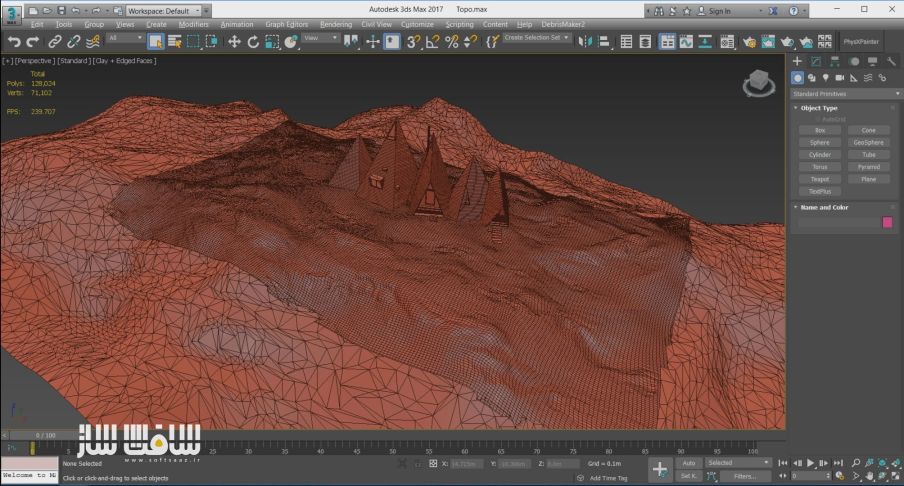
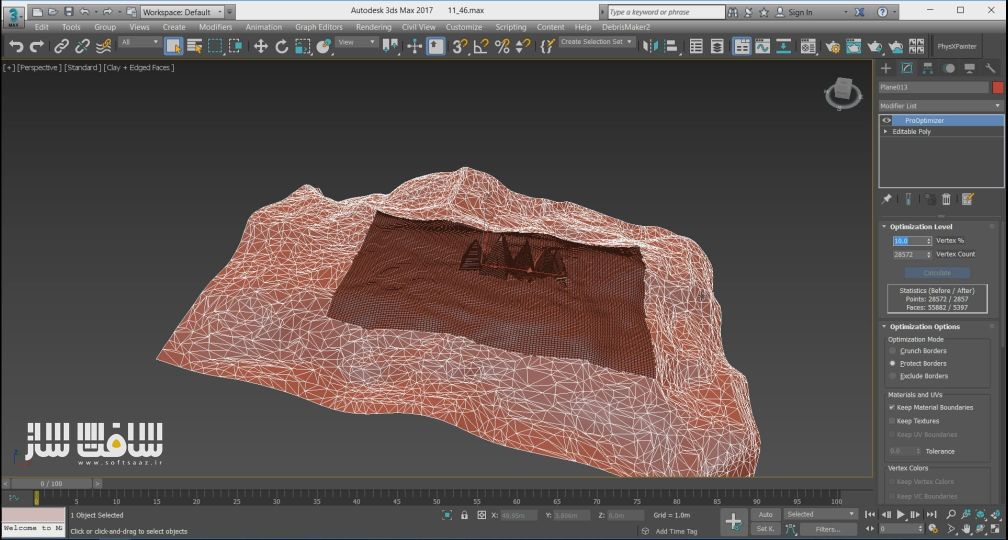
ابتدا من یک صفحه (PLANE) در مکس ایجاد میکنم، و اون رو با اصلاحگر و ابزار های موجود در ادیت پلی مانند Soft Selection، Conform، Paint و ابزار Deformation ویرایش کردم
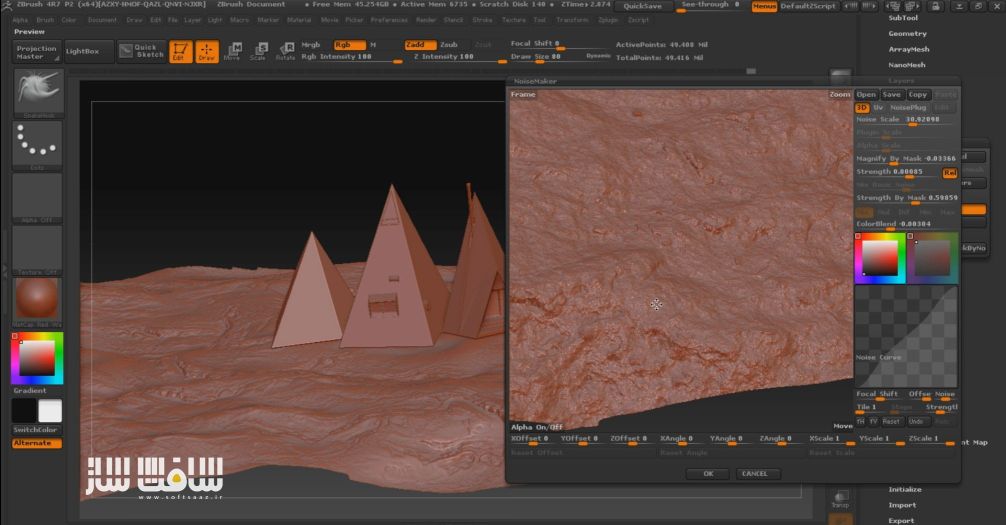
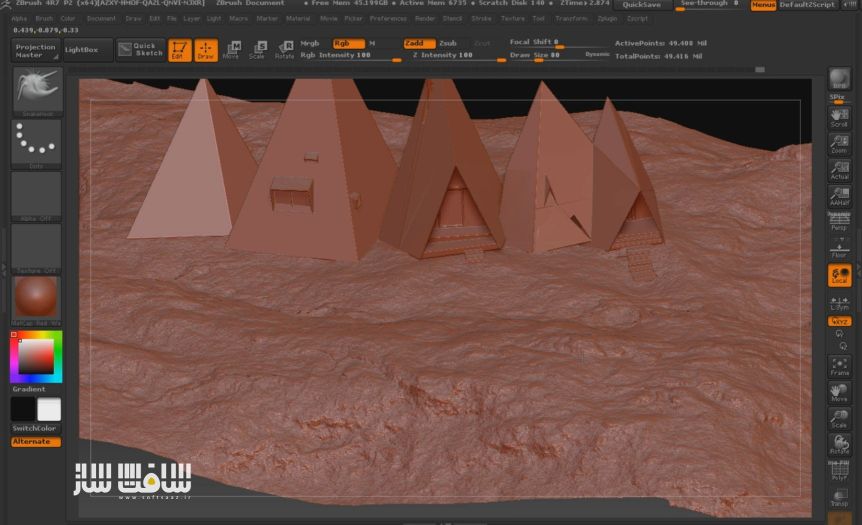
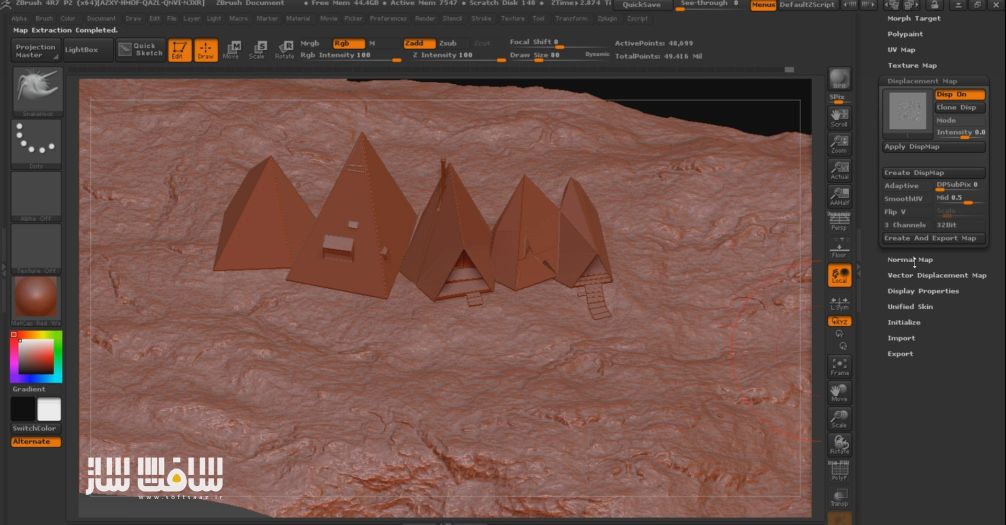
بعد از UV در مکس، مدل زمین را به نرم افزار Zbrush منتقل کردم. زمین رو با مپ های دیسپلیسمنت “Displacement” و نرمال مپ “Normal” ذخیره میکنم. در نهایت، مدل رو به مکس برمیگردونم.
قدم سوم – تنظیمات دوربین و نورپردازی
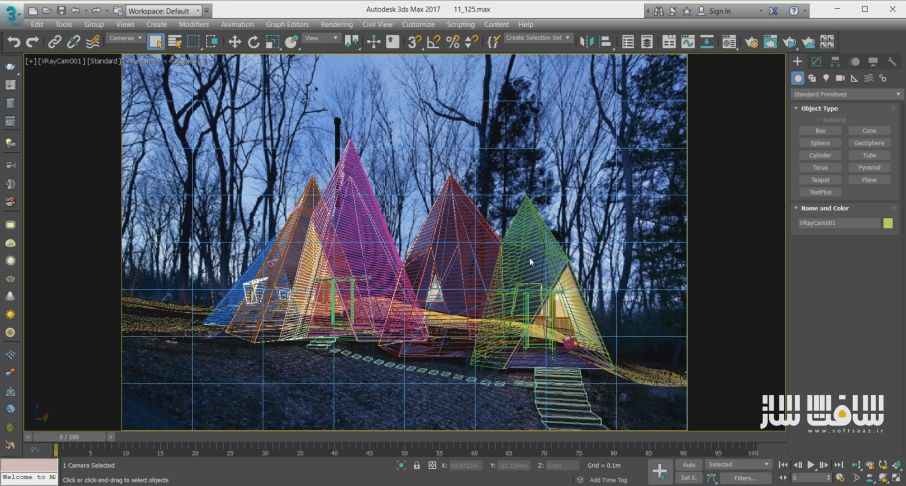
من تصویر رفرنس را به پشت زمینه مکس نسبت دادم و سپس دوربین را تنظیم کردم.
برای نورپردازی من از دو HDRI استفاده کردم.
اولین را از PG SKIES توسط Peter Guthrie غروب سال 2003 به من یک نورپردازی در تم آبی داد.
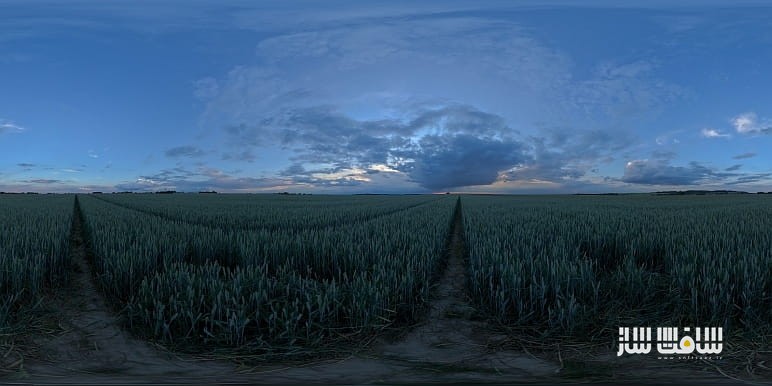
دومین را از www.noemotionhdrs.net . HDRI غروب آفتاب، برای ایجاد پس زمینه بیشتر شبیه به عکس رفرنس من است.
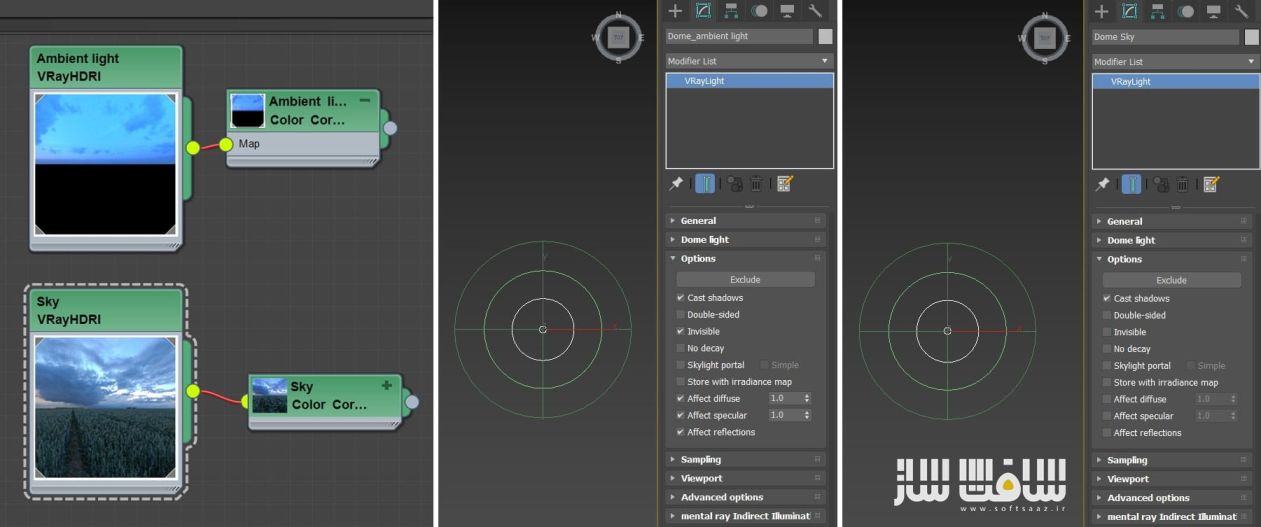
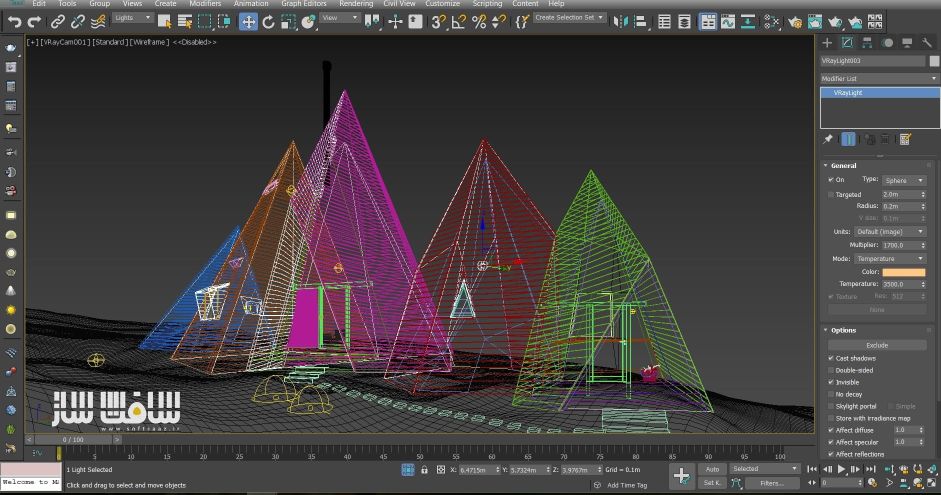
VrayLight
شما میتوانید در ادامه نور HDRI و نور گنبدی Dome Light پیدا کنید. برای نورپردازی داخلی را با استفاده از V-Ray Light از نوع Sphere انجام میدهم.
قدم چهارم – شبیه سازی پارچه

برای ساخت پارچه ترجیح میدهم از نرم افزار محبوب Marvelous Designer استفاده کنم. چون شبیه سازی در این نرم افزار ساده و لذت بخش است و خروجی با کیفیتی داره
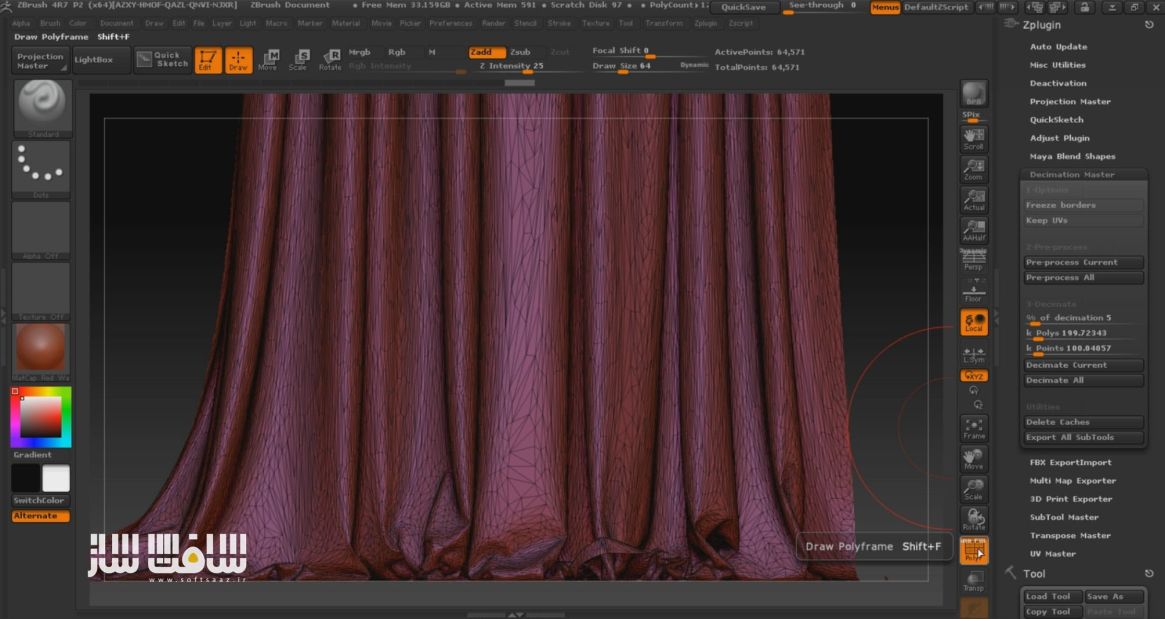
پس از شبیه سازی و ساخت پارچه، جهت سبک و بهینه سازی آن من از نرم افزار Zbrush و ابزار Decimation Master استفاده میکنم.
قدم پنجم – مدلسازی درخت
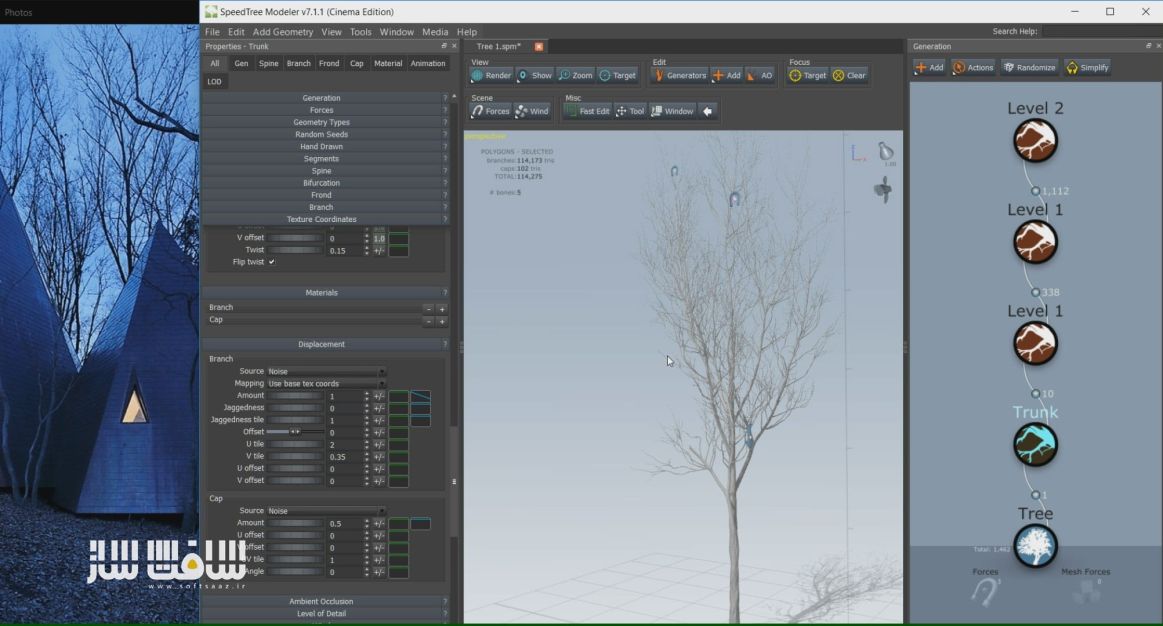
یکی از چالش های این پروژه شبیه سازی درختان بود که با استفاده از نرم افزار SpeedTree آسان شد. این برنامه یکی از بهترین ها در زمینه شبیه سازی درخت میباشد. ما فقط باید بدانیم چه درختی میخواهیم و اجازه دهیم نرم افزار آن را برای ما بسازد.
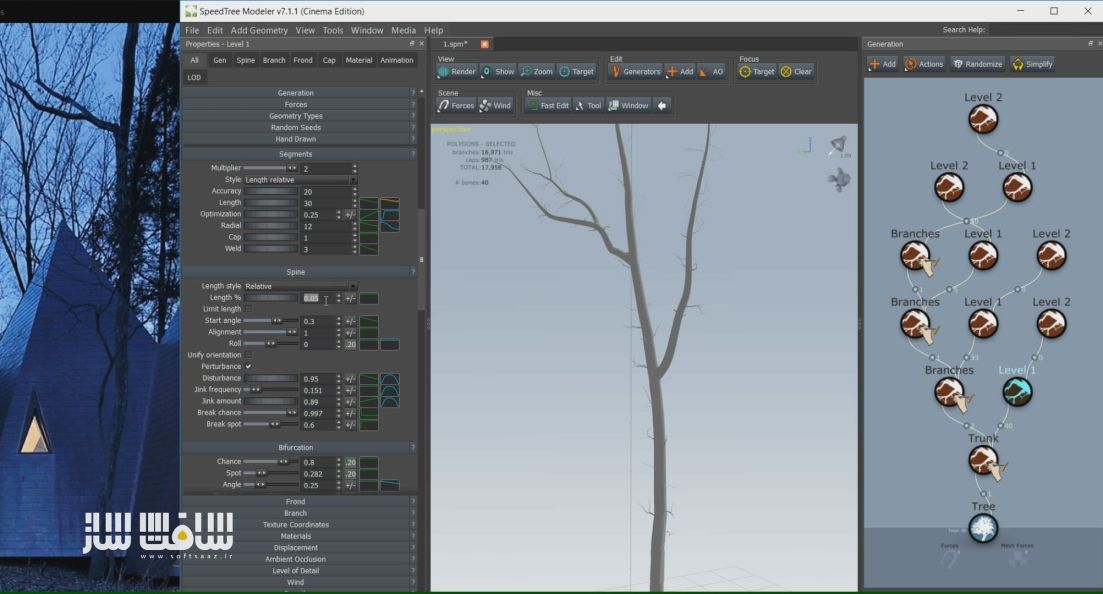
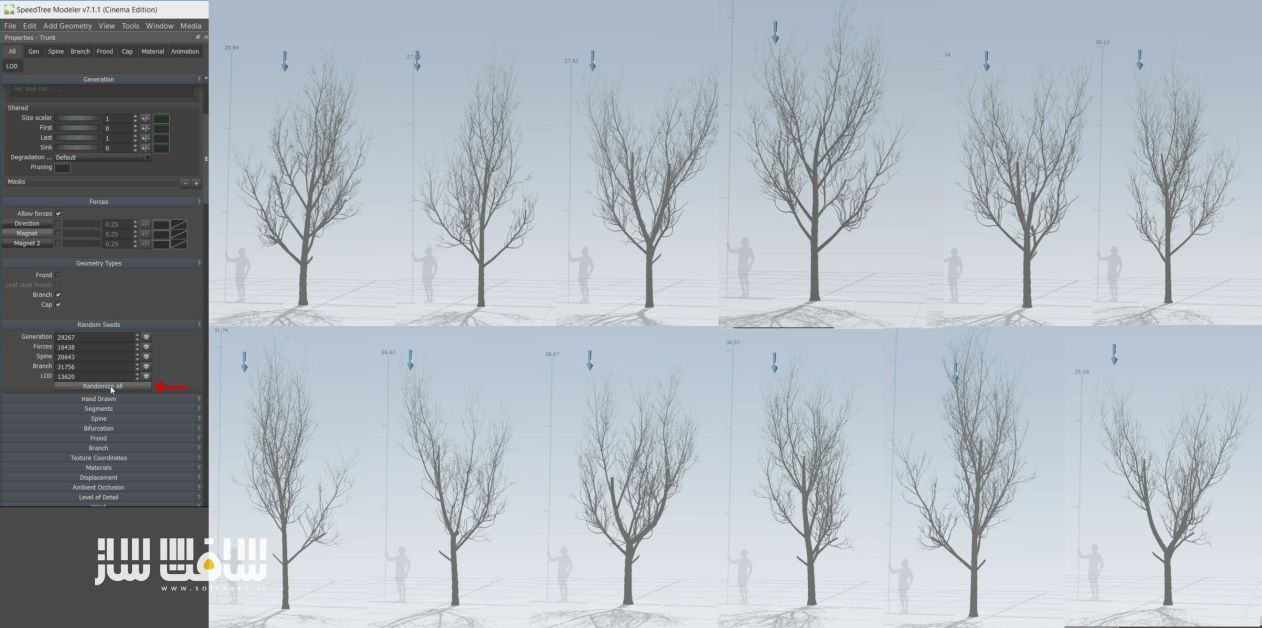
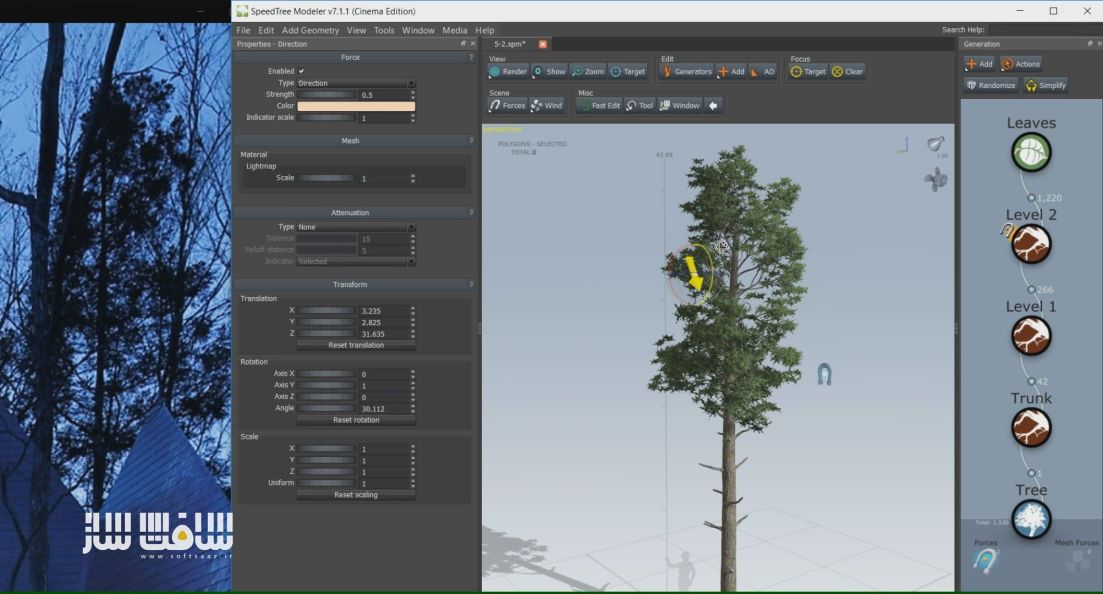
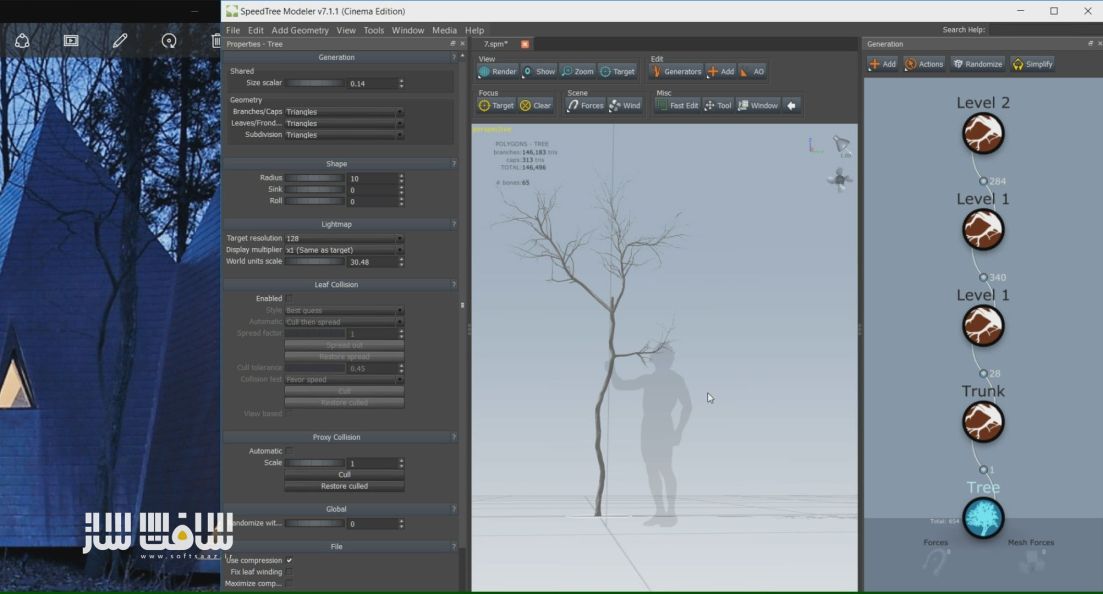
نیازی به ساخت همه درختان نیست فقط تعدادی از درختای اصلی را مدلسازی میکنیم، پر کردن صحنه با نرم افزار های اسکترینگ انجام میشود.
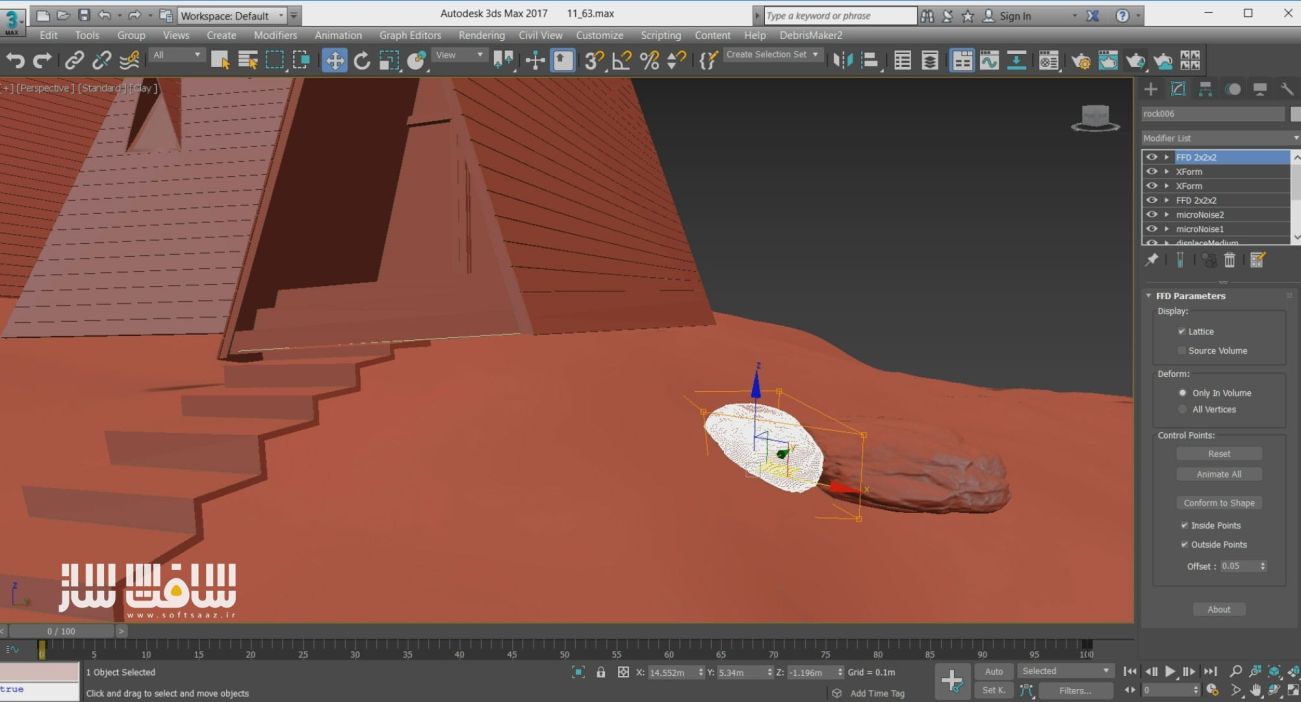
قدم ششم – مدلسازی سنگ
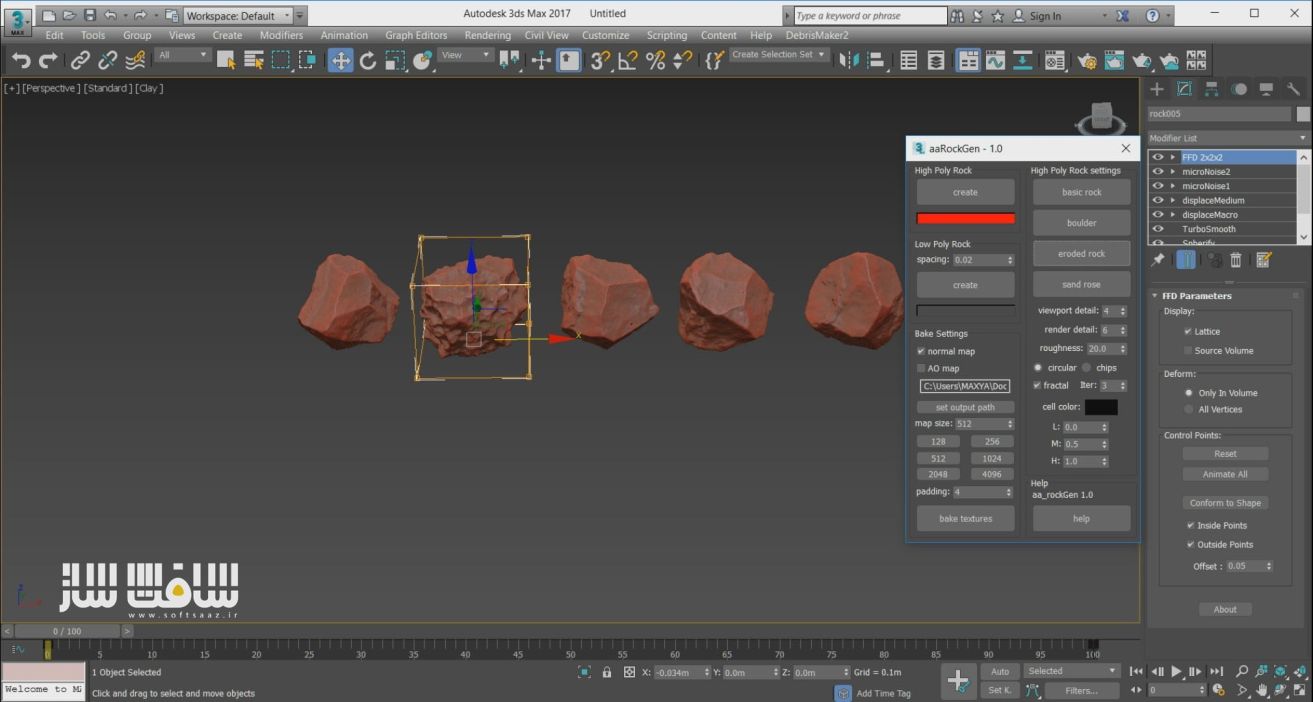
قدم هفتم – مگا اسکن
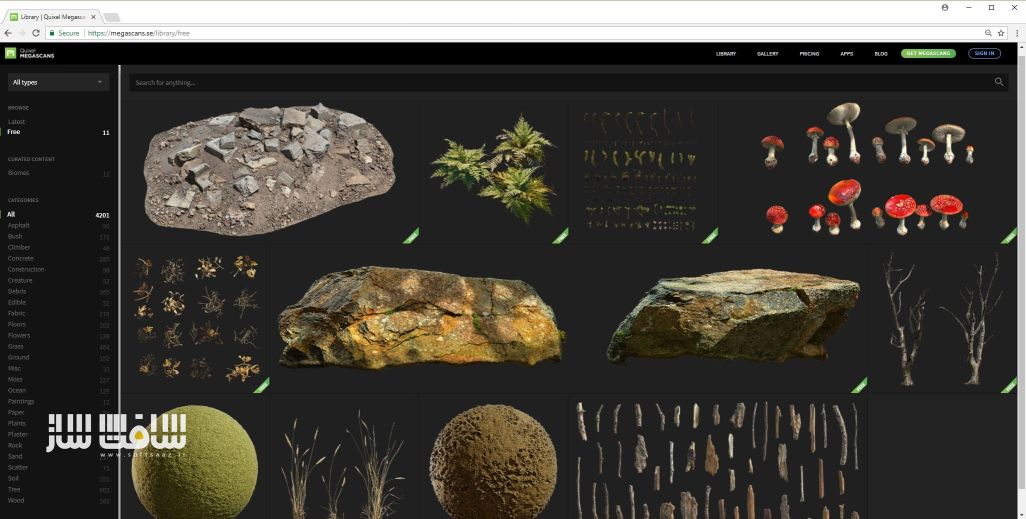
نرم افزار ” Megascans Bridge”
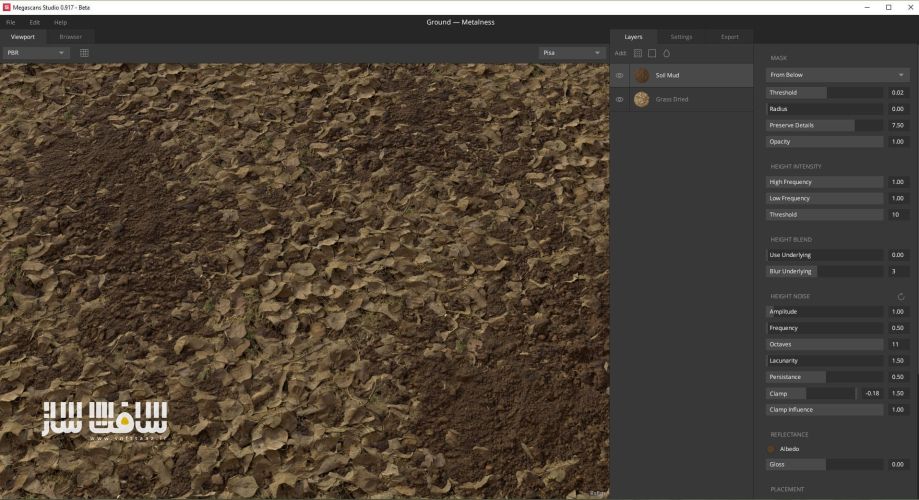
مدل های سه بعدی برای وی ری! :
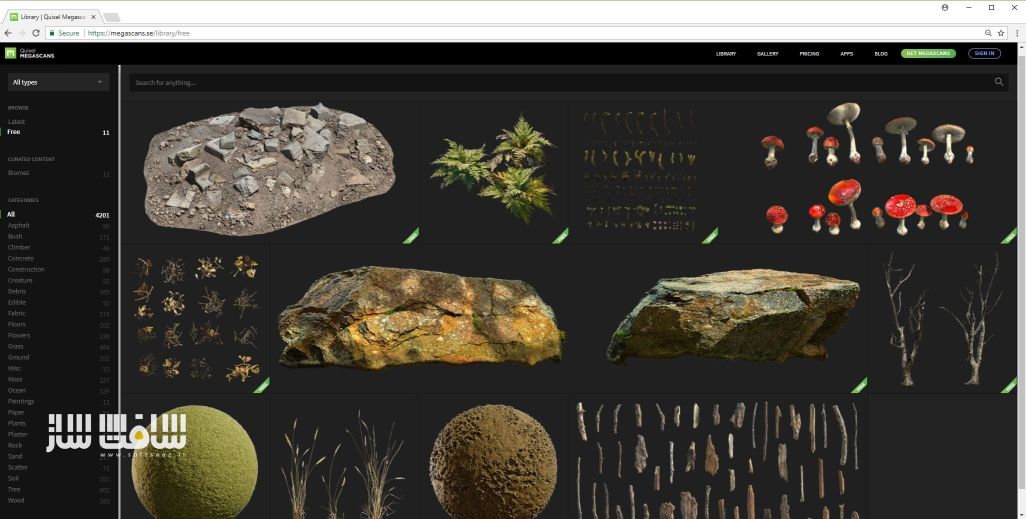
قدم هشتم – ذغال و چای
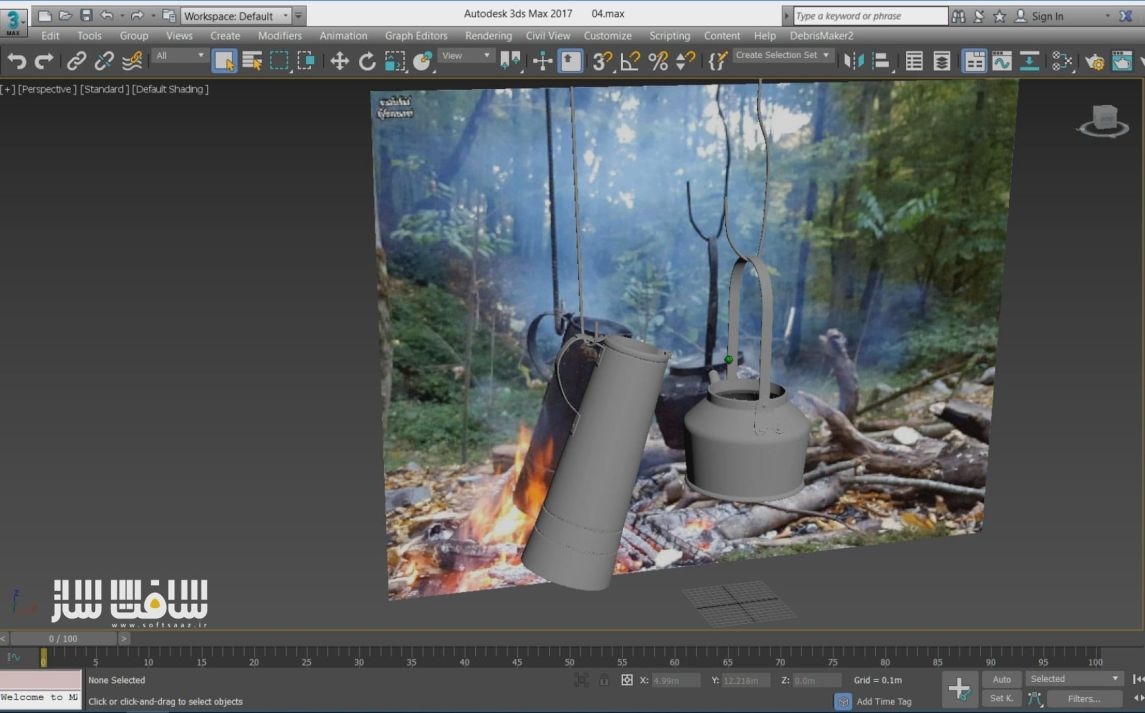
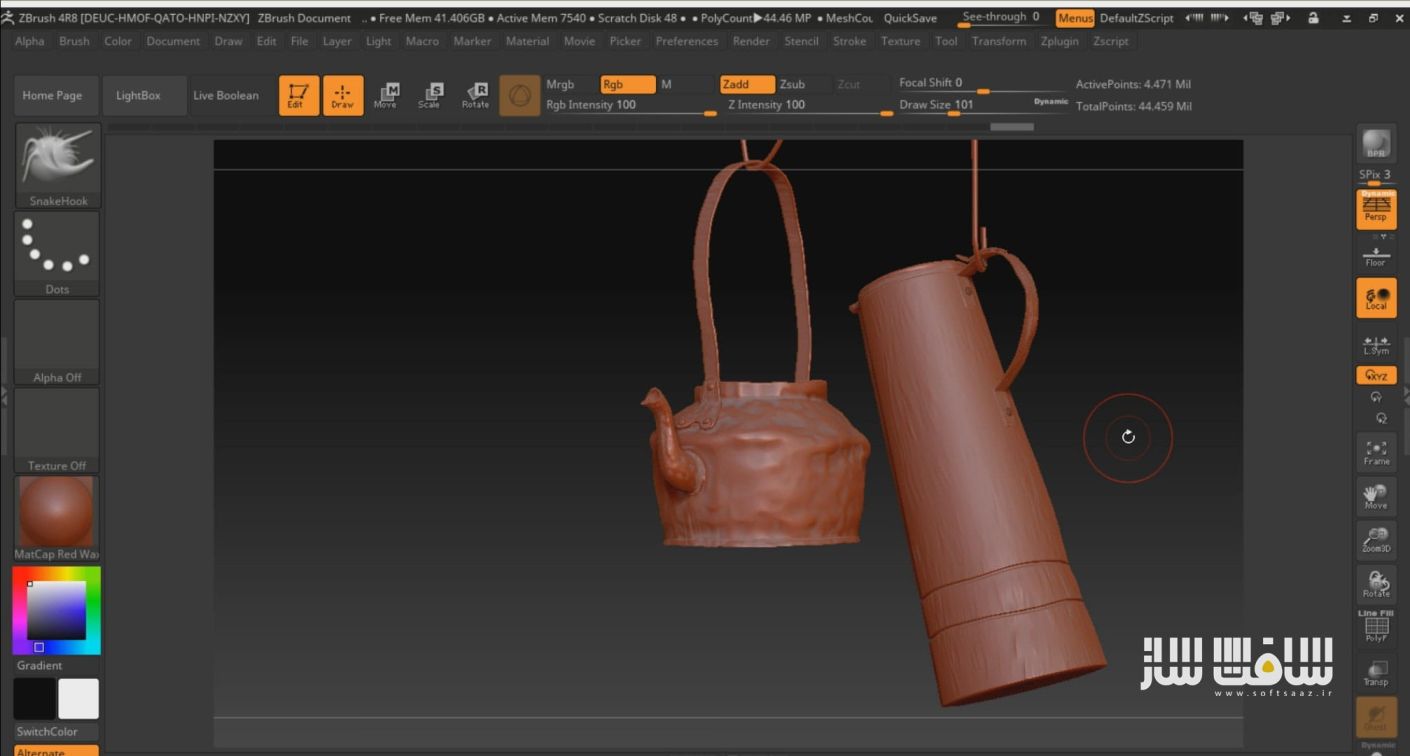
چای که توسط ذغال گرم میشود برای من الهام بخش بود. ابتدا من بیس و کلیت را با مکس مدلسازی کرده و مثل همیشه برای افزودن دتیل و جزئیات به نرم افزار زیبراش منتقل کردم.
قدم نهم – استفاده از مدل آماده برای پر کردن صحنه
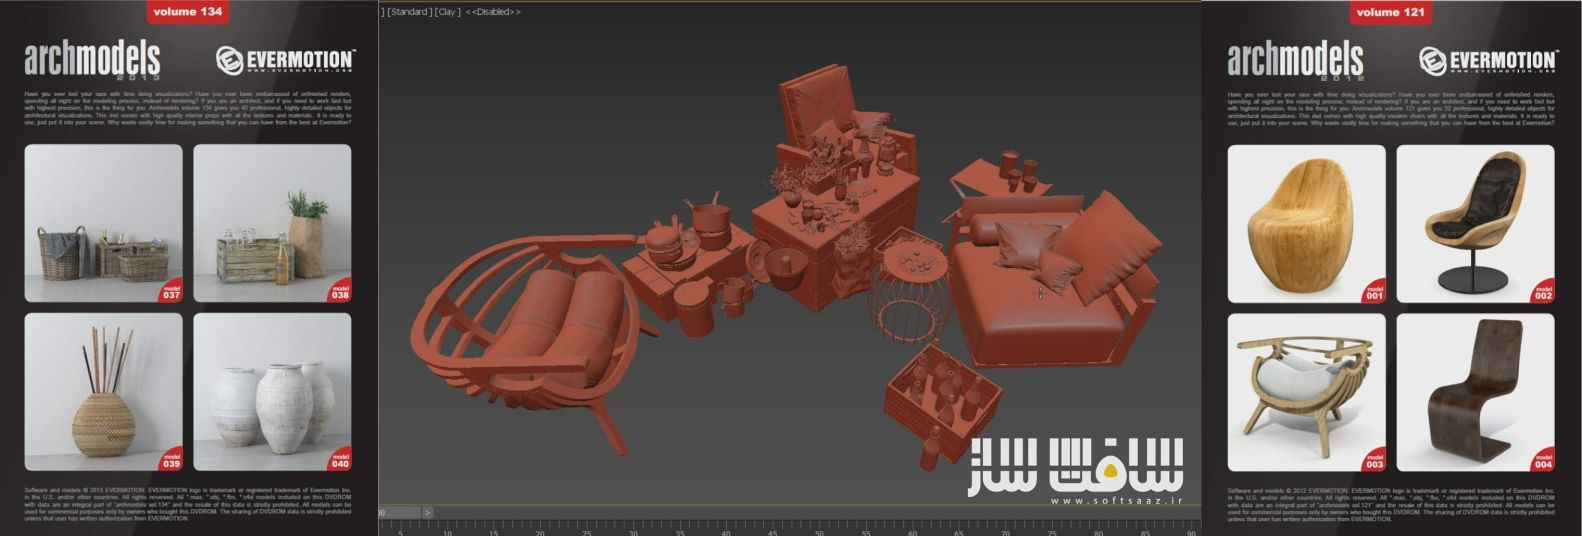
من همیشه ترجیح میدهم که خودم تمام مدل های موجود در صحنه را مدلسازی کنم اما در برخی موارد هنگامی که نیاز به صرفه جویی در زمان داشته باشید میتوانید از مدل های آماده استفاده کنید، بسیاری از مدل های با کیفیت را میتوان در سایت Evermotion یافت.
قدم دهم – انتشار آبجکت با فیزیکس پینتر
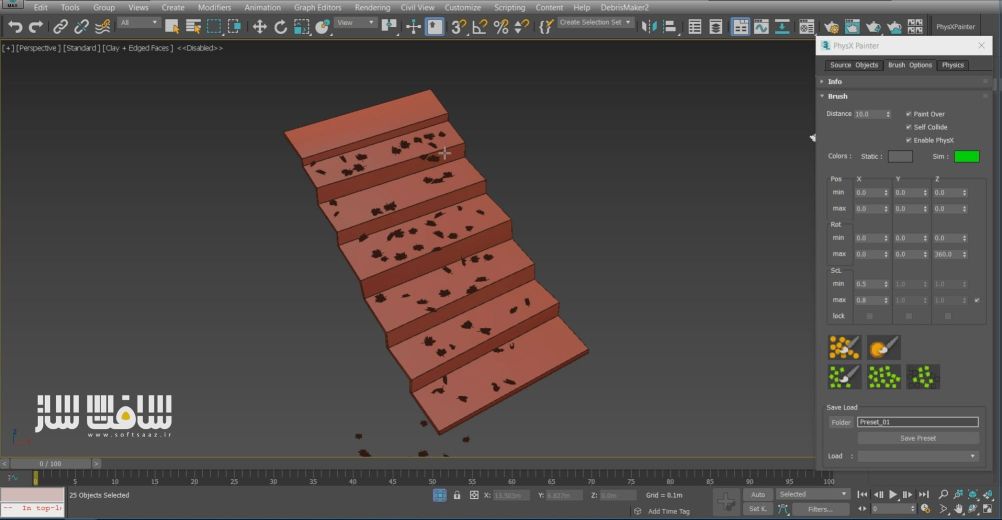
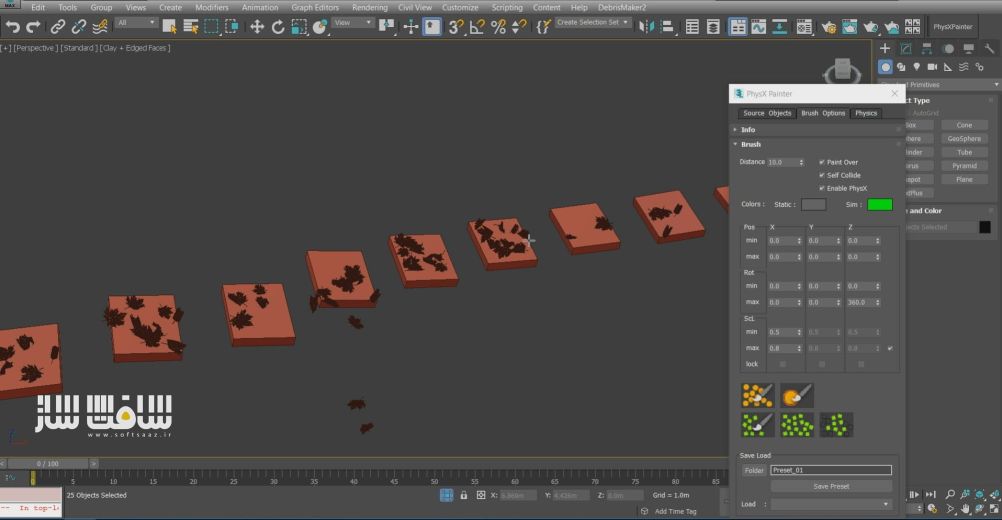
با استفاده از ابزار PhysX Painter برگ های خشک را روی پله ها منتشر و پخش کنید، این اسکریپت میتواند حرکات طبیعی برگ ها را بر اساس فیزیک شبیه سازی کند.
قدم یازدهم – انتشار آبجکت با مولتی اسکتر
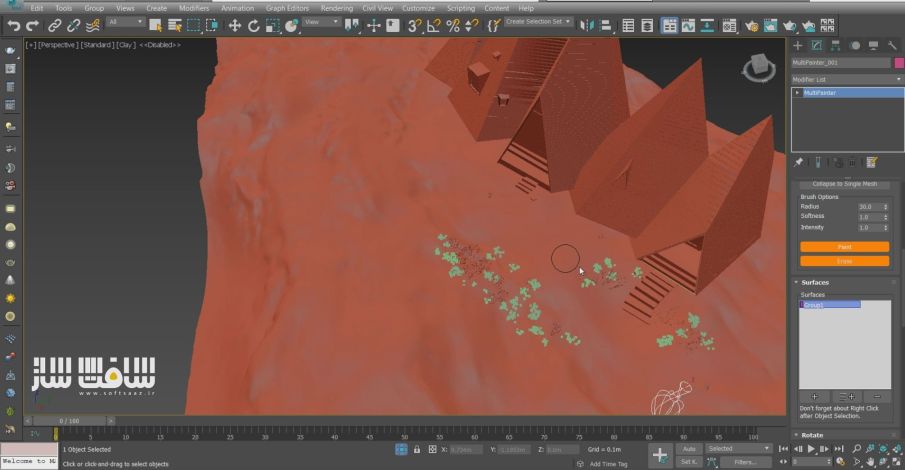
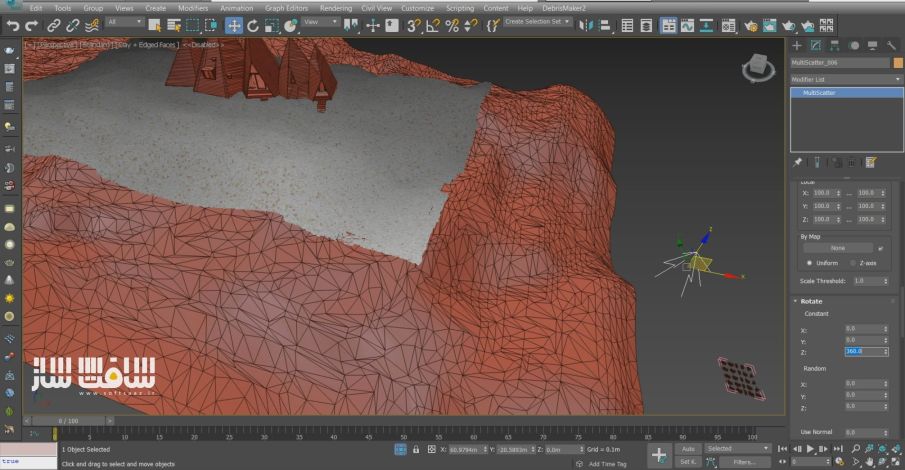
این افزونه قدرتمند یکی از بهترین پلاگین ها برای انتشار مدل هاست، من آن با برای انتشار درختان، برگ ها و بوته ها بر روی زمین استفاده میکنم.
قدم دوازدهم – جزئیات

یکی از مهمترین موارد و نکات ایجاد یک پروژه واقع گرایانه و رئال، افزودن و توجه به جزئیات است. من سعی کردم که در این پروژه تا حد امکان از افزودن دتیل و جزئیات استفاده کنم.

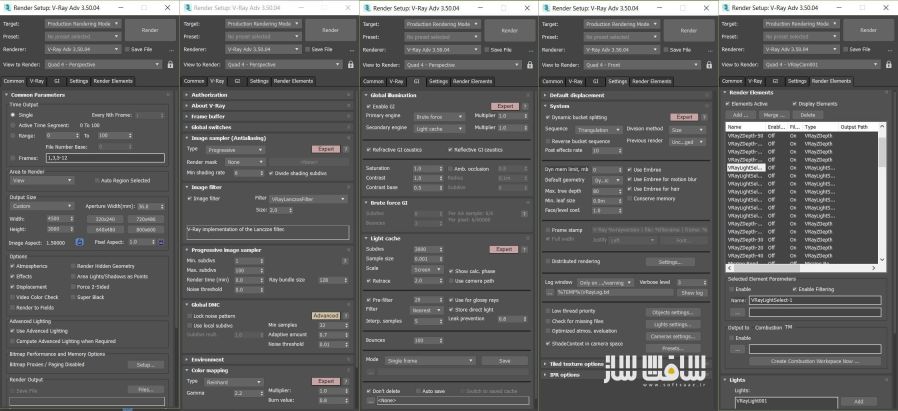
در تصاویر شما تنظیمات نهایی رندر را در موتور رندر وی ری مشاهده میکنید.
قدم چهاردهم – پست پروداکشن
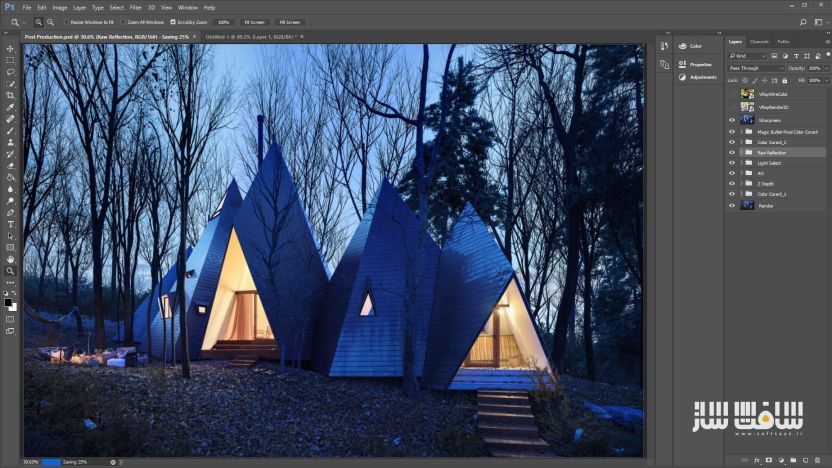
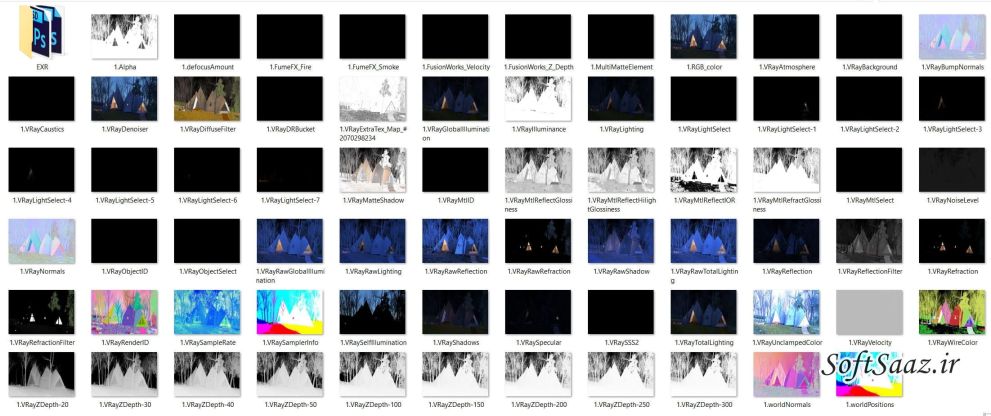
پس از رندرگیری، نوبت پست پروداکشن است. من میتوانم نور و رنگ این پروژه را به راحتی با استفاده از رندر المنت ها اصلاح کنم. با تشکر فراوان برای مطالعه
نویسنده : حسین یدالله پور
Making of “Nasu Tepee”
Tutorial by Hossein Yadollahpour.
Name: Hossein Yadollahpour
About Me: pcmaxya@gmail.com
ArtStation: https://www.artstation.com/yadollahpour
Location: Iran
Job title: CG Artist – Architect
Software used: 3dmax , Vray , Multiscatter , Speed tree , Zbrush , Marvelous designer , Megascans , Photoshop
Hey guys, my name is Hossein Yadollahpour. I was born in 1990 in Iran.I was introduced to CG world in 2001 when I was reading a tutorial book which was related to version 2.5 of 3D Max and then I was fascinated by CG world. My overall experience includes, architectural visualization, environment design, character design and VFX. In this tutorial I am going to show you my experiences which I gained during making the Nasu Tepee project. I hope you like it.
Recreation of Nasu Tepee project was started when I found some photos of this beautiful building on the Internet. You can find reference photos above.
Building modeling
Before starting to model any project, it is important to set the UNIT SETUP to unit which you want to work with it because of not to make any problem during the modeling process.
I started to model the building base on the information which I could find on the Internet.
In order to complete the model, I used the Rayfire plugin.
Do not make a mistake! We do not want to destroy anything! By installing this powerful plugin, we add a very interesting and useful modifier to 3D Max which is called Bricks Rayfier. In my opinion, this plugin is one of the fastest and easiest way to build the tile for the building.
First, I Created a plane in 3D Max then edited it by options existing in edit poly such as, soft selection, conform and paint deformation and etc.
After UV in 3D Max I transferred the ground to Zbrush software. I save ground as displacement and normal map. Finally, I transferred the ground to 3D Max again.
I imported the reference photo into 3D Max and then matched the camera with the scene.
For lighting, I used 2 HDRI
Number 2003 Dusk from Peter Guthrie pack which gave me great blue theme for environmental lighting
HDRI with quality Noemotion number 06-14_Sunset A, to make my background more similar to reference photo.
VrayLight
For interior lighting, I used the Vray light sphere.
Cloth Simulation
To create cloth, I prefer to use popular Marvelous designer software. Because, simulation in this software is very easy and enjoyable and gives you high quality outputs.
After making the cloth, to optimize it, I transferred it to Zbrush software and used Decimation Master command.
Tree Modeling
One of the challenges in this project was tree simulation, fortunately, it was quite easy thanks to Speed Tree software.
This powerful software is one of the best choices to make any kind of tree. We only need to know what kind of tree we want then let software do the work.
SpeedTree
There is no need to make all of trees. Just some principal trees would be enough. To fill up the scene, software can copy your trees by random.
Rock modelling
Modeling rock
To model the rock in 3D Max, there are many different ways. Rock Generator script is one of the good choices for sure
Megascans
You can find Megascans Studio software helping to create materals and Megascans Bridge software which helps to import Quixel Megascans ready-made models to many softwares and renderer engines.
Megascans Studio: Ground Texturing
Megascans Bridge :3D Models For Using in Vray
Tea and coal modeling
A Tea being heated by coal photo was an inspiration for me. First, I modeled the base objects in 3D Max and like always I transferred it to Zbrush software to add details.
Use ready-made models to fill the scene!
I always prefer to model whole the scene by myself in my personal projects, but in some cases especially when you need to save your time, Many high quality ready-made models can be found on Evermotion website.
Scattering with PhysX Painter script
Scattering
I scattered the leaves on the stairs by working with PhysX Painter script. This script can simulate the realistic movement.
Scattering with Multiscatter Plugin
Multiscatter
This powerful plugin is one of the best to scatter and paint the model. I used it to scatter trees, laves, woods and bushes on the ground.
Details
One of the most important thing making a project interesting and realistic, is adding details. I tried to add details as much as possible in this project.
Render settings and render elements
In the photo above, you can see the final settings of the Vray renderer engine.
Post Production
After rendering, it was turn of post-production. I could correct light and colour of the project because of the render elements in this step.
In the end, I appreciate the time you spent on this text. You can watch the process of Nasu Tepee modeling in following movie.
منبع خبر : سایت اورموشن Evermotion
امتیازدهی به این مطلب
امتیاز سافت ساز - 88%
88%
لطفا به این مطلب امتیاز دهید


