آموزش ساخت پرتره کارتونی یک زن با Affinity Designer
Udemy - Create a Female Cartoon Portrait with Affinity Designer

آموزش ساخت پرتره کارتونی یک زن با Affinity Designer
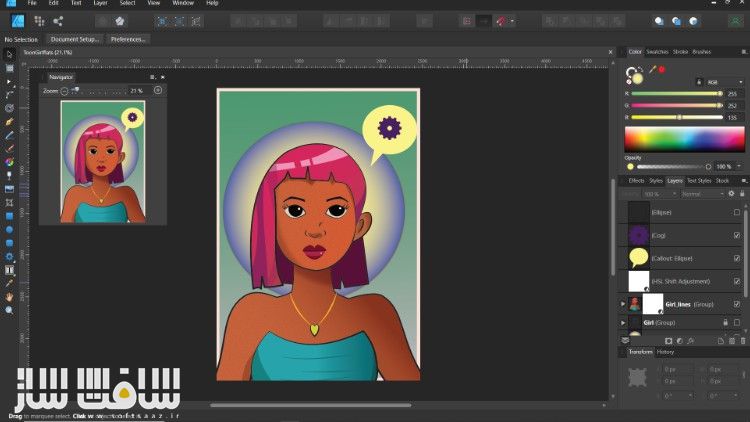
آموزش ساخت پرتره کارتونی یک زن با Affinity Designer : در این دوره از هنرمند Mahmud Shuaib ، با نحوه ساخت یک کاراکتر زن با استفاده از Affinity Designer V1 آشنا خواهید شد. این دوره نکات و ترفند های در مورد نحوه ایجاد پرتره کارتونی زن را در افینیتی دیزاینر نشان می دهد.
این دوره به بررسی پیکسل شخصی ، کار با ابزار brush برای ترسیم کاراکتر ، استفاده از لاین آرت ، افزودن رنگ های فلت ، نحوه نمونه برداری از رنگ ها ، پر کردن اشکال ، نحوه استفاده از ماسک و لایر استایل ها ، مفاهیم مختلفی چون استفاده از گرادیان ها ،استفاده از فیلتر ها و … را پوشش می دهد. این دوره آموزشی توسط تیم ســافــت ســاز برای شما عزیزان تهیه شده است.
عناوین آموزش ساخت پرتره کارتونی یک زن با Affinity Designer:
- پیمایش نرم افزار Affinity Designer
- نحوه استفاده از ابزار Pen و Node
- نحوه استفاده از Affinity Designer برای خلق آثار هنری
- نحوه افزودن نور و سایه به طرح ها در Affinity Designer
عنوان دوره : Udemy – Create a Female Cartoon Portrait with Affinity Designer
سطح : متوسط
زمان کل دوره : 2.27 ساعت
تعداد فایل ها : 6
سال آموزش : 2024
فایل تمرینی : دارد
مربی دوره : Mahmud Shuaib
نرم افزار : Affinity Designer
زیرنویس انگلیسی : ندارد
Udemy – Create a Female Cartoon Portrait with Affinity Designer
Learn how to navigate Affinity Designer Software
Students will learn how to use the Pen and Node Tool
Students will learn how to use Affinity Designer to Create artwork.
Learn how to add lighting and shading to designs in Affinity Designer
Hello. In this Affinity Designer Cartoon Portrait course for beginners, I will be demonstrating and showing you the tips and tricks on how to create a female cartoon portrait in Affinity Designer V1. We first begin by touring the software’s user interface, next we begin by exploring the pixel personal and use the brush tool to flesh out and sketch our character. After sketching the character, we switch to the designer persona to create clean, stylized, and crisp line art for the character. Using the new line art, we just created, we will proceed to adding flat colors. Here, we will learn how to sample colors for the software and fill out the shapes and paths we created. To give our design a nice look, we will learn how to add lighting and shading to the character using masking and layer styles. To finalize our design, we will proceed to add some effects using filters to retouch the design. In this final section, we will learn a variety of concepts like using the gradients to have a mixture of colors to make our characters pop. We have a lot to cover, and the course has more tips and tricks. I’ll see you at the course.
حجم کل : 1.4 گیگابایت

برای دسترسی به کل محتویات سایت عضو ویژه سایت شوید
برای نمایش این مطلب و دسترسی به هزاران مطالب آموزشی نسبت به تهیه اکانت ویژه از لینک زیر اقدام کنید .
دریافت اشتراک ویژه
مزیت های عضویت ویژه :
- دسترسی به همه مطالب سافت ساز
- آپدیت روزانه مطالب سایت از بهترین سایت های سی جی
- ورود نامحدود کاربران از هر دیوایسی
- دسترسی به آموزش نصب کامل پلاگین ها و نرم افزار ها
اگر در تهیه اشتراک ویژه مشکل دارید میتونید از این لینک راهنمایی تهیه اشتراک ویژه رو مطالعه کنید . لینک راهنما
For International user, You can also stay connected with online support. email : info@softsaaz.ir telegram : @SoftSaaz
امتیاز دهی به این مطلب :
امتیاز
لطفا به این پست امتیاز دهید


